
If you’re using AWS Lightsail for WordPress then you must be using the WordPress standard installation that comes with the Apache server. But, if you’re looking to install WordPress with Nginx on AWS Lightsail then this tutorial will guide you to installation.
If you’re looking to install WordPress on Nginx with any cloud provider or your custom server please follow this tutorial to install WordPress with Nginx.
Nginx is a very powerful web-server, WordPress runs very efficiently on Nginx. Let’s start with setting up a server, for this guide,
I’m using Ubuntu 18.04 latest stable version of Ubuntu available in AWS Lightsail.
This Tutorial has 7 Steps:
Let’s start with the first step creating Lightsail instance
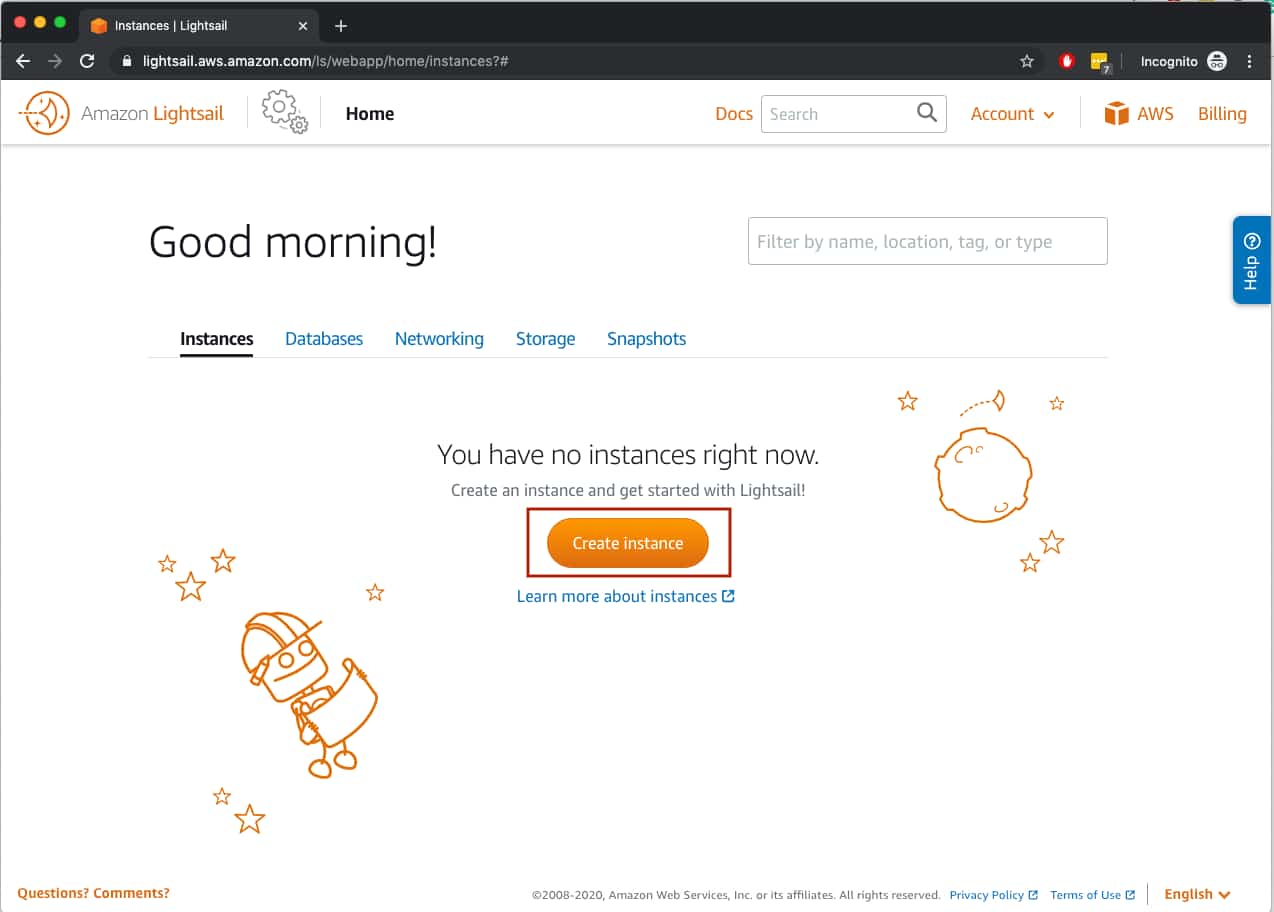
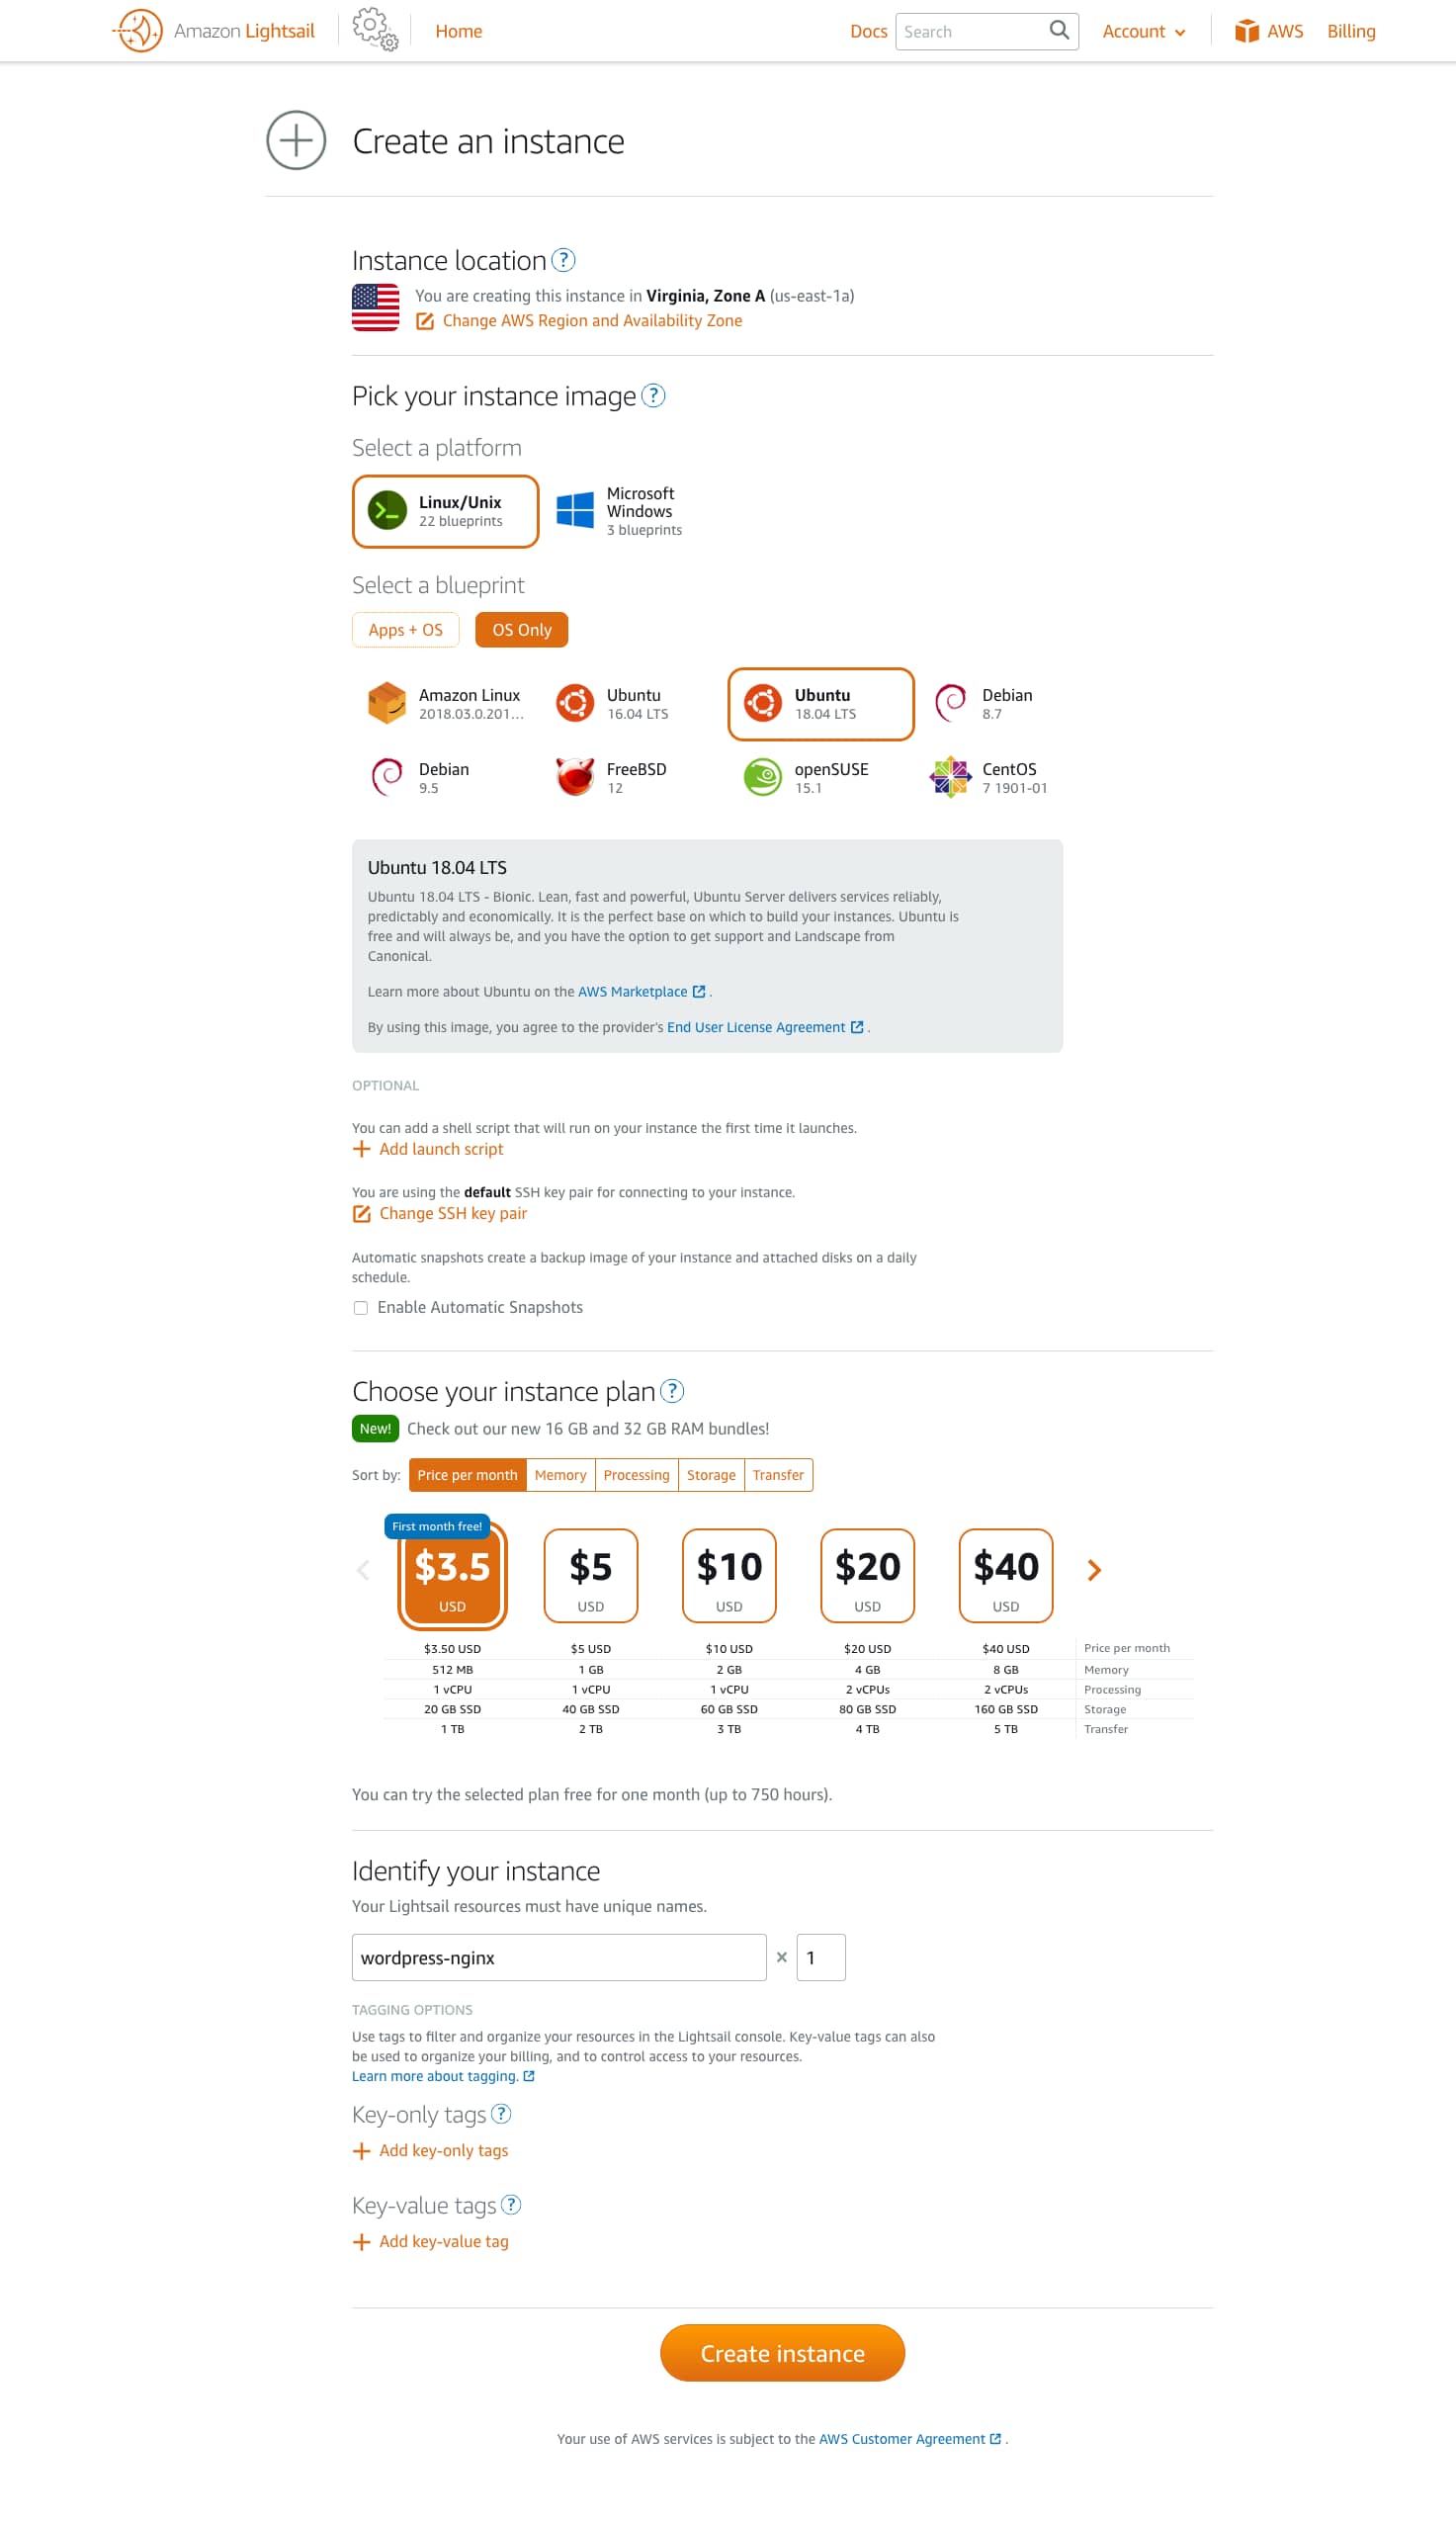
Step 1: Create Lightsail Ubuntu Instance.
For the demonstration I’m using Ubuntu 18.04 at the end of the guide I will give you detail on how to automatic security updates for your OS that will automatically update all security patches.
Please select the Linux platform and Ubuntu latest version and choose your instance plan and click on Create Instance.
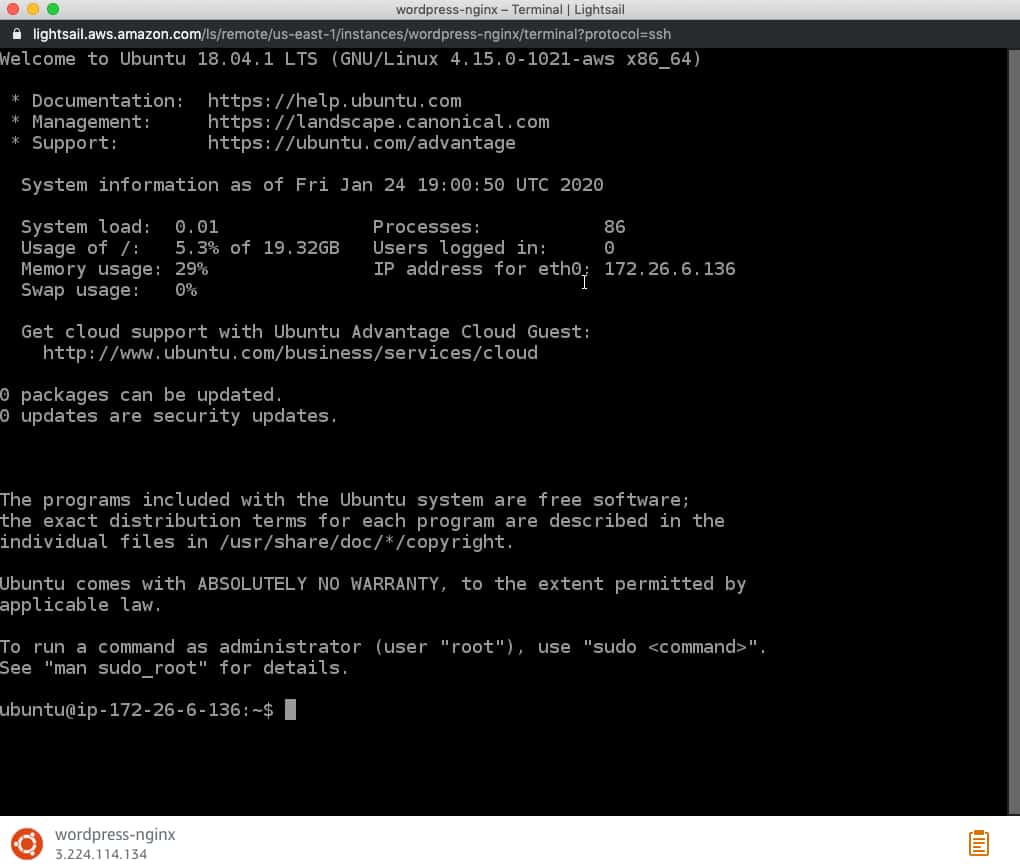
Once the instance is created Click on launch instance as shown in the below image.

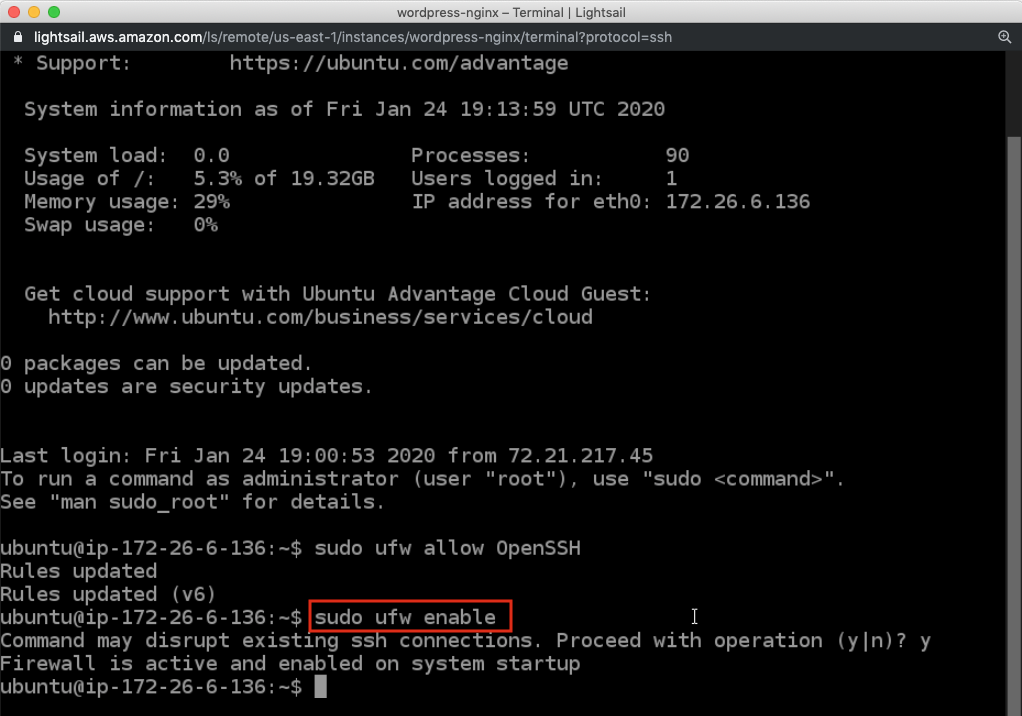
Step 2: Setup Basic Firewall.
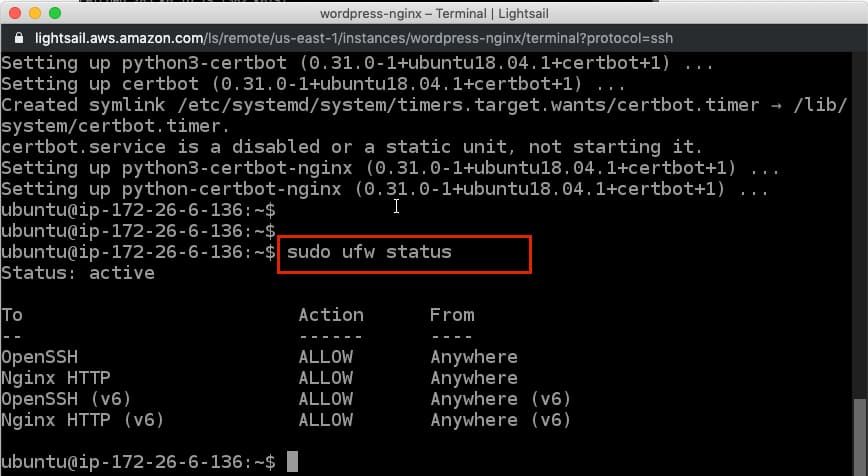
The first step is you need to make sure that firewalls allow SSH connection to the server. type the below command to allow firewall OpenSSH.
sudo ufw allow OpenSSH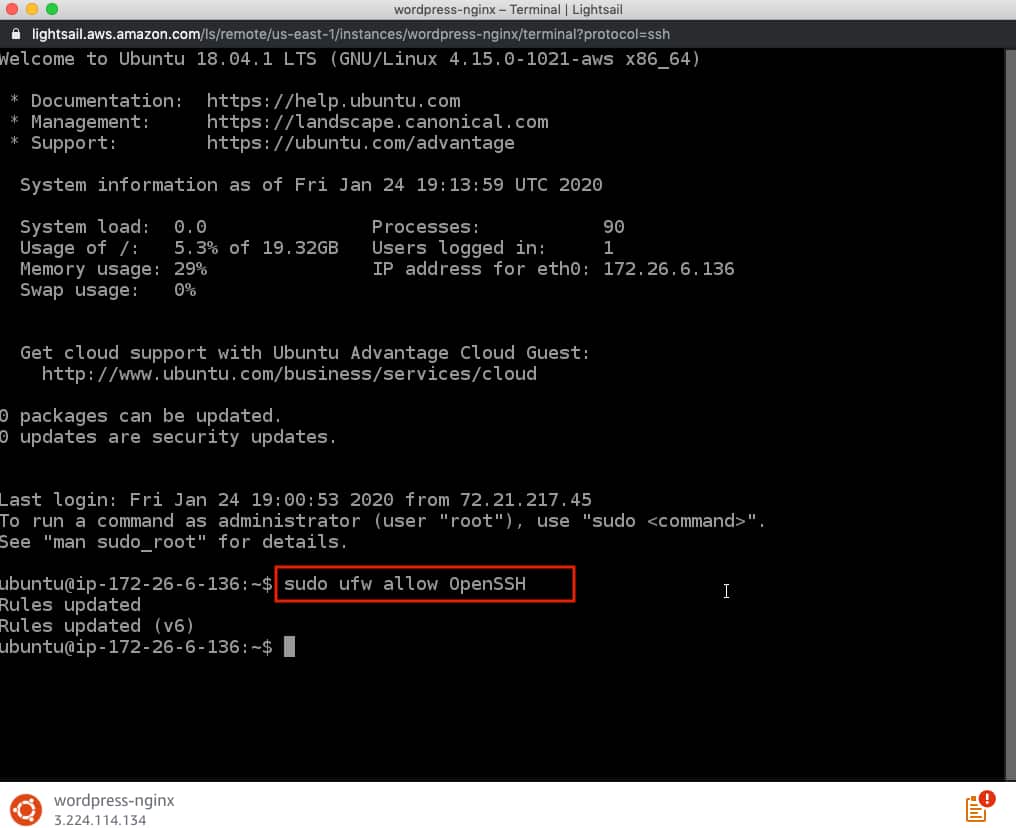
after that, you can enable the firewall by typing:
sudo ufw enableEnter
You can check that SSH connections are allowed by typing:
sudo ufw status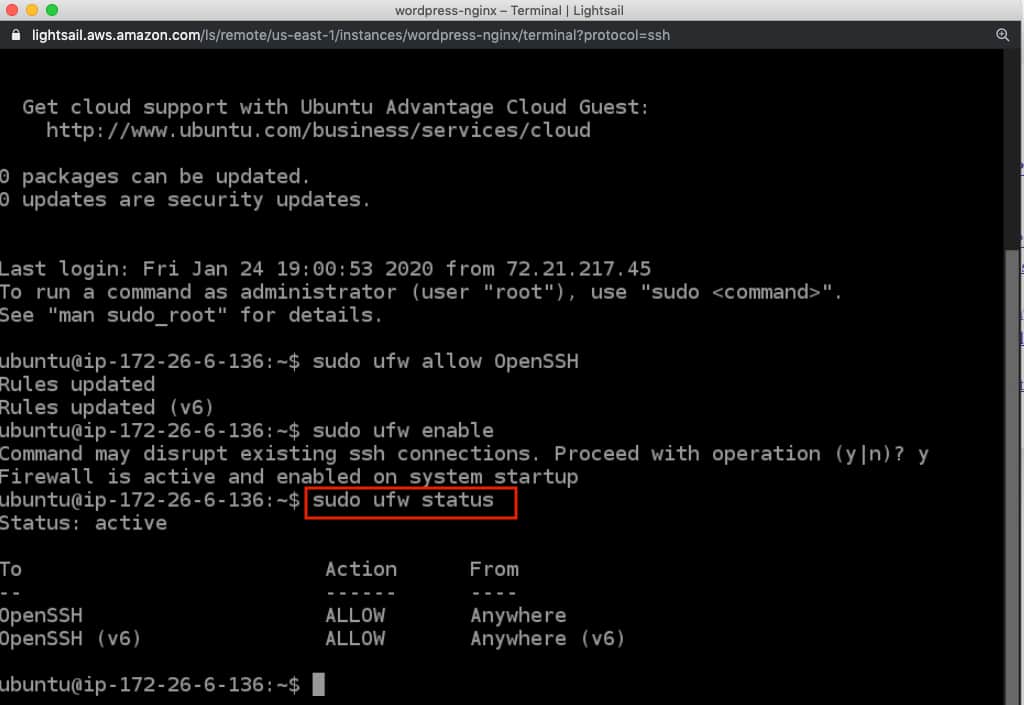
Step 3– Installing the Nginx Web Server
We will use Ubuntu’s default apt package to complete the necessary installations. when asked choose Y and hit enter.
sudo apt update
sudo apt install nginx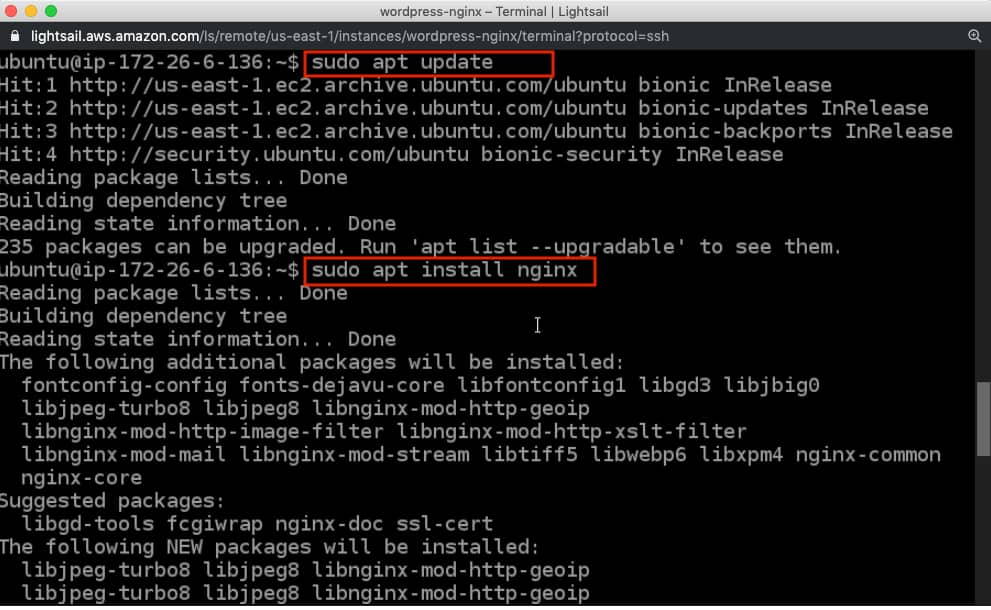
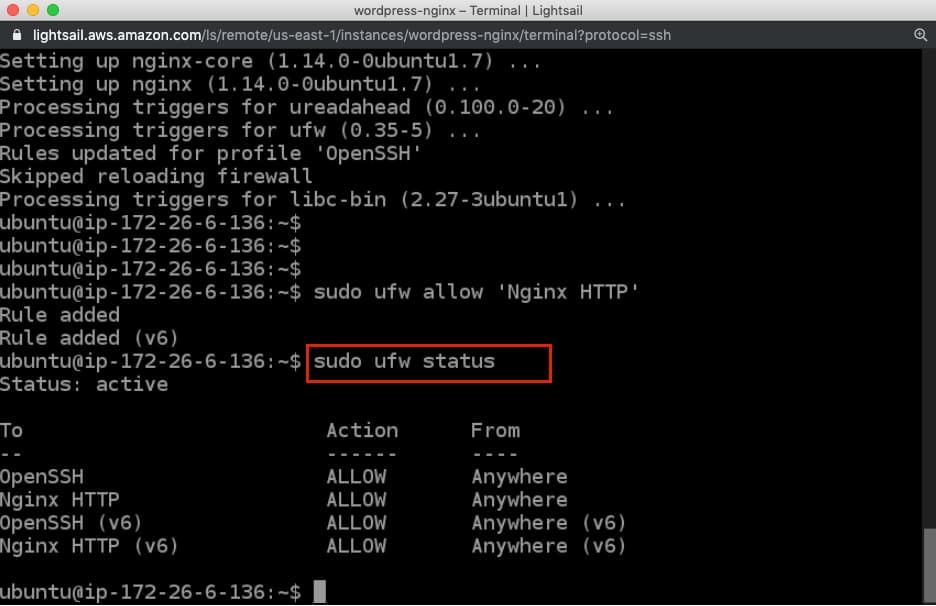
now, You need to allow Nginx traffic on port 80, In Step 1 we already enabled basic firewall. now. enable the HTTP traffic by following command.
sudo ufw allow 'Nginx HTTP'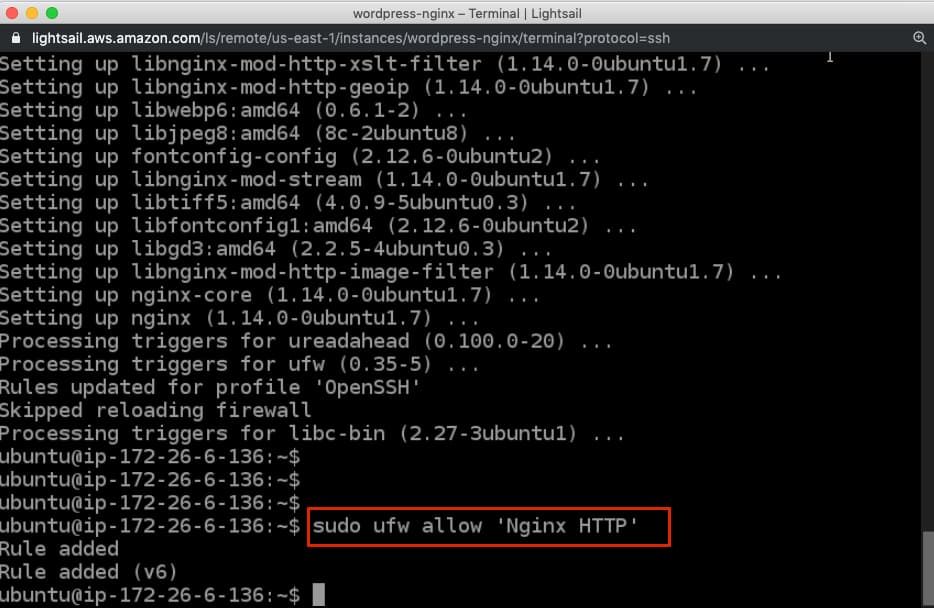
You can verify the change by running.
sudo ufw status
This command’s output will show that HTTP traffic is allowed.
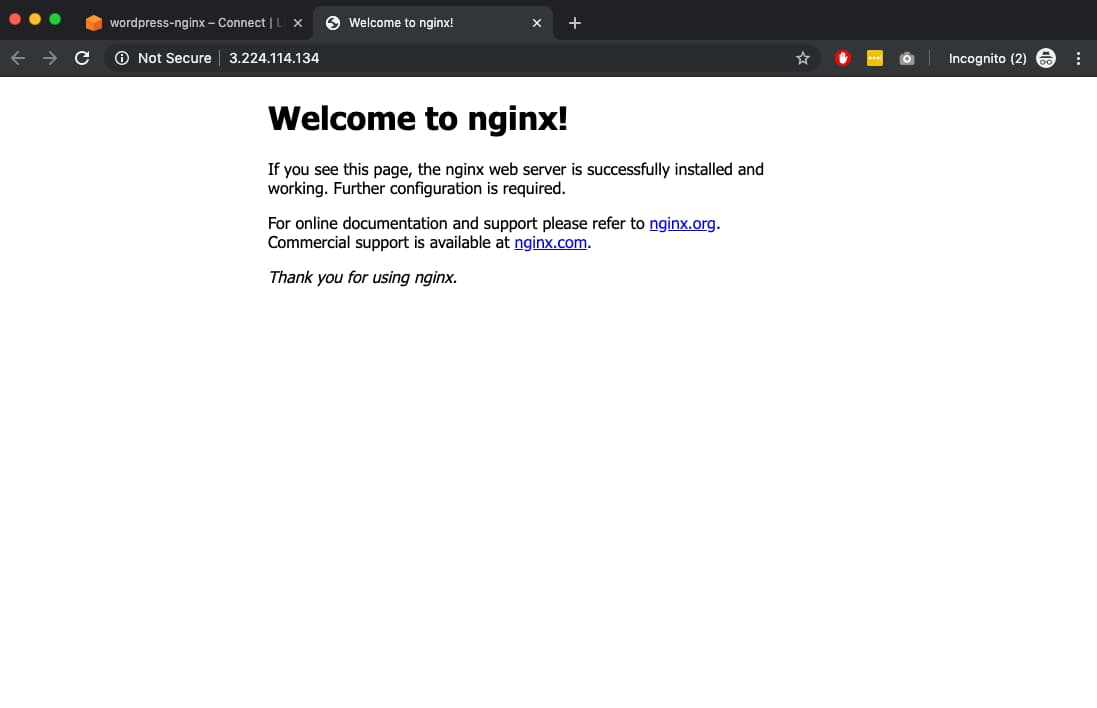
Now If you go http://server_domain_or_IP you will see below page, you have successfully installed Nginx.
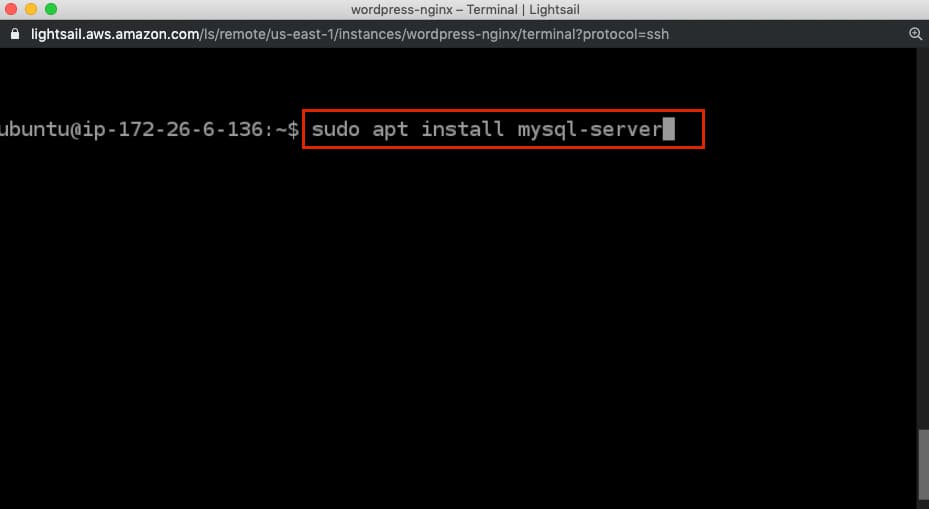
Step 4 – Installing MySQL to Manage Site Data
Let’s move to next step after installing Nginx WebServer you need to Install MySQL by typing.
sudo apt install mysql-server
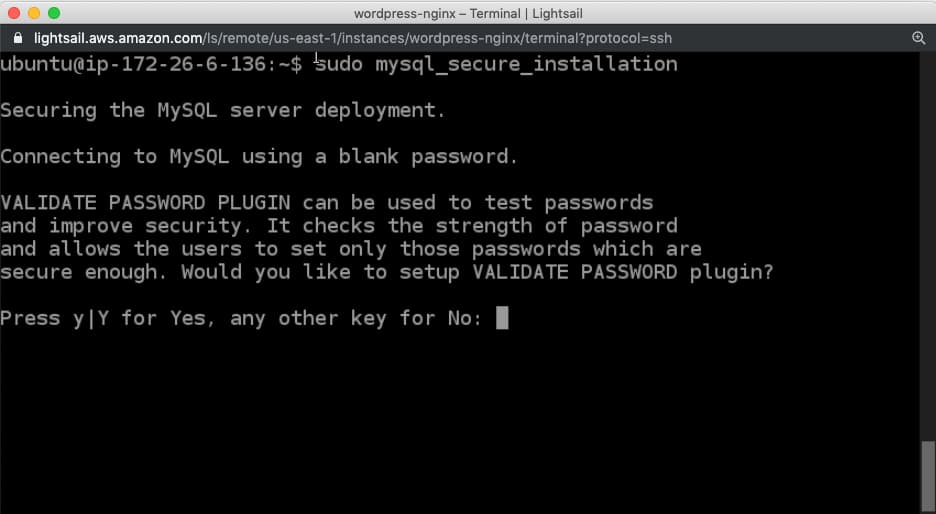
To secure the installation, Initiate the script by typing following command.
sudo mysql_secure_installation
This script will ask if you want to configure the VALIDATE PASSWORD PLUGIN. If you enable then, a password that does not match to the plugin criteria will be rejected with an error. ( you should always set a
Answer Y for yes, or anything else to continue without enabling.
Next, you’ll be asked to submit and confirm a root password.
For the rest of the questions, you should press Y and hit the ENTER key at each prompt.
Now MySQL is installed.
Let’s create a Database for WordPress.
Enter into MySQL by typing just sudo mysql
sudo mysql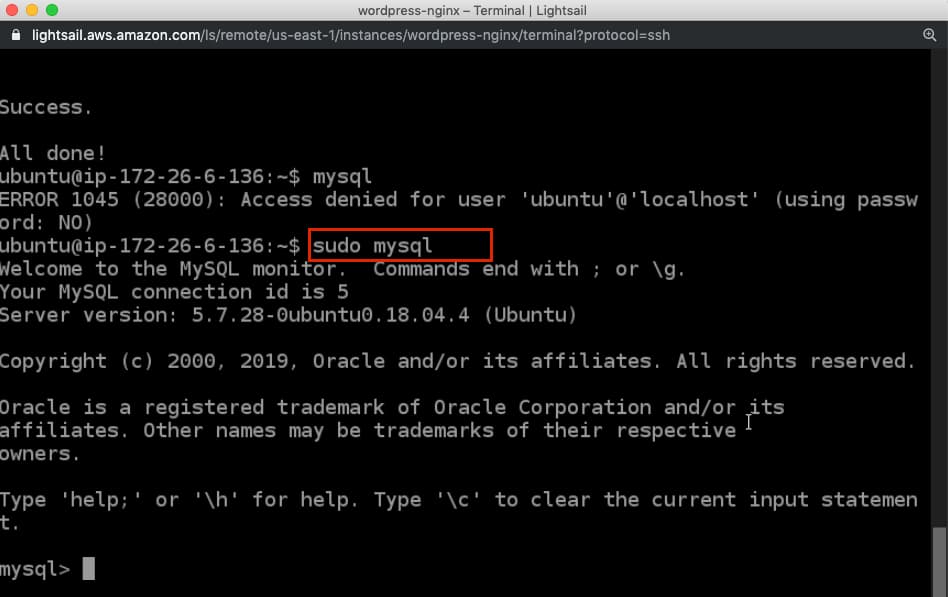
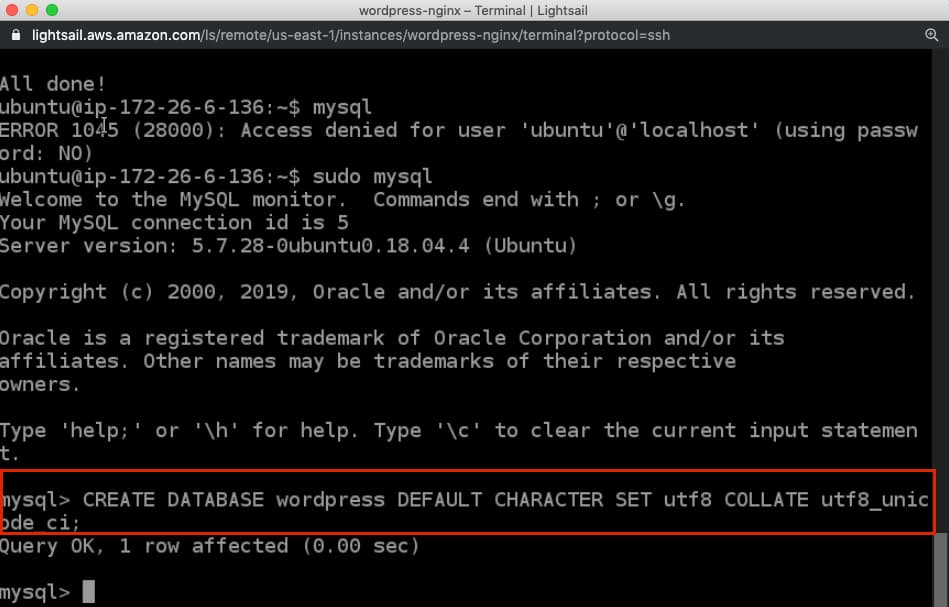
First, you need to create a database for WordPress by typing, I have given my database name as wordpress
CREATE DATABASE wordpress DEFAULT CHARACTER SET utf8 COLLATE utf8_unicode_ci;
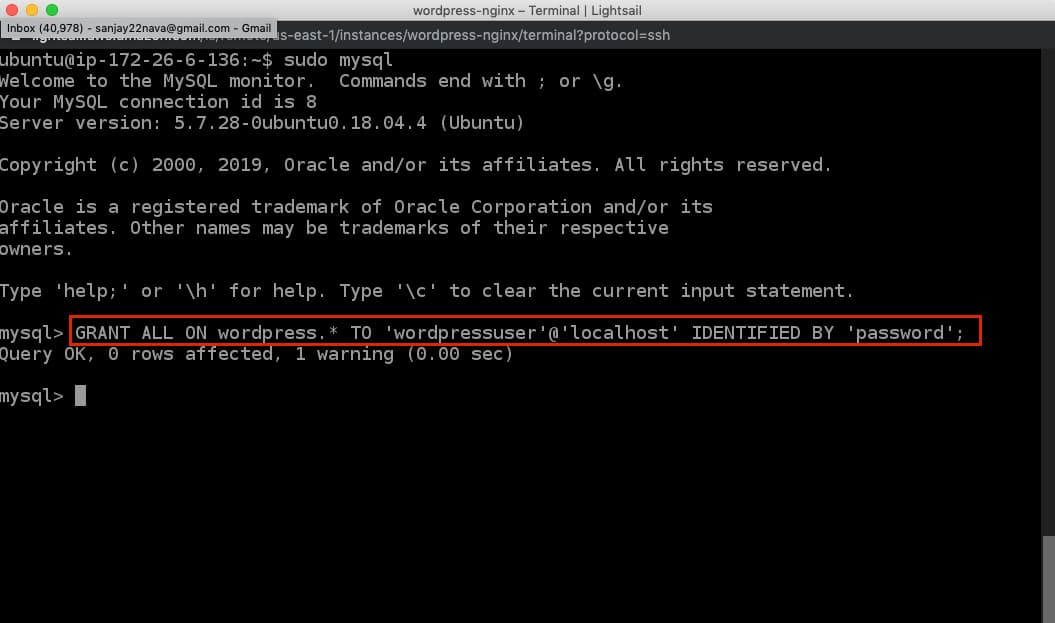
Next, we are going to create a separate MySQL user account that we will use exclusively to operate on our new database.
please change the WordPress user to your appropriate MySQL username and password to a strong password. (and you need to remember this password, you will need this password during WordPress installation)
GRANT ALL ON wordpress.* TO 'wordpressuser'@'localhost' IDENTIFIED BY 'password';
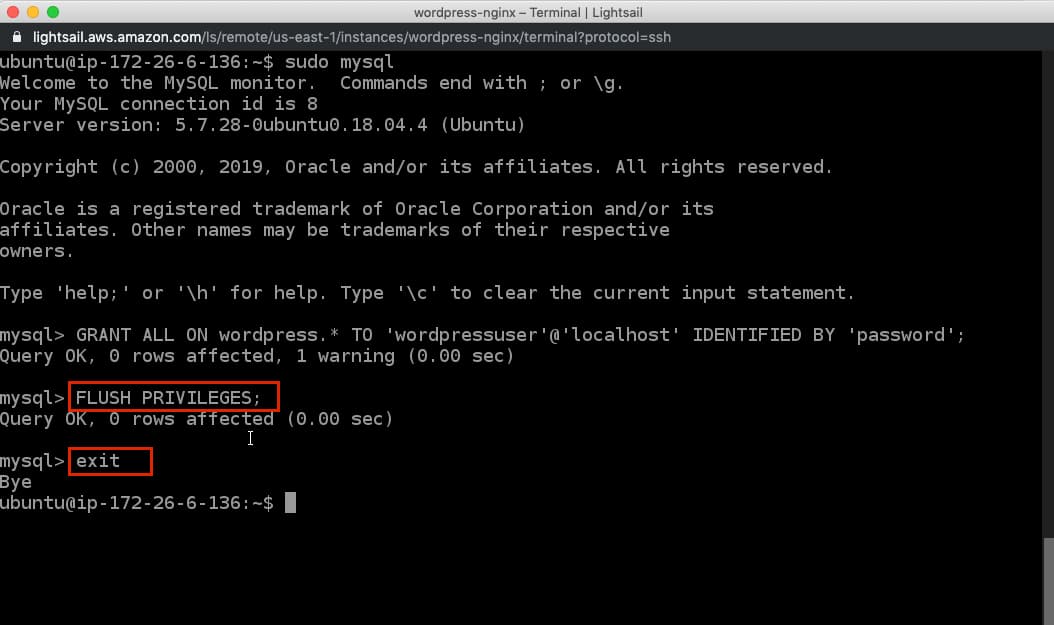
Now, We need to flush the privileges so that the current instance of MySQL knows about the recent changes we’ve made
FLUSH PRIVILEGES;
Exit out of MySQL by typing:
exit;
now, whatever the changes we needed for MySQL is done, let’s move on to next step.
Step 5 – Installing PHP
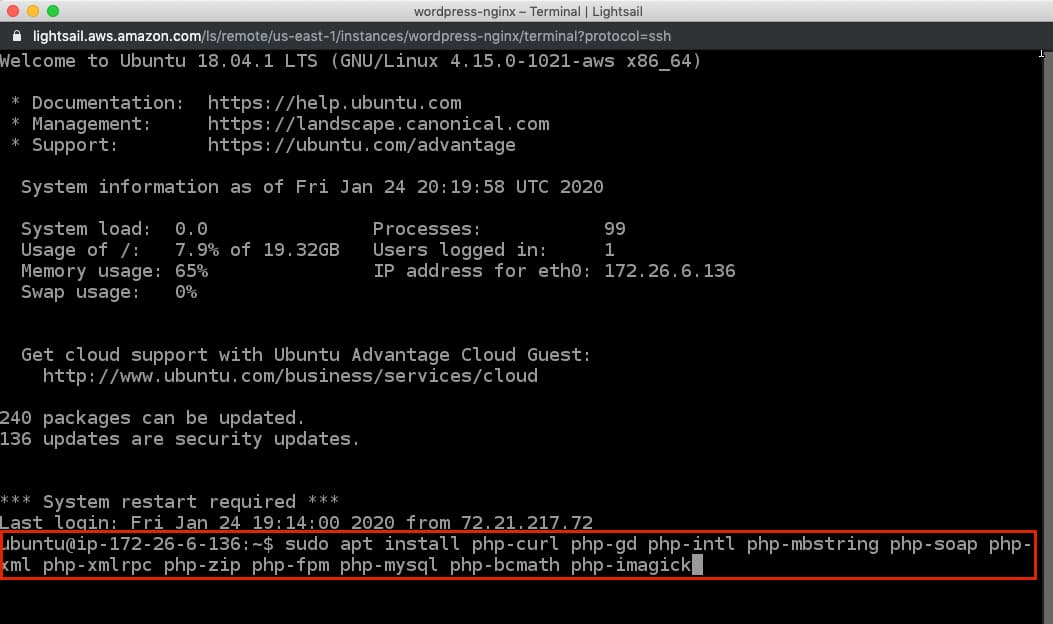
Along with PHP installation, We need to install some of the most popular PHP extensions for use with WordPress by typing:
sudo apt install php-curl php-gd php-intl php-mbstring php-soap php-xml php-xmlrpc php-zip php-fpm php-mysql php-bcmath php-imagick
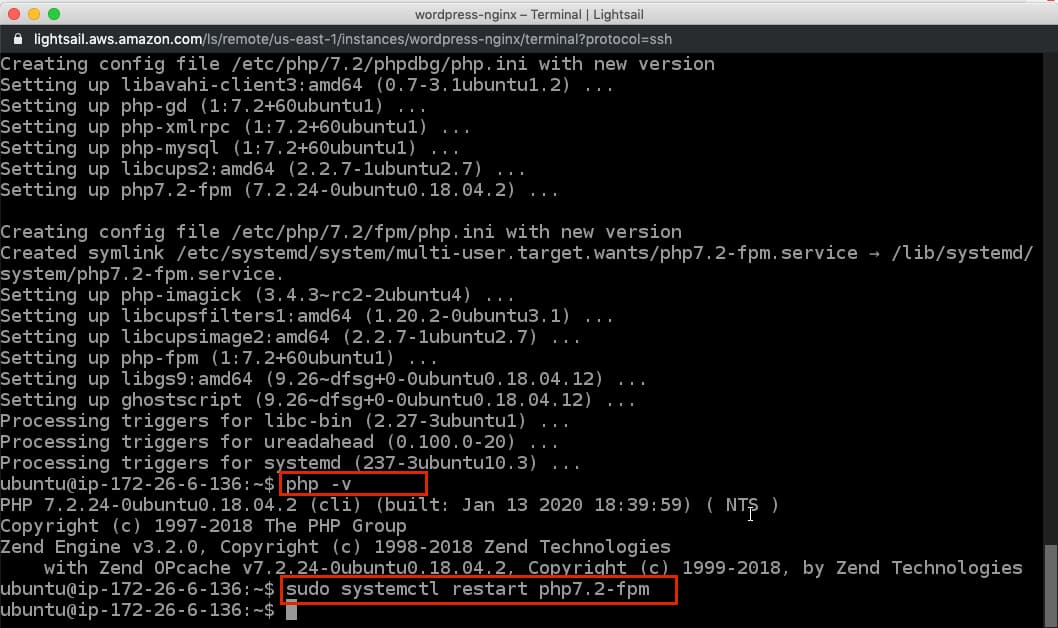
When you are finished installing the extensions, restart the PHP-FPM process. Here we installed the latest PHP version to check your
add that version for our restart, ( for me the current latest version of PHP was 7.2)
sudo systemctl restart php7.2-fpm
Step 6 – Configuring Nginx
Now We need to configure Nginx file to serve WordPress for that fires, We need to create Nginx file.
sudo nano /etc/nginx/sites-available/wordpress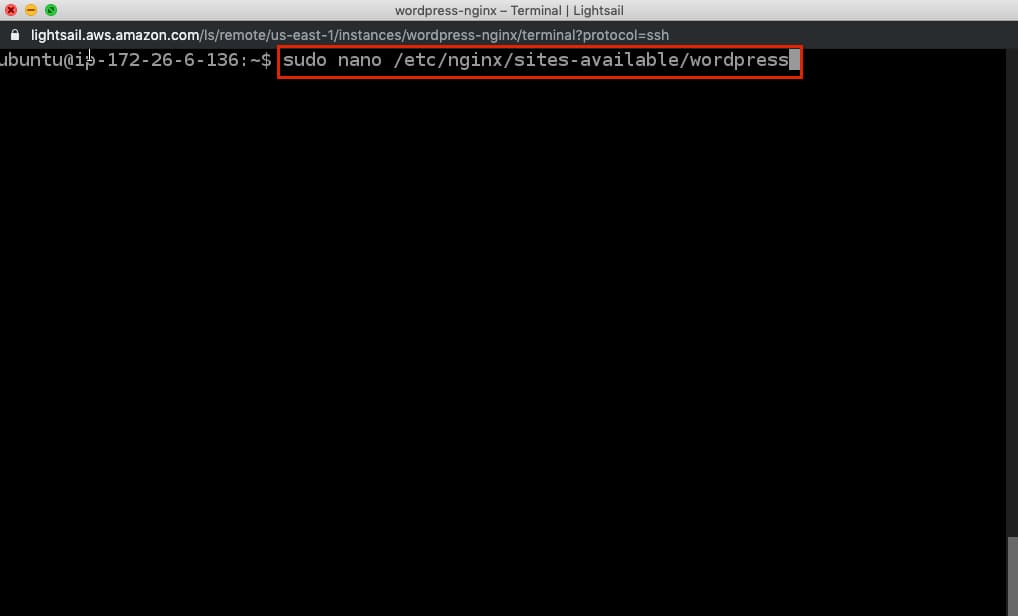
Add the following code in this file and change the server_name to your domain name
server {
        listen 80;
        root /var/www/wordpress;
        index index.php index.html index.htm index.nginx-debian.html;
        server_name myexampleblog.com www.myexampleblog.com;  #change this to your domain name here

        location / {
                try_files $uri $uri/ /index.php$is_args$args;
        }
        location = /favicon.ico { log_not_found off; access_log off; }
        location = /robots.txt { log_not_found off; access_log off; allow all; }
        location ~* \.(css|gif|ico|jpeg|jpg|js|png)$ {
                 expires max;
                 log_not_found off;
        }
        location ~ \.php$ {
                include snippets/fastcgi-php.conf;
                fastcgi_pass unix:/var/run/php/php7.2-fpm.sock;
        }

        location ~ /\.ht {
                deny all;
        }
}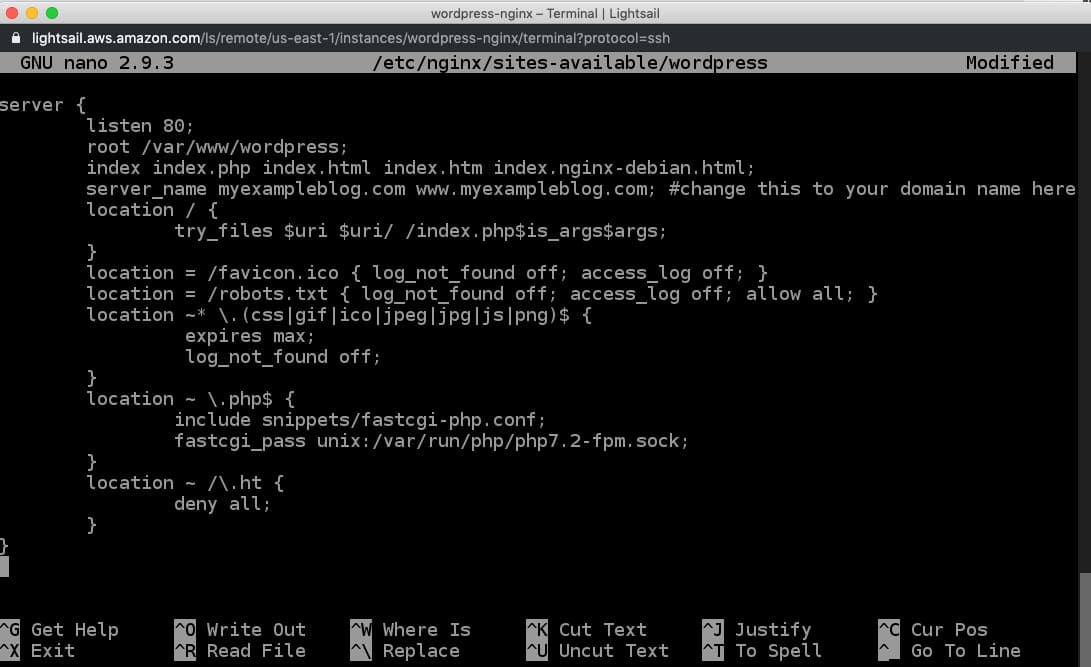
After adding this content, save and close the file.
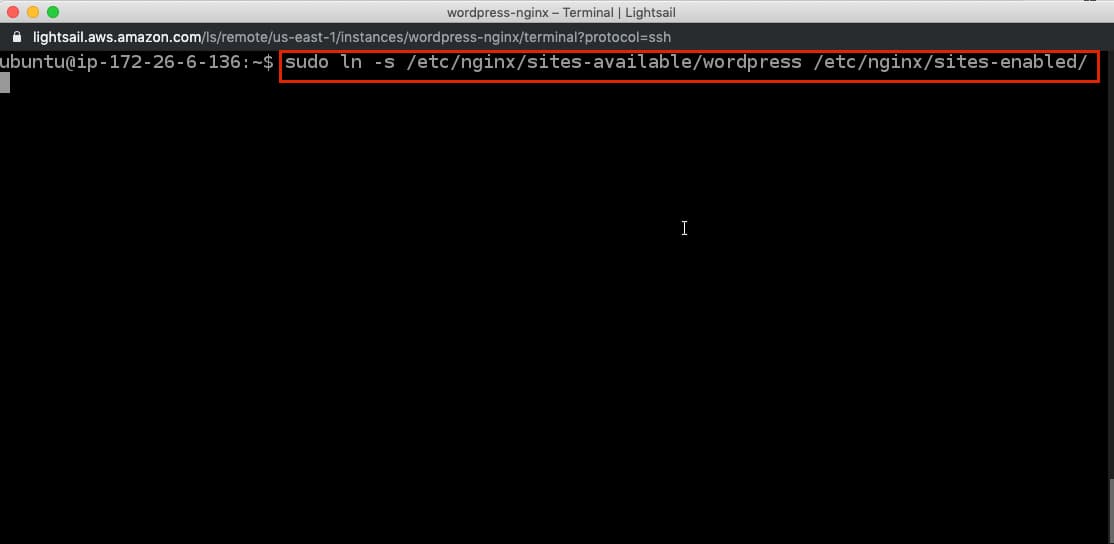
Enable your new server block by creating a symbolic link from your new server block configuration file (in the /etc/nginx/sites-available/ directory) to the /etc/nginx/sites-enabled/ directory by following code:
sudo ln -s /etc/nginx/sites-available/wordpress /etc/nginx/sites-enabled/
Then, unlink the default configuration file from the /sites-enabled/ directory:
sudo unlink /etc/nginx/sites-enabled/default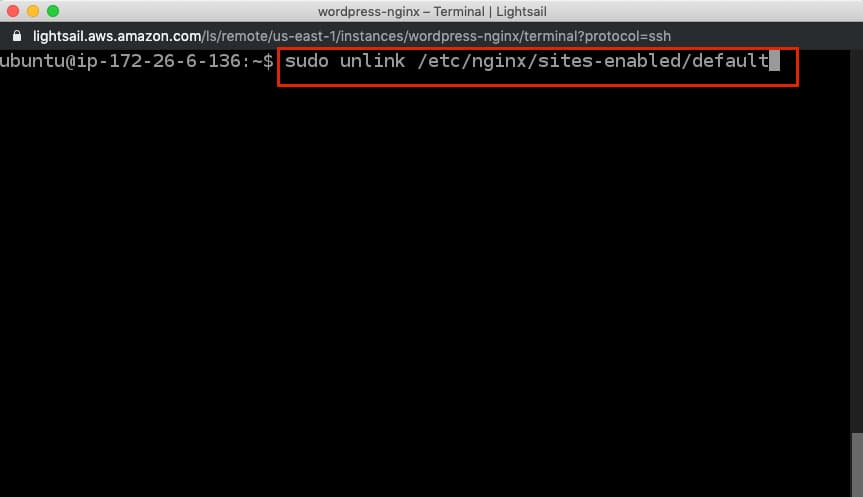
Now, we can check our configuration for syntax errors by typing:
sudo nginx -tIf no configuration error, reload Nginx by typing:
sudo systemctl reload nginx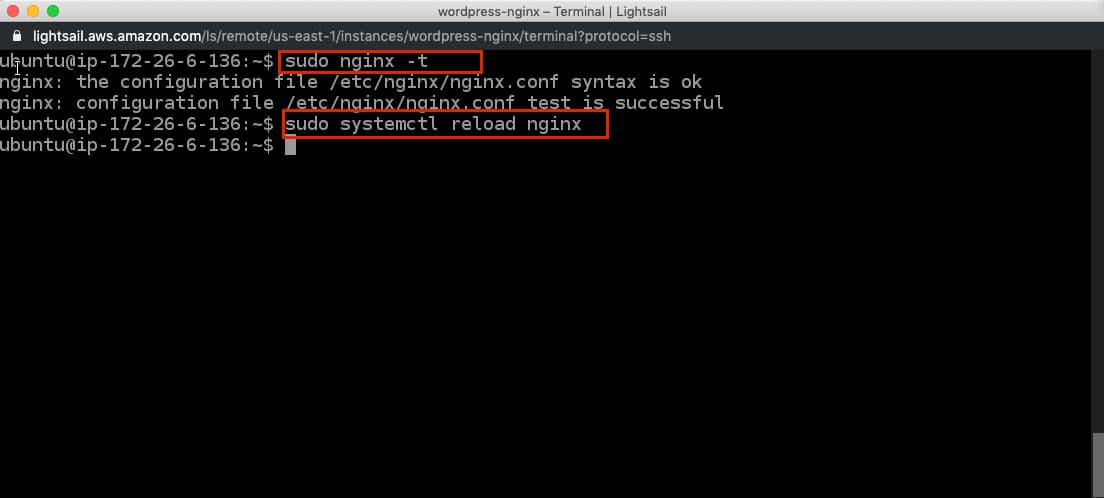
That’s all you needed to configure Nginx, Make sure you have changed the server_name in the
Step 7 – Downloading WordPress
Now, for the last step of this tutorial, we need to download the latest WordPress by typing
cd /tmp
curl -LO https://wordpress.org/latest.tar.gz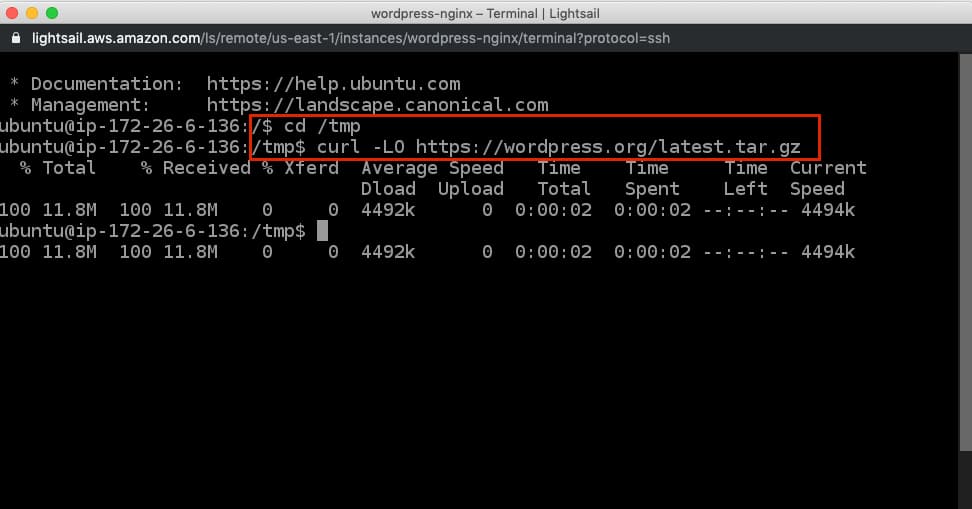
Extract the compressed file to create the WordPress directory structure
tar xzvf latest.tar.gz
Now, we can copy the entire contents of the directory into our WordPress root. ( we’re copying everything into /var/www/wordpres/ directory because we have added root /var/www/wordpress/ as to serve WordPress from that directory in the Nginx config file)
sudo cp -a /tmp/wordpress/. /var/www/wordpressNow that our files are in place, we’ll assign ownership them to the www-data user and group
sudo chown -R www-data:www-data /var/www/wordpresswe need to copy over sample configuration file to wp-config.php to WordPress root directory.
sudo cp /var/www/wordpress/wp-config-sample.php /var/www/wordpress/wp-config.php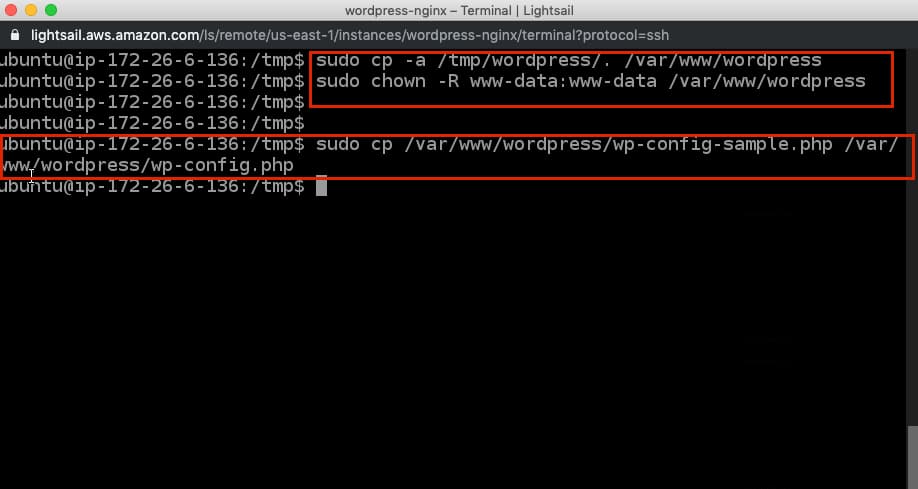
Now the last part is to edit the wp-config.php
sudo nano /var/www/wordpress/wp-config.php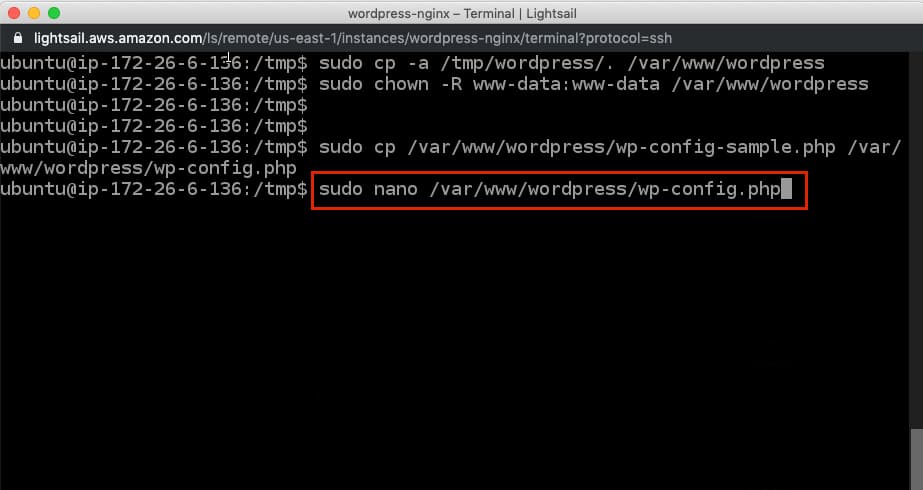
Find the section that contains the dummy values for those settings. It will look something like this. (we need to replace these dummy values)
define( 'AUTH_KEY',         'put your unique phrase here' );
define( 'SECURE_AUTH_KEY',  'put your unique phrase here' );
define( 'LOGGED_IN_KEY',    'put your unique phrase here' );
define( 'NONCE_KEY',        'put your unique phrase here' );
define( 'AUTH_SALT',        'put your unique phrase here' );
define( 'SECURE_AUTH_SALT', 'put your unique phrase here' );
define( 'LOGGED_IN_SALT',   'put your unique phrase here' );
define( 'NONCE_SALT',       'put your unique phrase here' );
Delete these line and paste the
copy and paste line one by one justify may not work in the Lightsail Shell terminal.
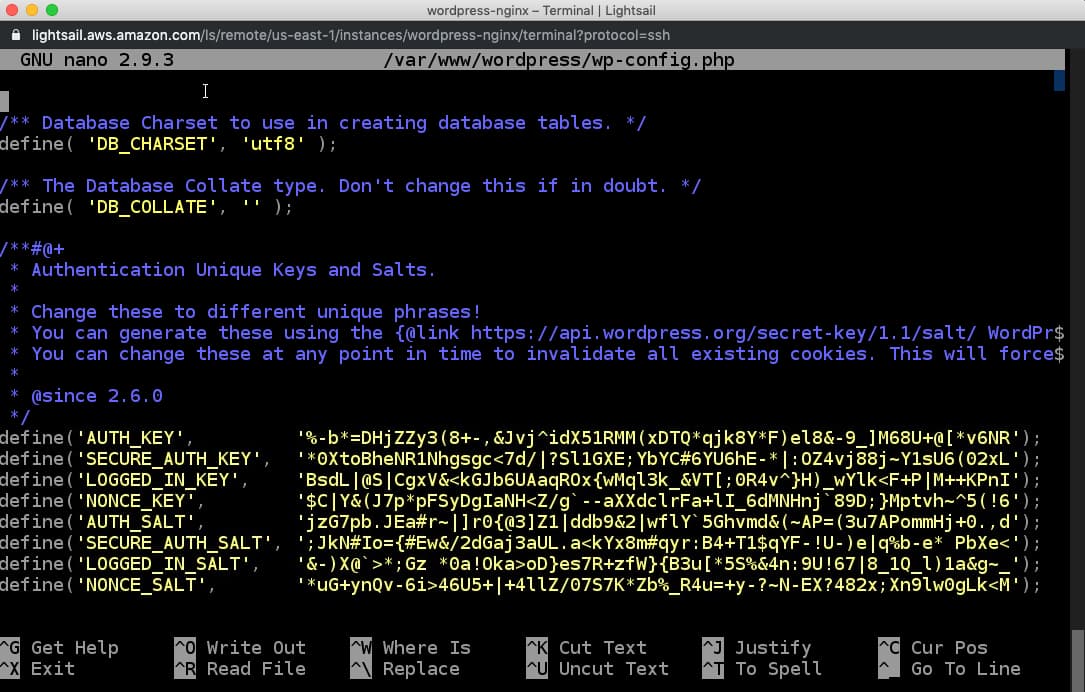
Next, we need to modify some of the database connection settings at the beginning of the file. and we need to add one line define(‘FS_METHOD’, ‘direct’).
. . .

define('DB_NAME', 'wordpress');

/** MySQL database username */
define('DB_USER', 'wordpressuser');

/** MySQL database password */
define('DB_PASSWORD', 'password');

. . .

define('FS_METHOD', 'direct');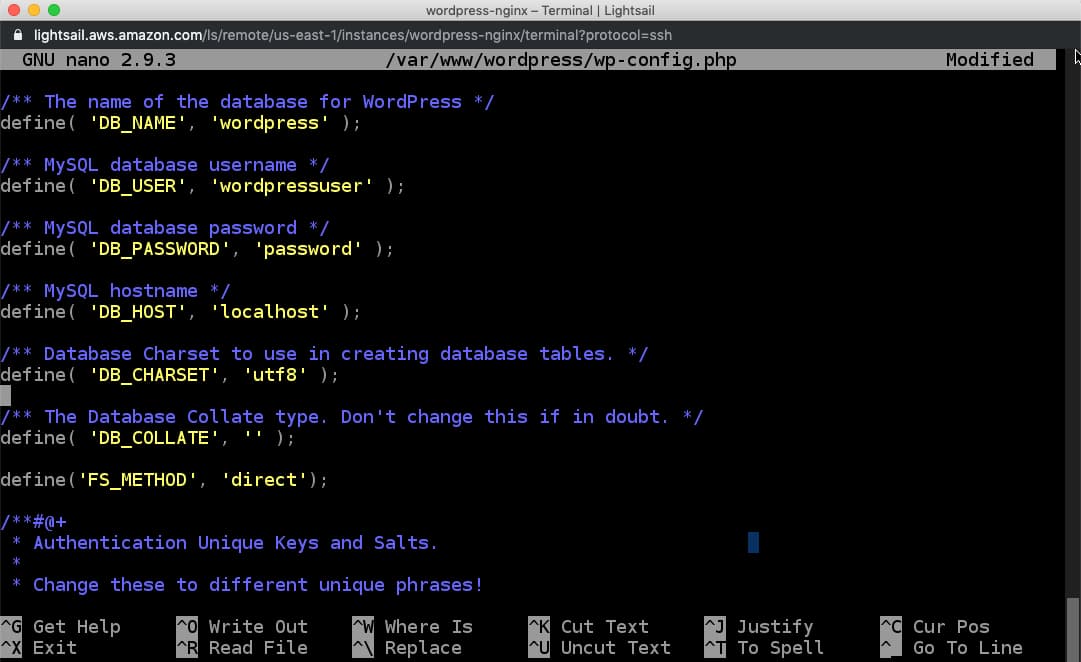
Now Save this file and go to your server Ip Address
http://server_domain_or_IP
BOOM!
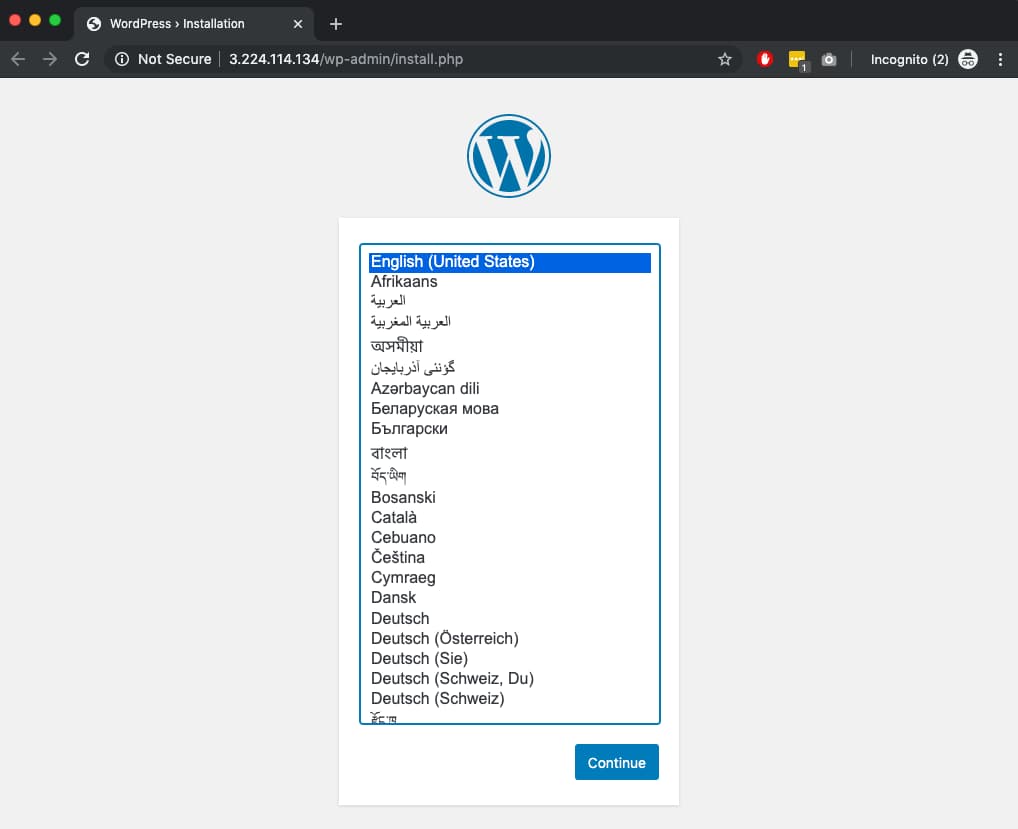
Your
Now you can set up your admin account from here, select your language and Next, you will come to the main setup page.
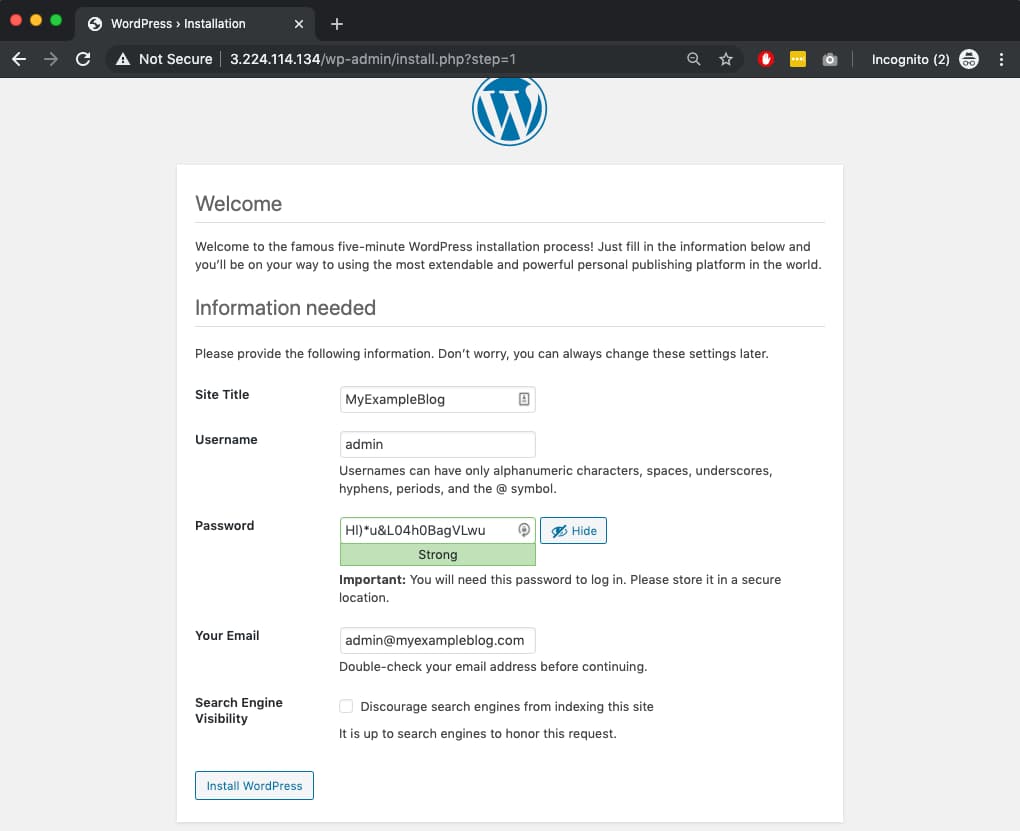
Select a name for your WordPress site and choose a username (it is recommended not to choose something like “admin” for security purposes).
A strong password is generated automatically. Save this password or select an alternative strong password
Bonus – Attach server to the domain
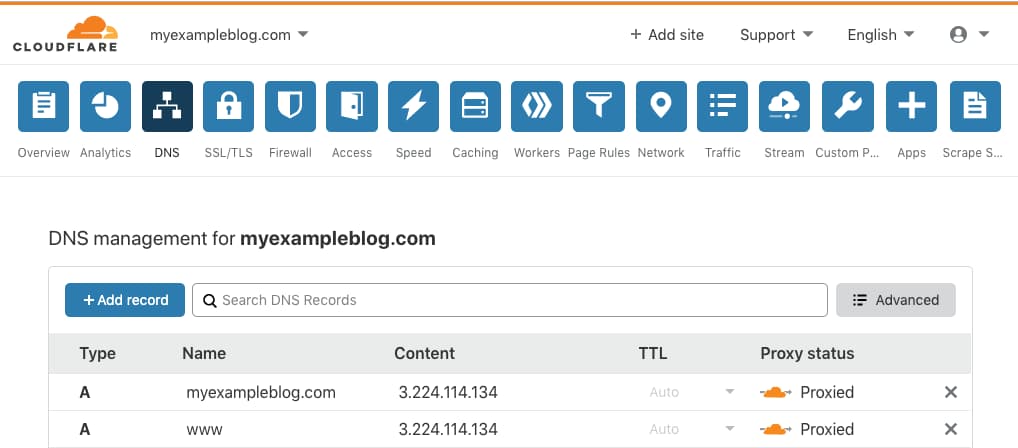
As we already added the server_name name in our Nginx config file. Now we need to setup DNS to point our server’s IP to a domain.
You need to add DNS A record as shown in the below image. Go to your domain registrar and you can add A records points to the server IP address.
After adding DNS record, change the WordPress URL to your domain name.
After saving this you will be logged out once you logged back in you will the URL is changed.
Extra Bonus: install Free SSL certificate
Now you have attached domain to your WordPress installation let’s begin to install an SSL certificate.
We will use Let’s Encrypt to obtain an SSL certificate. Let’s Encrypt is a free, automated, and open Certificate Authority backed by major tech organizations.
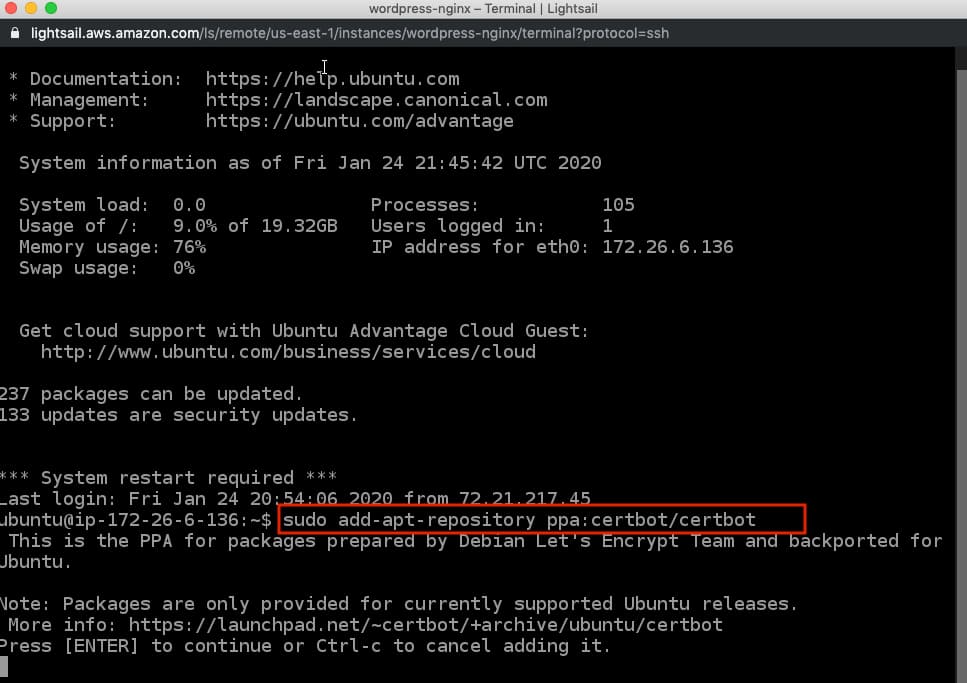
We’ll use certbot to install the SSL certificate, let’s install certbot first.
sudo add-apt-repository ppa:certbot/certbotYou’ll need to press ENTER to accept.
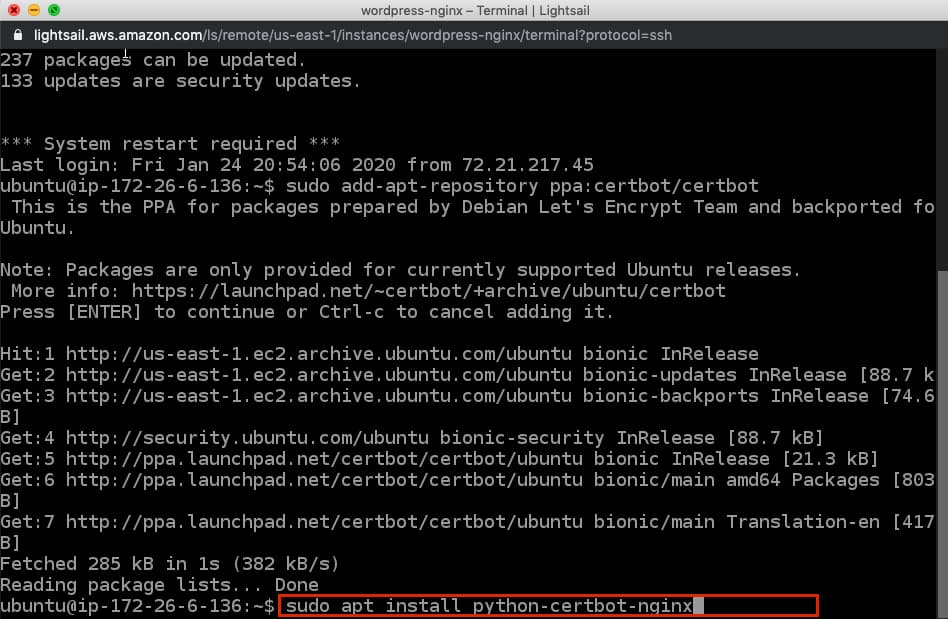
Install Certbot’s Nginx package with apt:
sudo apt install python-certbot-nginxYou’ll need to press Y to install python-certbot-nginx.
now, You need to allow HTTPS traffic Through the Firewall
check your ufw firewall current setting, You can see the current setting by typing:
sudo ufw statusour current status should look like this,
Now, allow Nginx full profile and delete the Nginx HTTP profile allowance.
sudo ufw allow 'Nginx Full'
sudo ufw delete allow 'Nginx HTTP'
Now check your status it should look like this,
sudo ufw status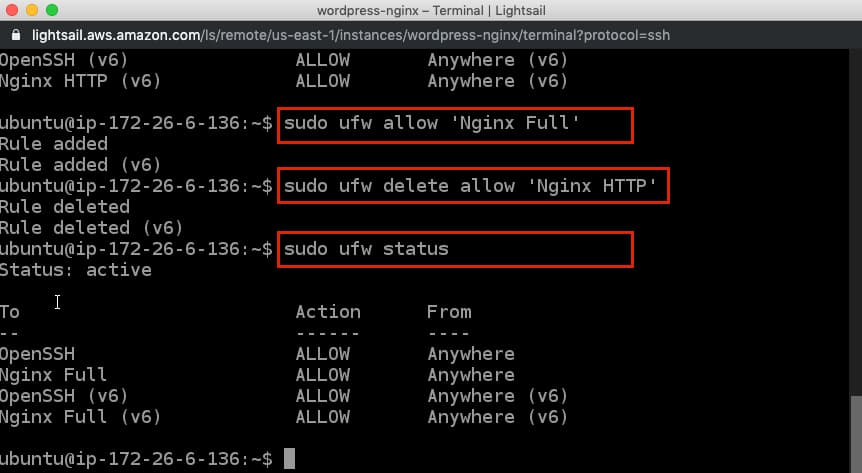
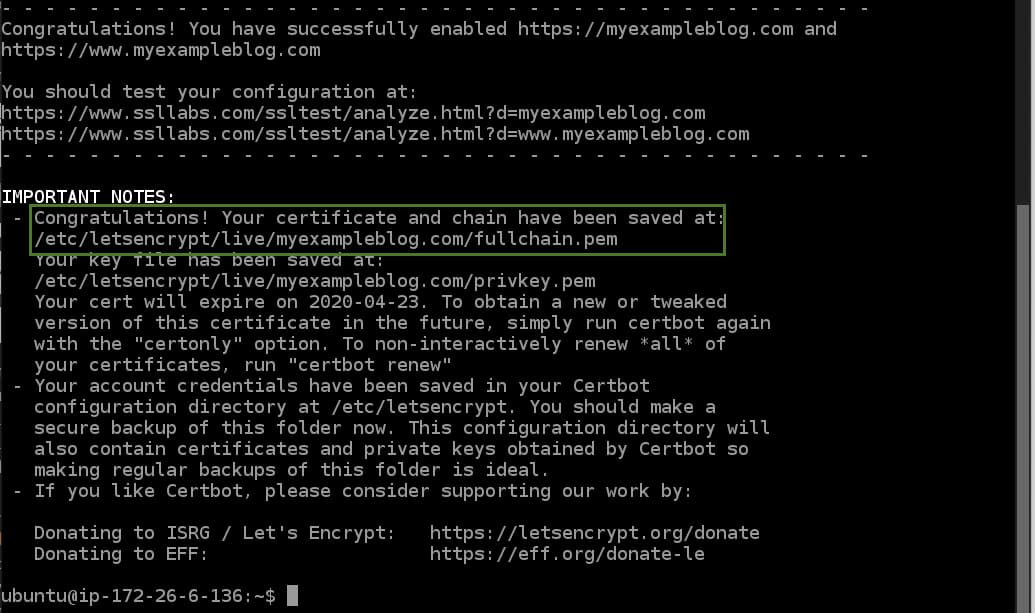
Now Obtain SSL certificate for your domain,
sudo certbot --nginx -d myexampleblog.com -d www.myexampleblog.comCertbot will ask you a couple of agreements and redirect from HTTP to HTTPS. ( choose if you want the server to redirect HTTPS). If you see below output then your SSL certificate is successfully installed.
One last important thing! Auto-Renewal your SSL certificate type below command, this will auto-renew your SSL certificate so you don’t have to worry about broken SSL.
sudo certbot renew --dry-runyou will see below output.
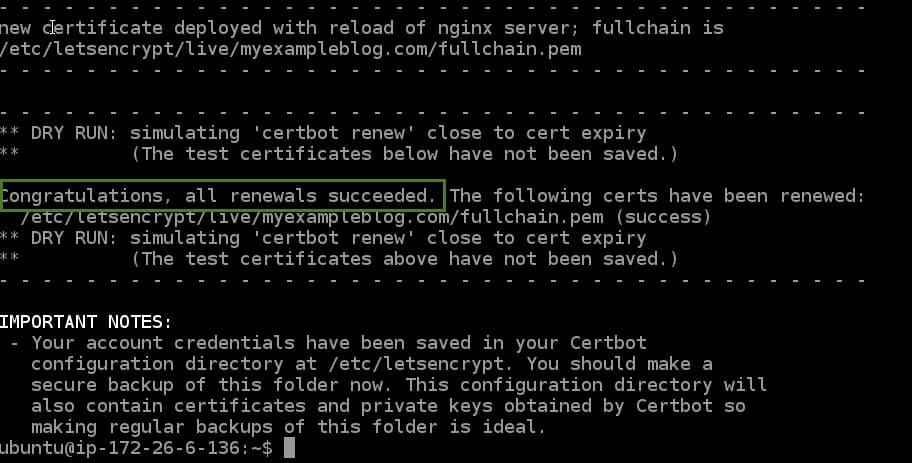
Now you have successfully installed SSL and it’s on automatic renewal.
Now AWS Lightsail does not have by default HTTPS 443 port open you need to go into Lightsail Instance setting and add 443 HTTPS port.
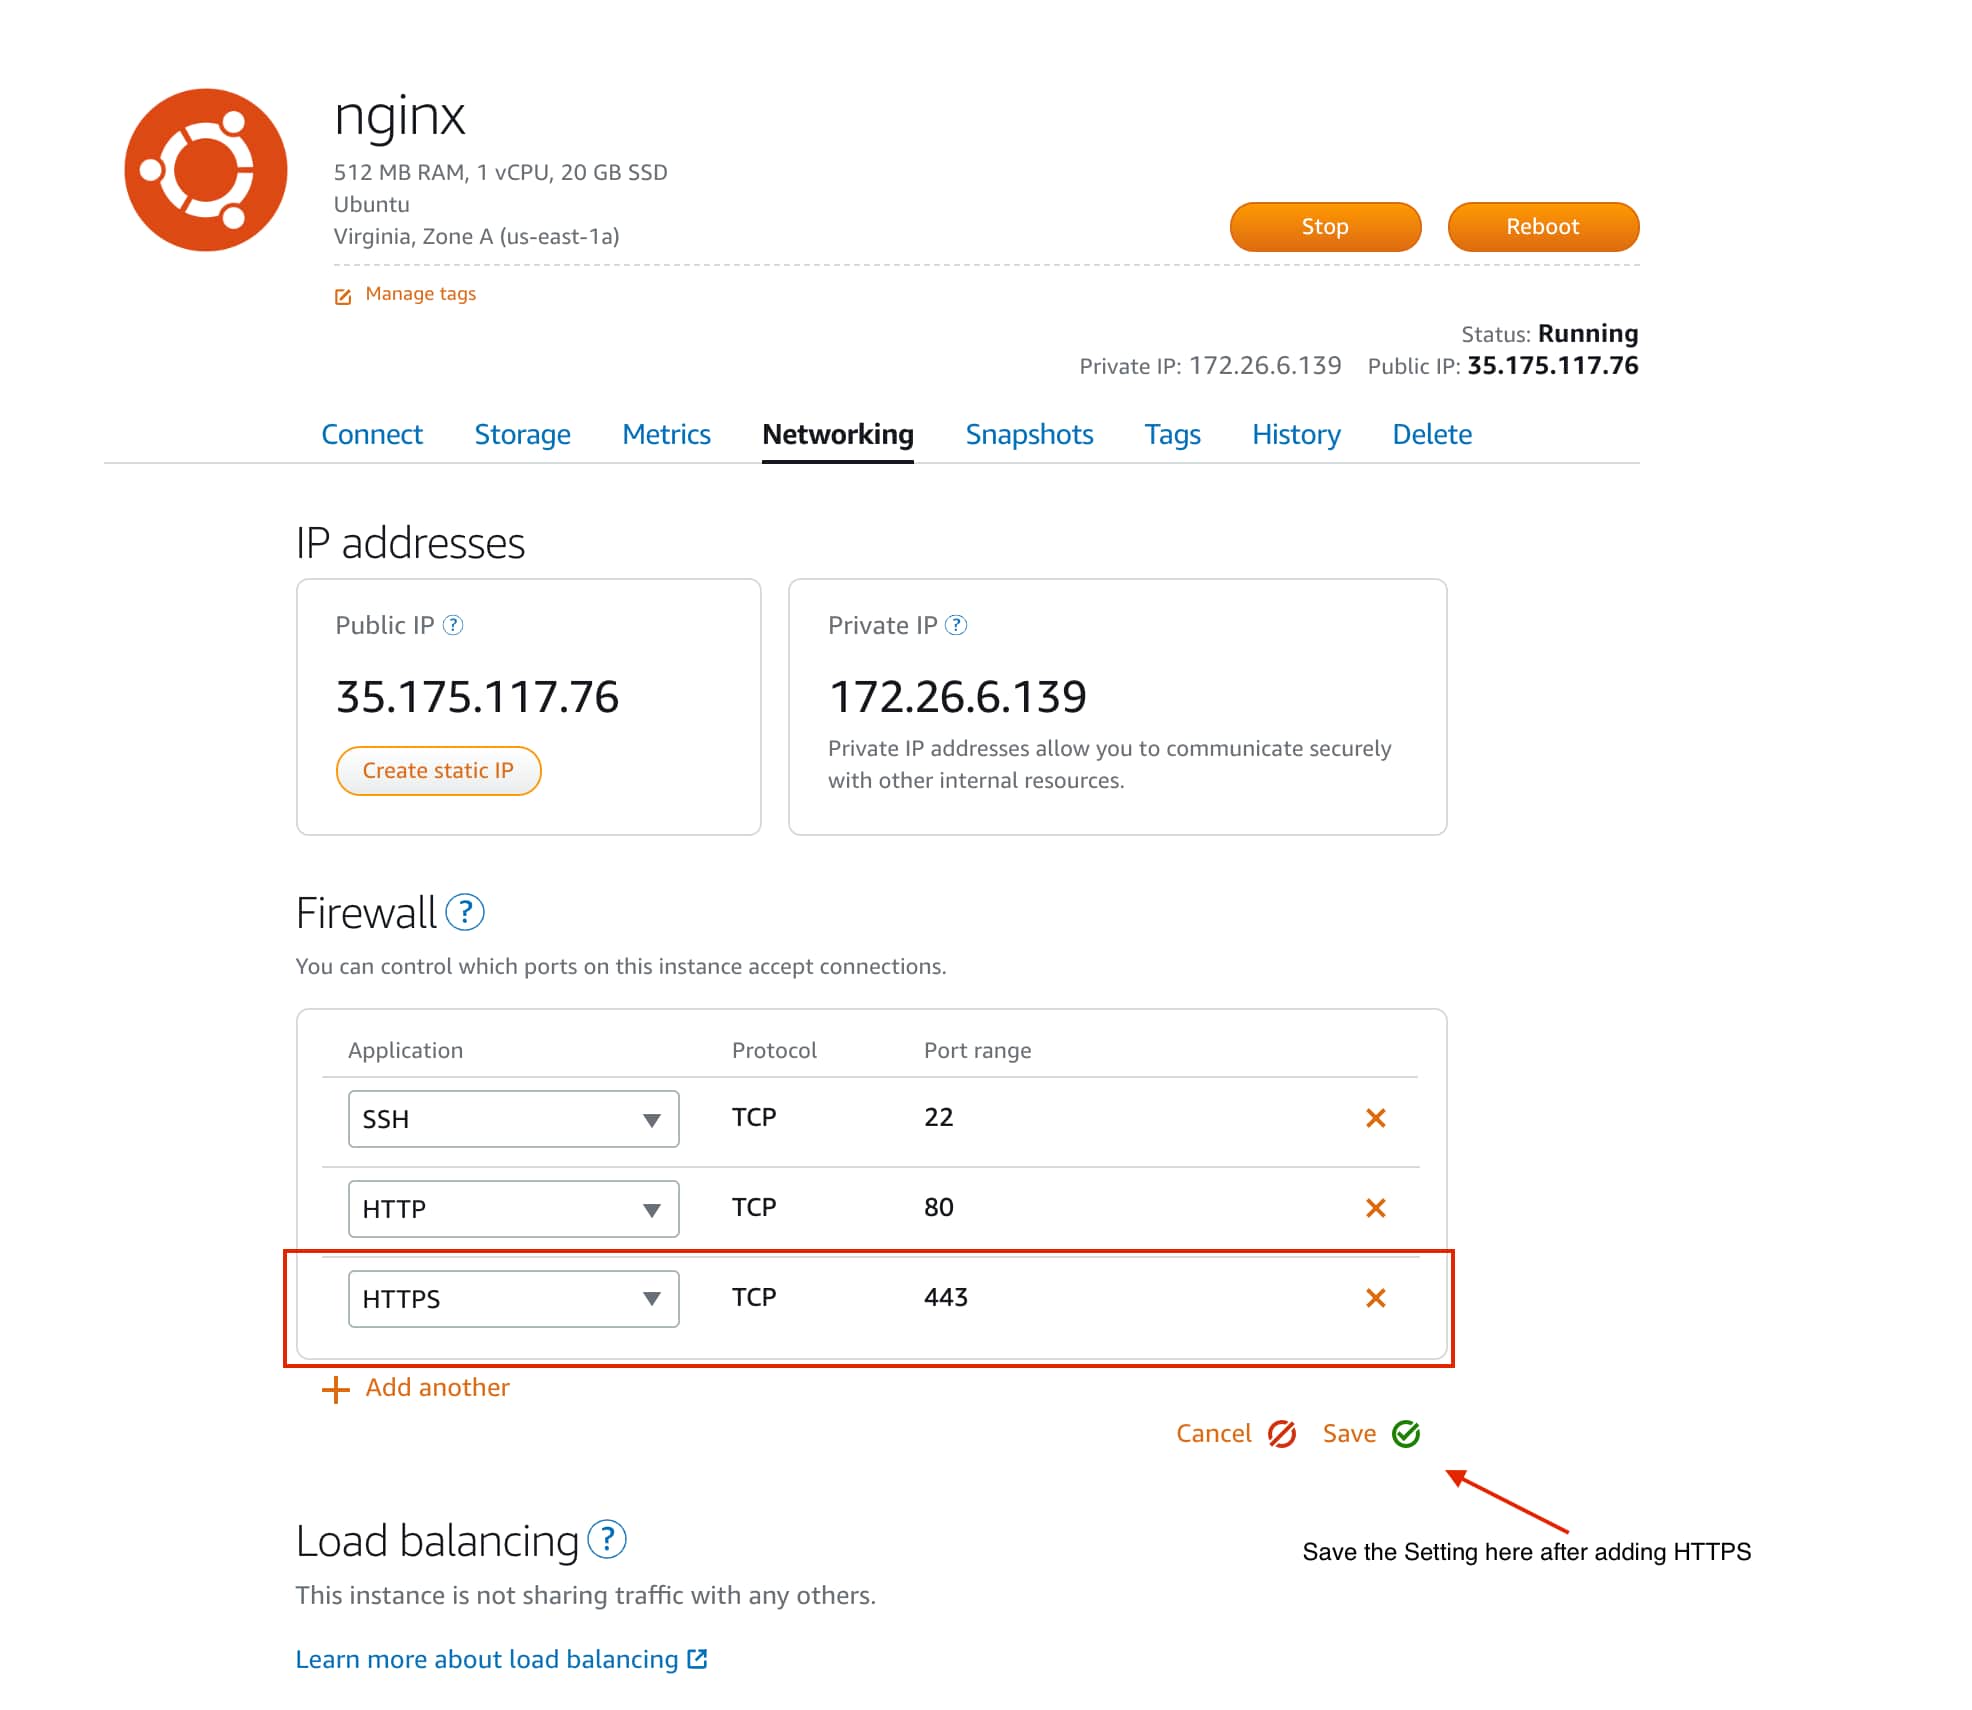
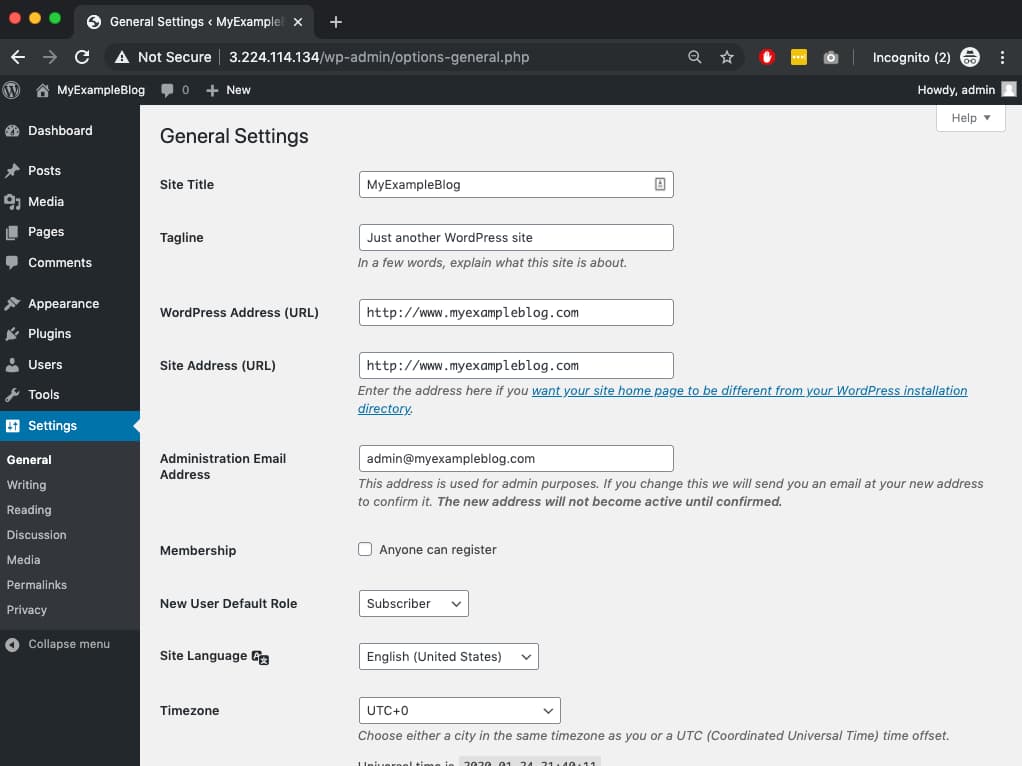
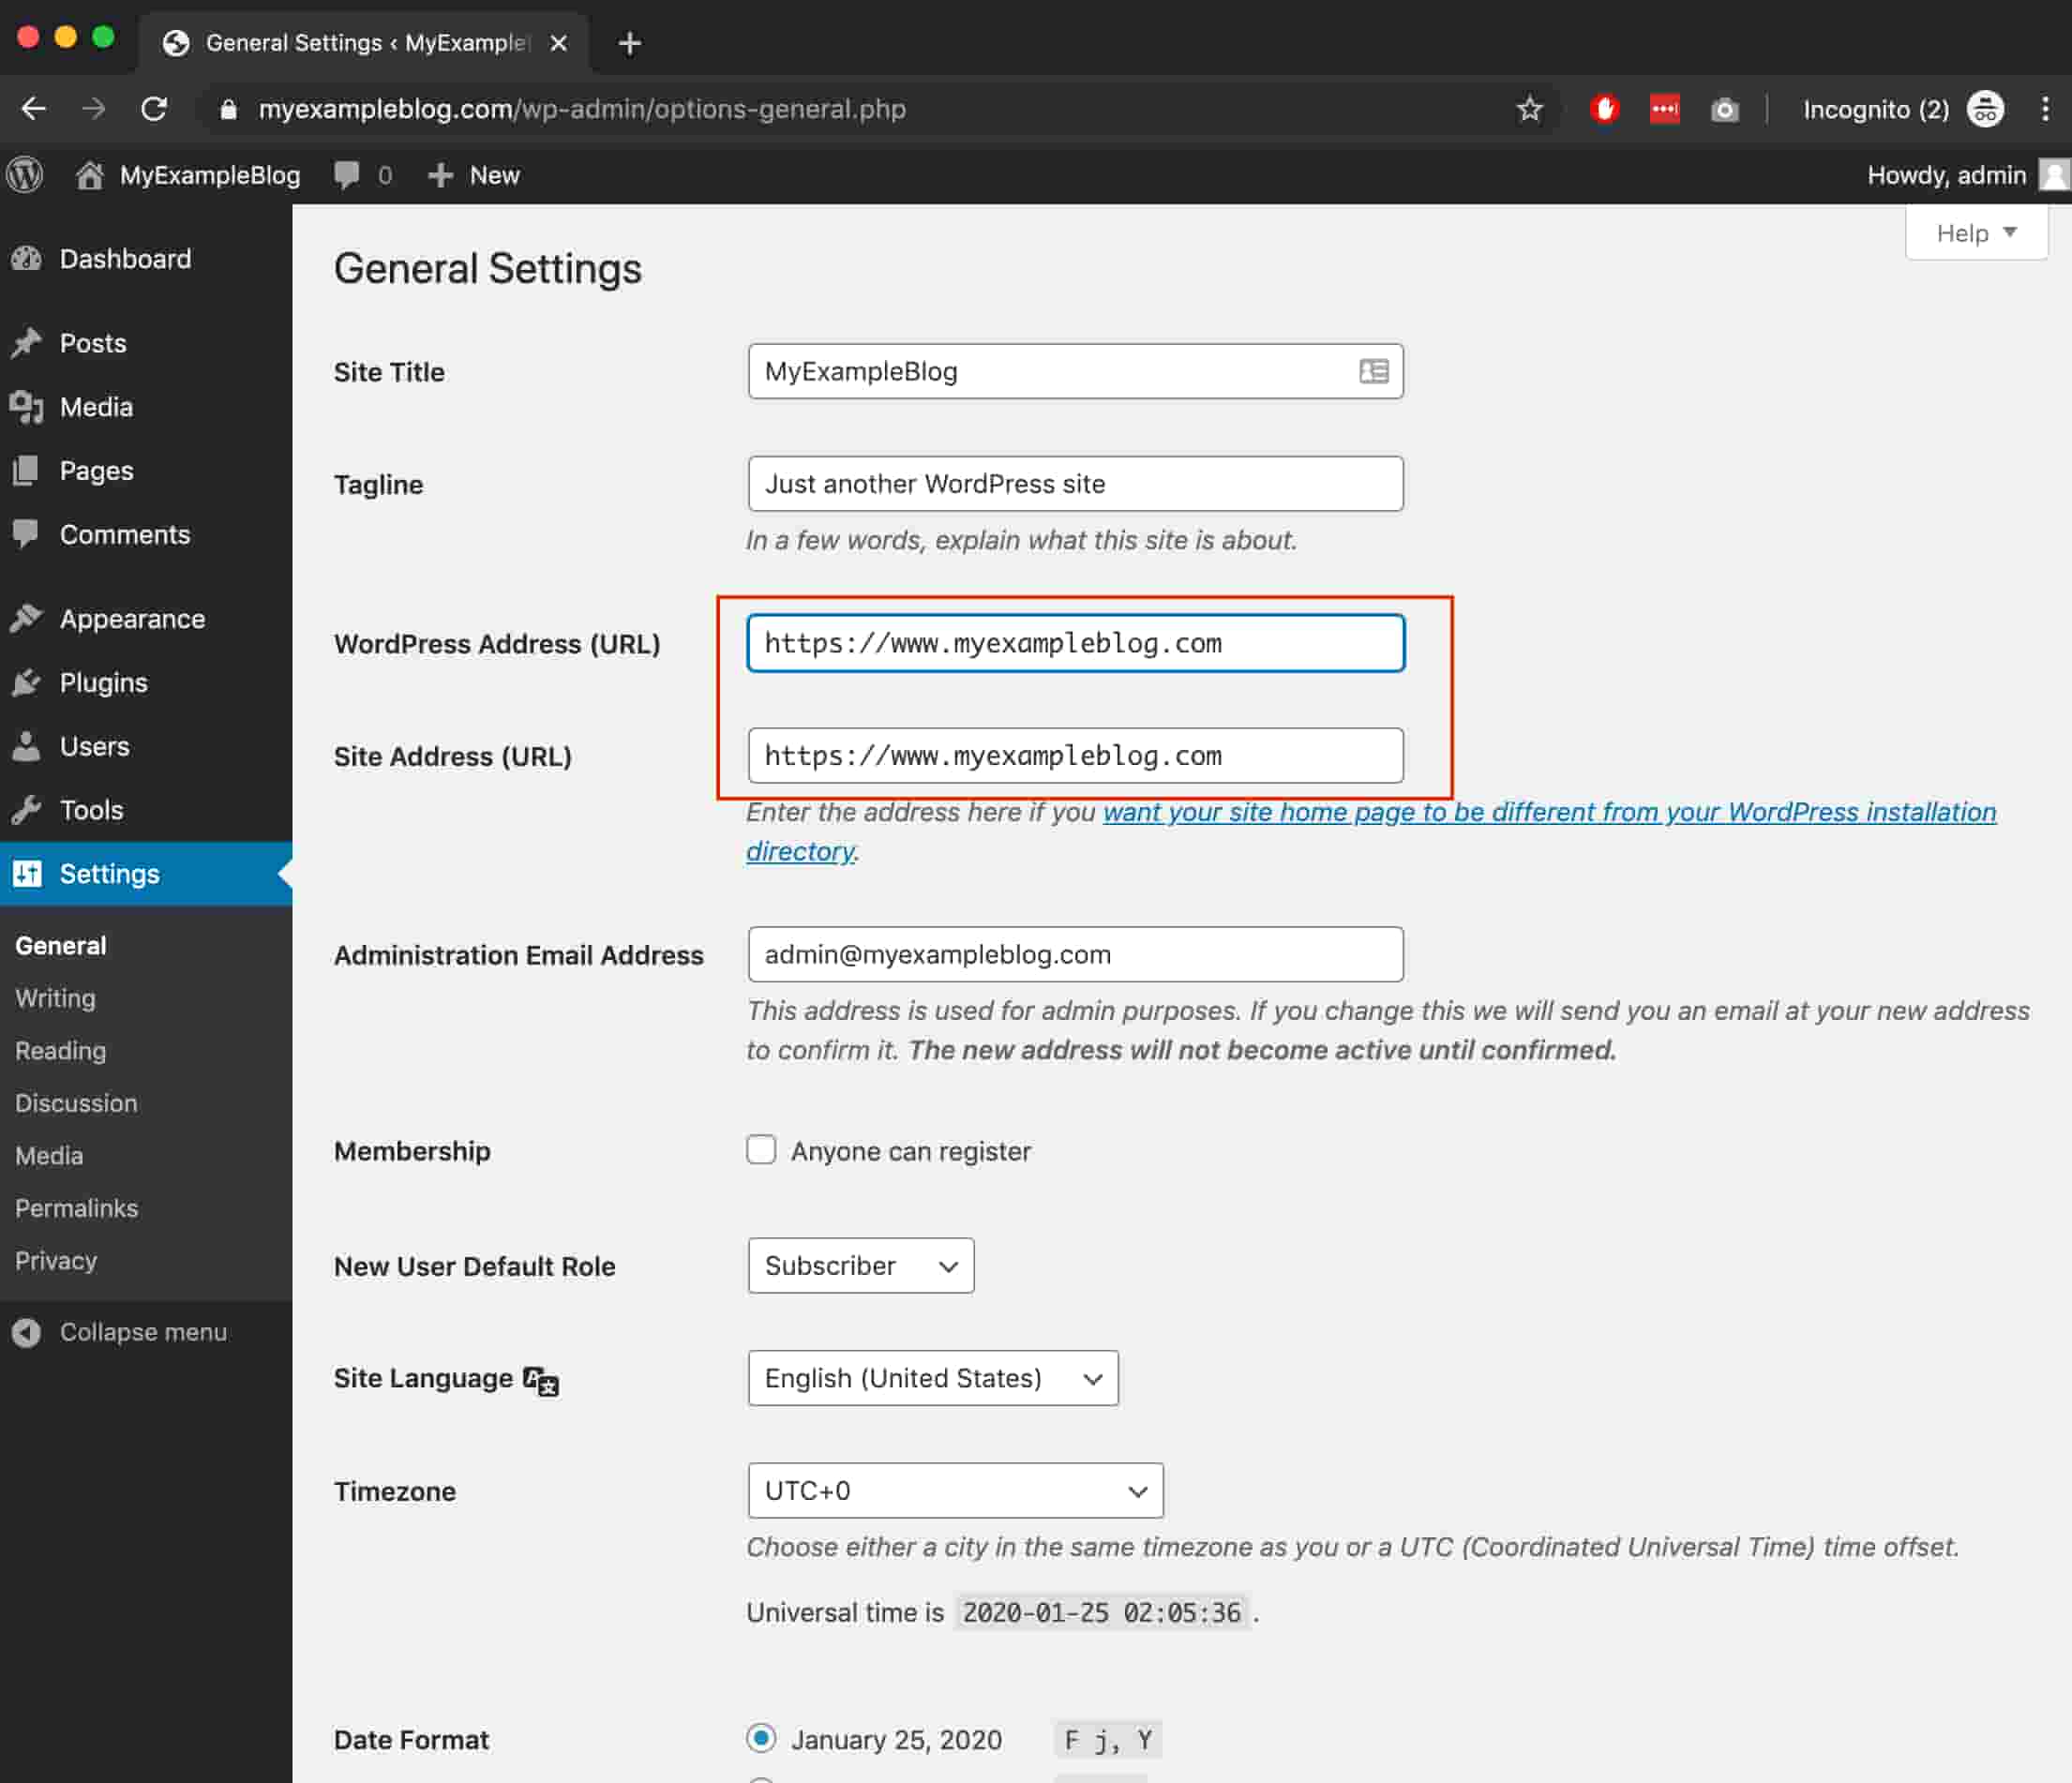
Let’s change the WordPress URL to HTTPS. Go yo the WordPress Settings > General and chage the url pointed to HTTPS.
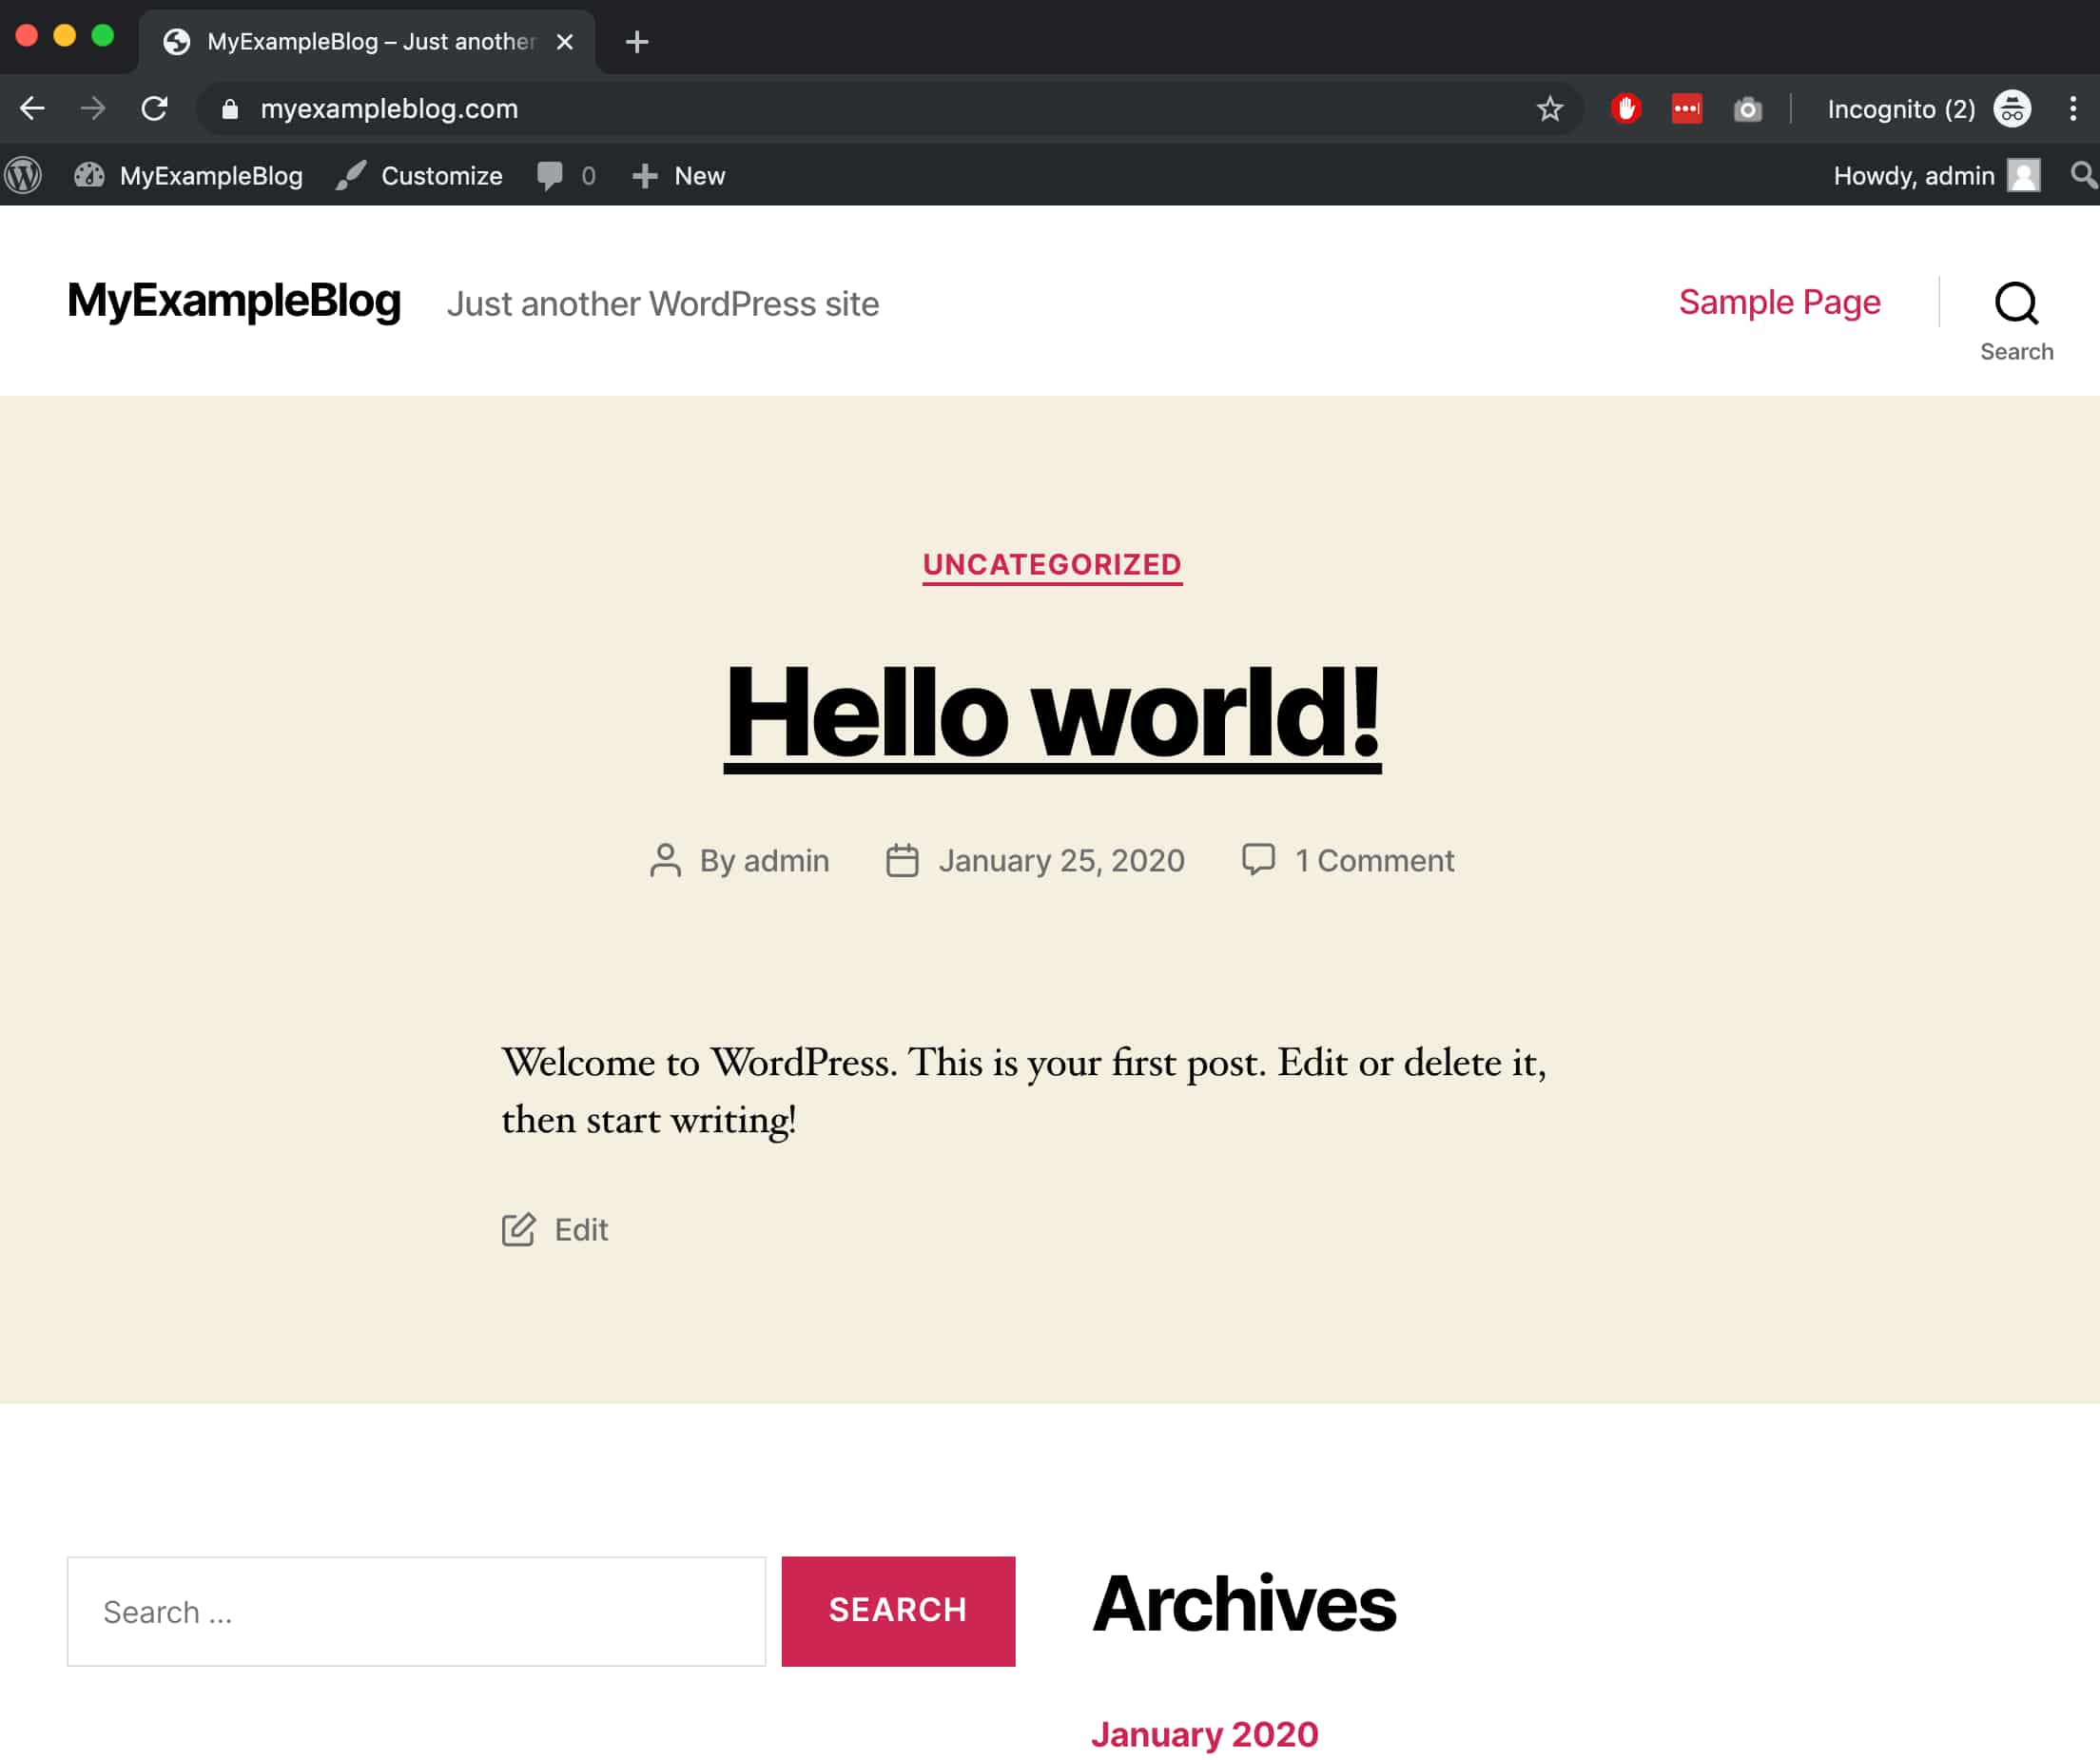
Now IF you go to your WordPress website you will see HTTPS.
Post-Install Maintenance
We strongly suggest you turn on automatic security updates for your OS.
In Ubuntu use the
sudo dpkg-reconfigure -plow unattended-upgradesIf you are using a password and not
Just restart your Lightsail instance every 6 month to make all updates.
Please help us to improve this guide.
That’s all.
Feel free to ask any question in Comment.
Thanks man, Perfectly Works.
I’m glad it helped
Everything went great except for this part:
GRANT ALL ON wordpress.* TO ‘wordpressuser’@’localhost’ IDENTIFIED BY ‘password’;
MySQL 8+ doesn’t allow creating users with the GRANT command.
It worked for me with this:
mysql> CREATE USER ‘username’@’localhost’ IDENTIFIED BY ‘desired_password’;
mysql> GRANT ALL PRIVILEGES ON db_name.* TO ‘username’@’localhost’ WITH GRANT OPTION;