
Once you deployed WordPress on Google Cloud and assigned Static IP, the next thing is to setup domain name to Google cloud.
To get your domain name setup in google cloud, you first need to have a registered domain.
you can have your domain registered with Google domains. (you can also register with Namecheap or Godaddy).
Once you have a domain name, you can follow four easy steps to transfer domain name to Google Cloud.
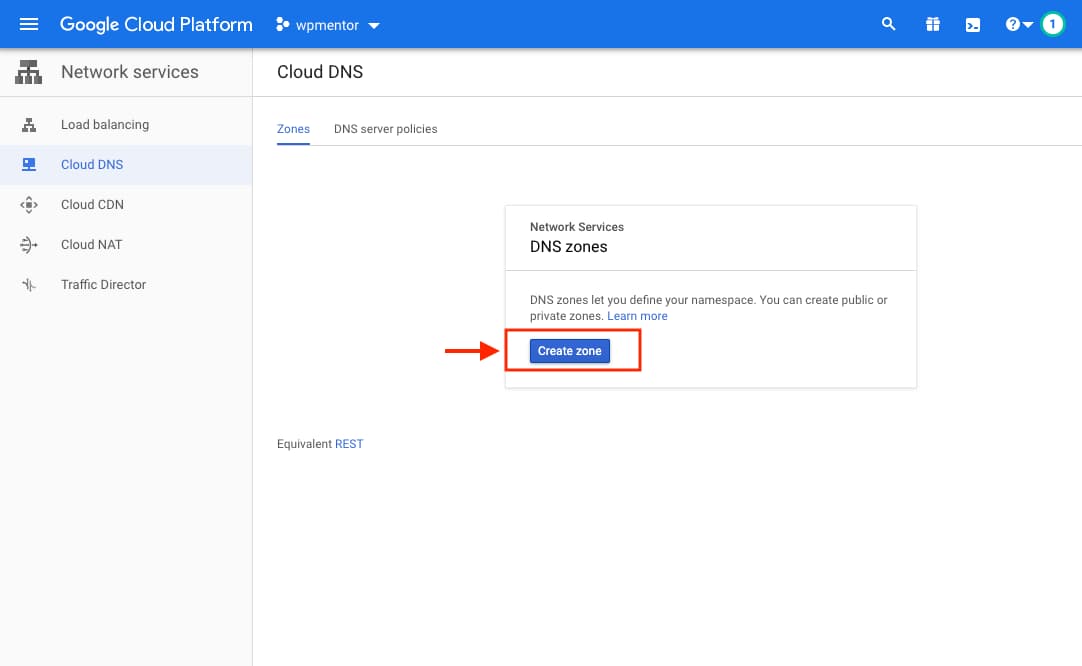
1. Create a Cloud DNS Zone
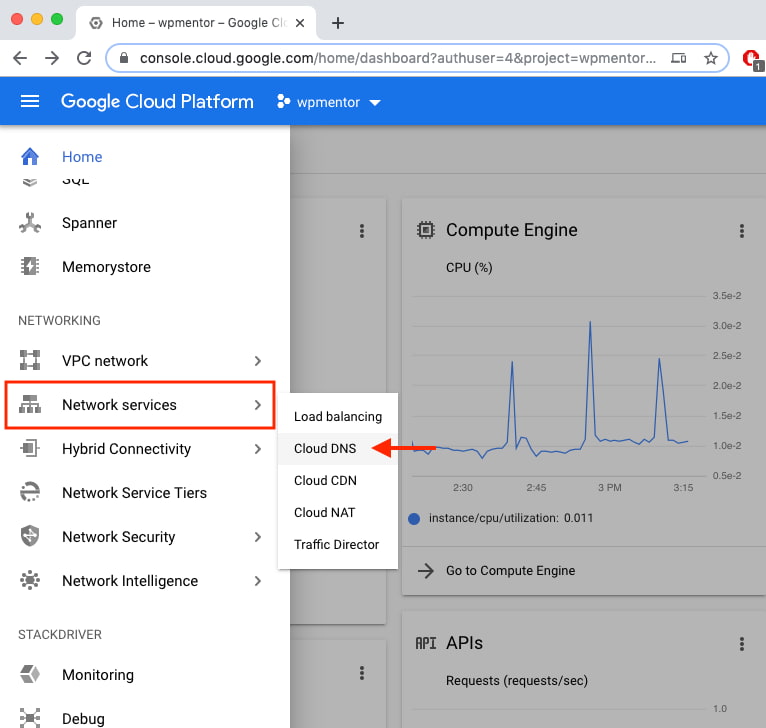
First, you need to go to your project in Google Cloud and select Network Services => Cloud DNS.
Here is the direct link to go to Cloud DNS.
Now after getting into Cloud DNS, you need to create Zone, click on “CREATE ZONE”.
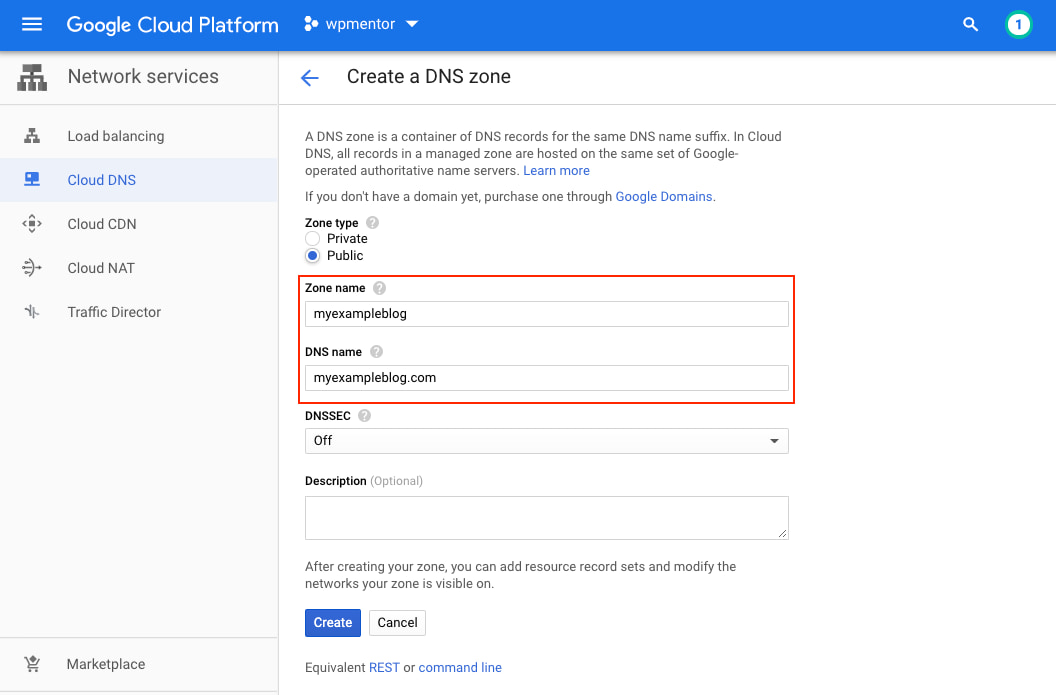
Add the Zone name as your website name and DNS name as your root domain then click on Create.
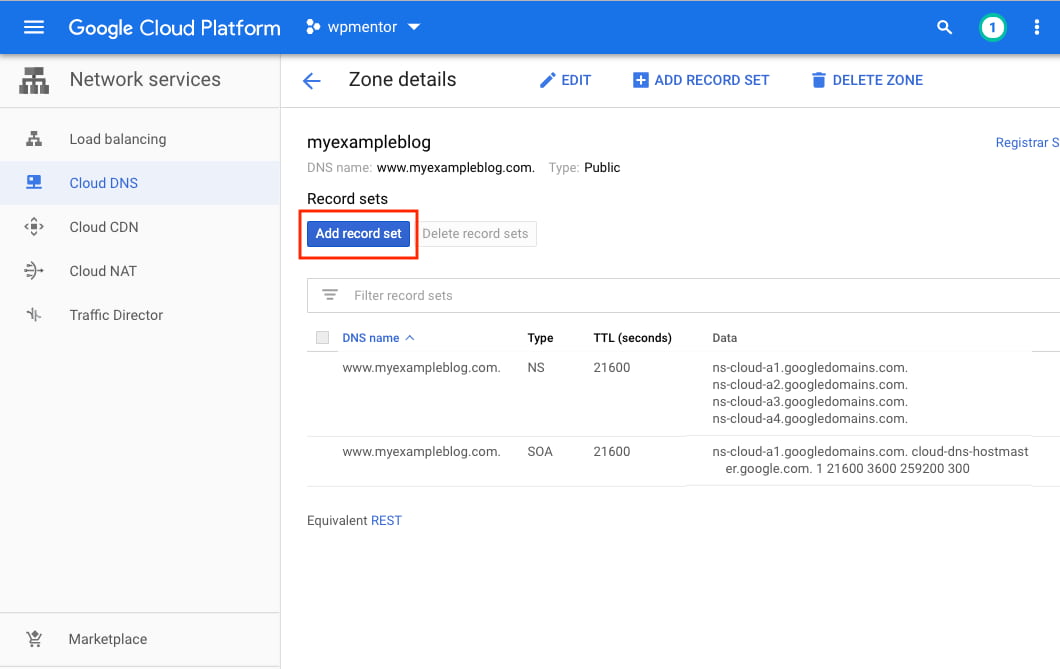
2. Add DNS Records
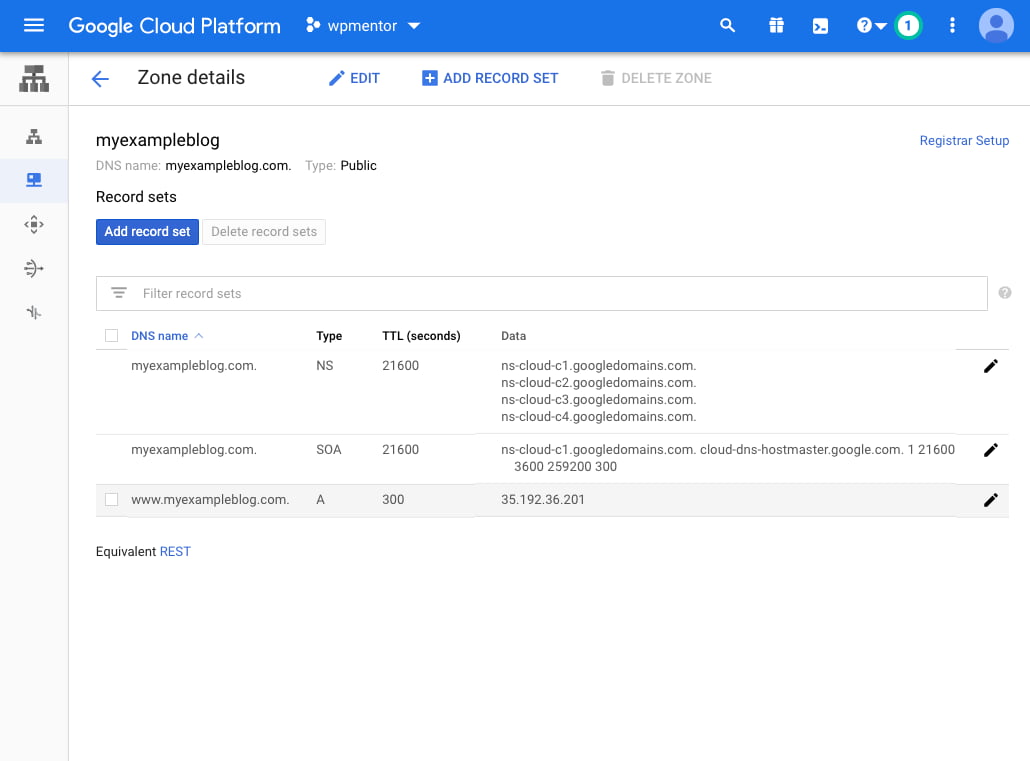
Once it’s created it will look like the below image.
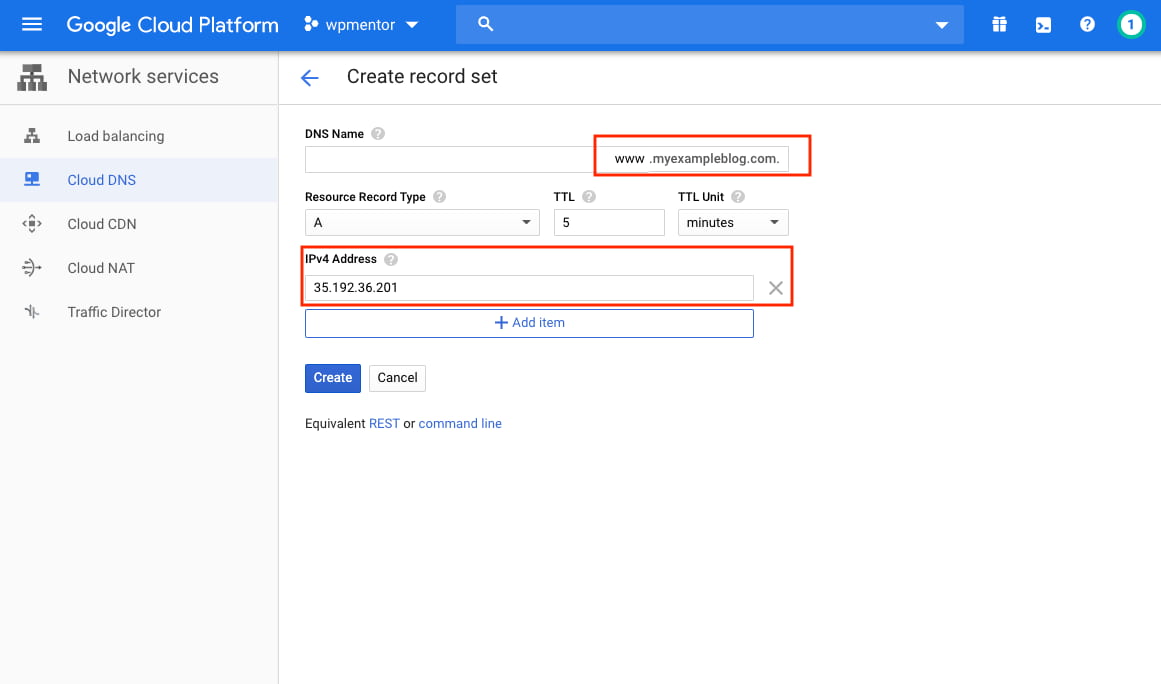
now you need to add DNS record. Click on Add record set to add DNS record.
First thing, you need to add A record WWW points to your domain name www.myexampleblog.com.
If you prefer non-www domain name like just myexampleblog.com then just keep DNS Name empty.
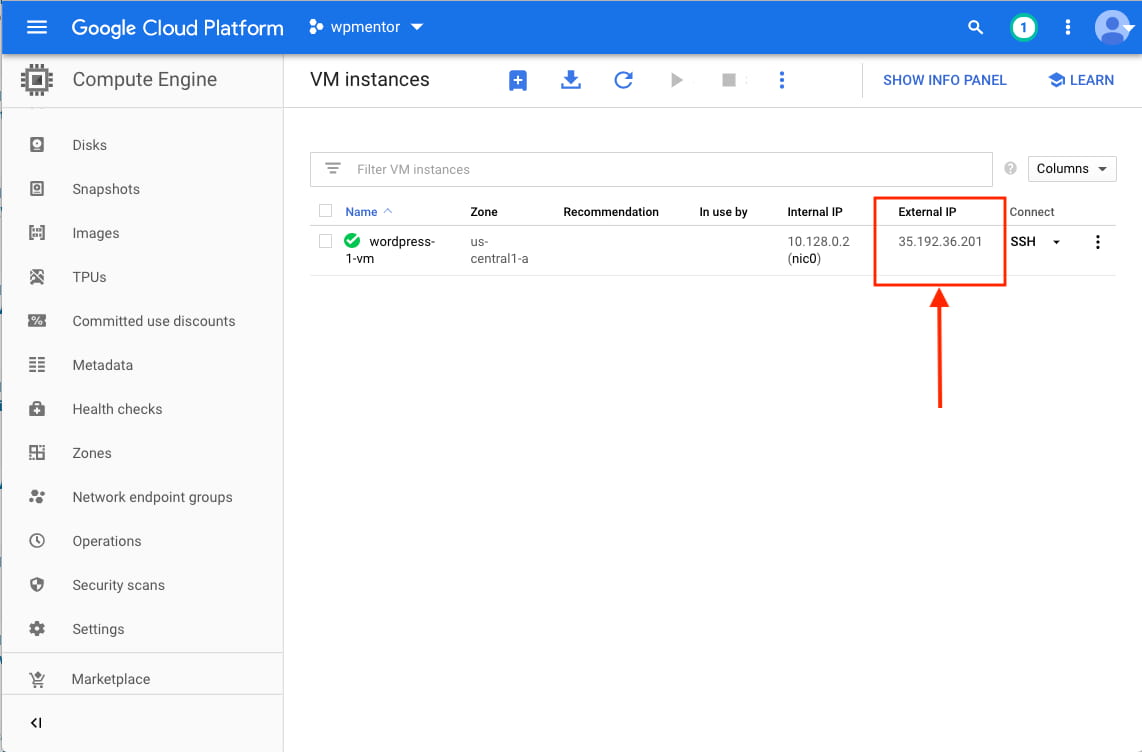
To get your server IP address, go to Compute Engine => VM Instances => External IP.
Add the Servers IP address and Click on Create.
Once you have added DNS A record it should have looked like this.
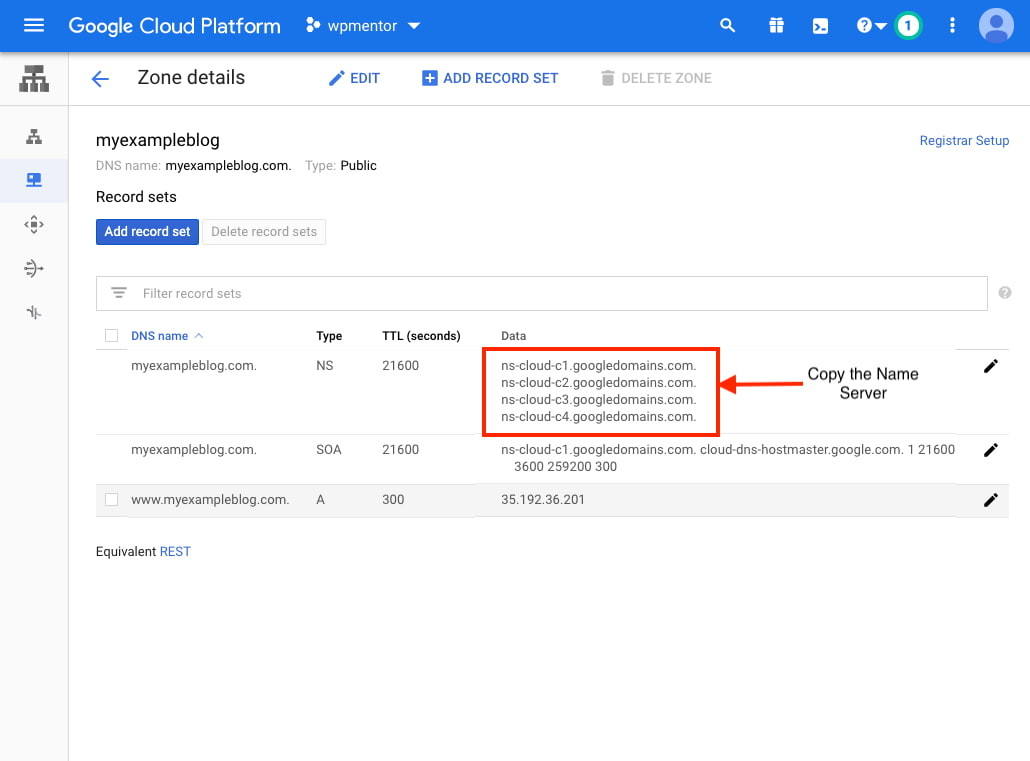
3. Configure Name Server
One last thing remains for DNS is to Configure Name Server. You need to point your domain name to your blog/website on Google cloud.
To complete this step that adds the name server and into your domain name.
Here is my example I have used NameCheap, but, the process is the same to add Name Server.
If you don’t find a way to add a name server in your domain provider please let me know in the below comment section, I will assist with that.
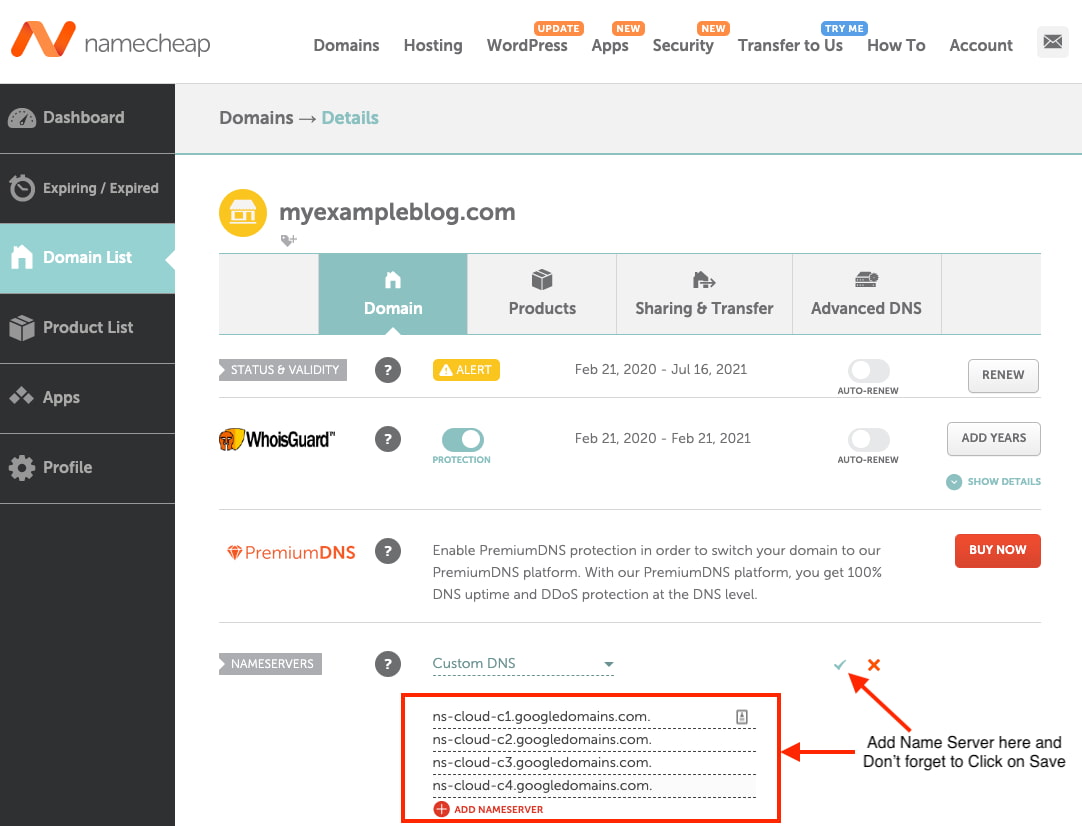
Copy the Name server,
To Add name server in Namecheap, log in into your Namecheap account and click on the domain then add custom DNS as shown in the below image, don’t forget to click on Save button.
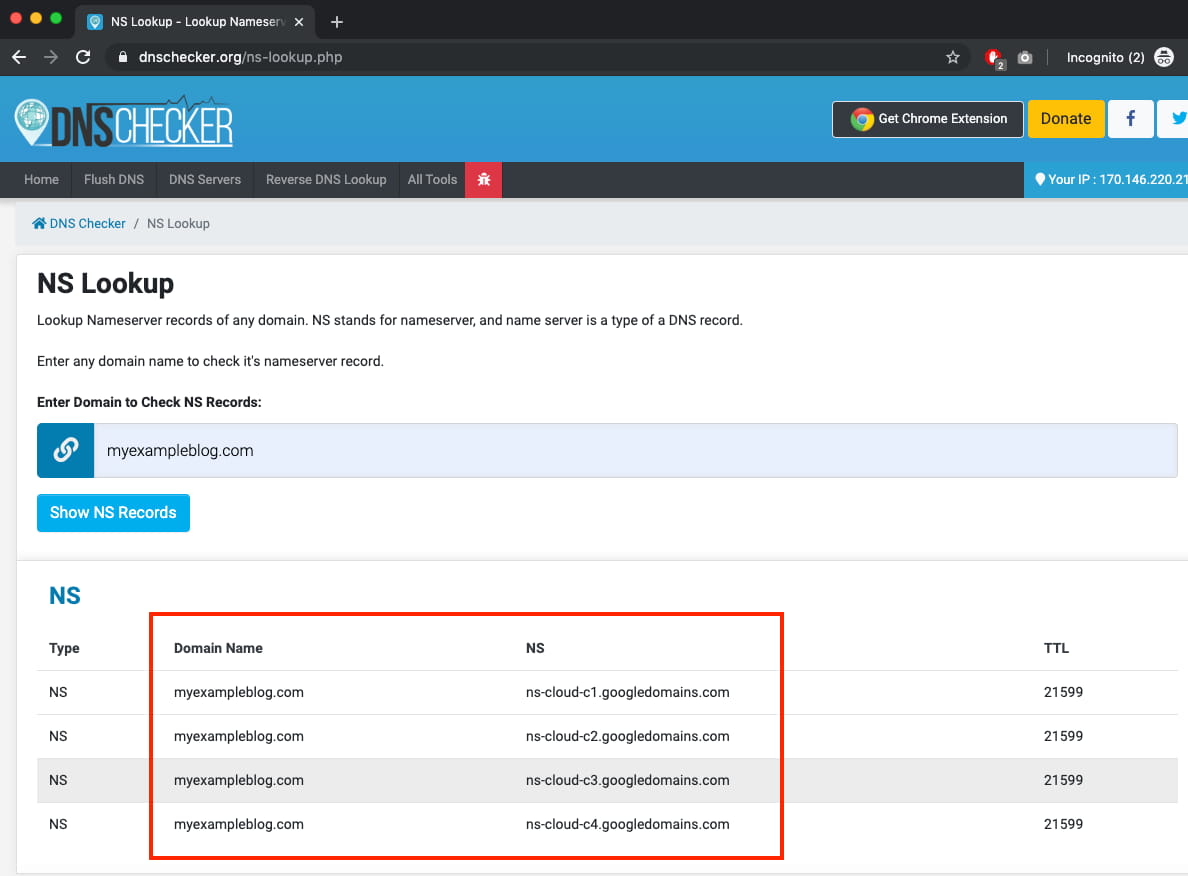
Once the DNS is added, it will take less than 30 minutes to propagate.
In my experience, it took 2 minutes to propagate.
You can go to dnsserver.org, to check the status. In my case, it was quick.
4. Edit WordPress URLs
If you have deployed WordPress with this tutorial, it should be quick to change your WordPress URL.
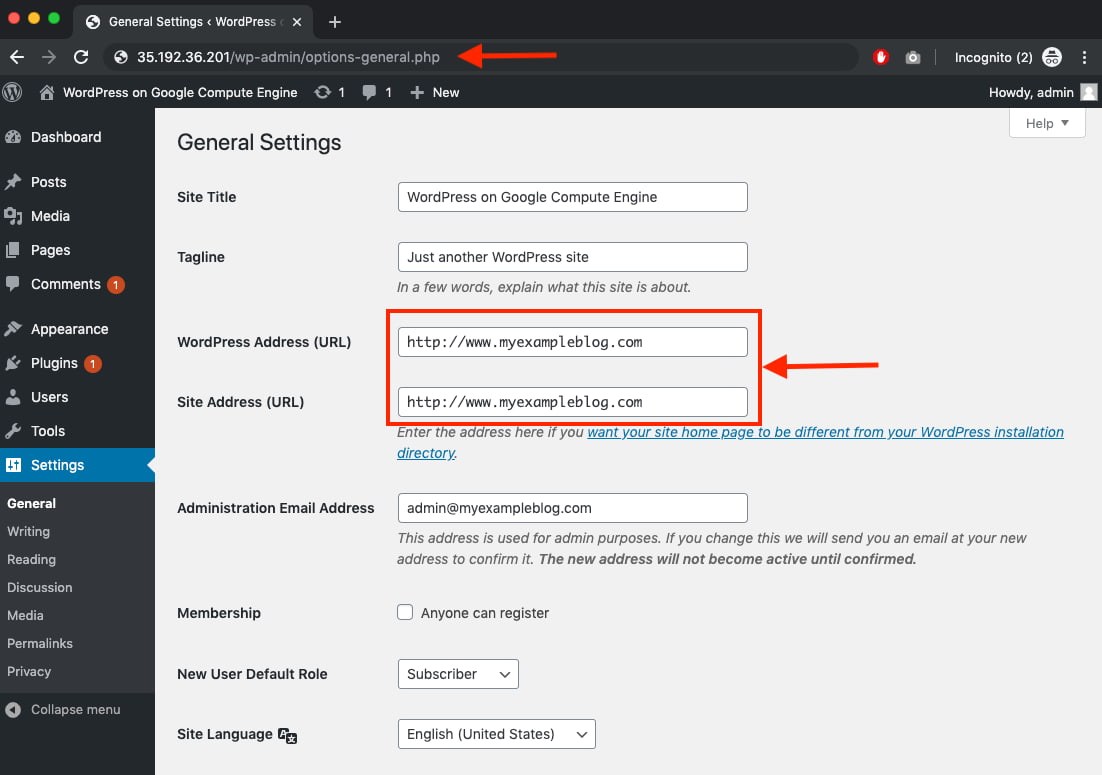
Go to your WordPress site IP address then navigate to the admin dashboard, => Settings => General.
Change the WordPress Addres (URL) and Site Address (URL) and click on save. ( make sure you don’t add https at this point if you don’t have SSL configured to your web server.)
Then click on save after that you will be logged out from the admin dashboard.
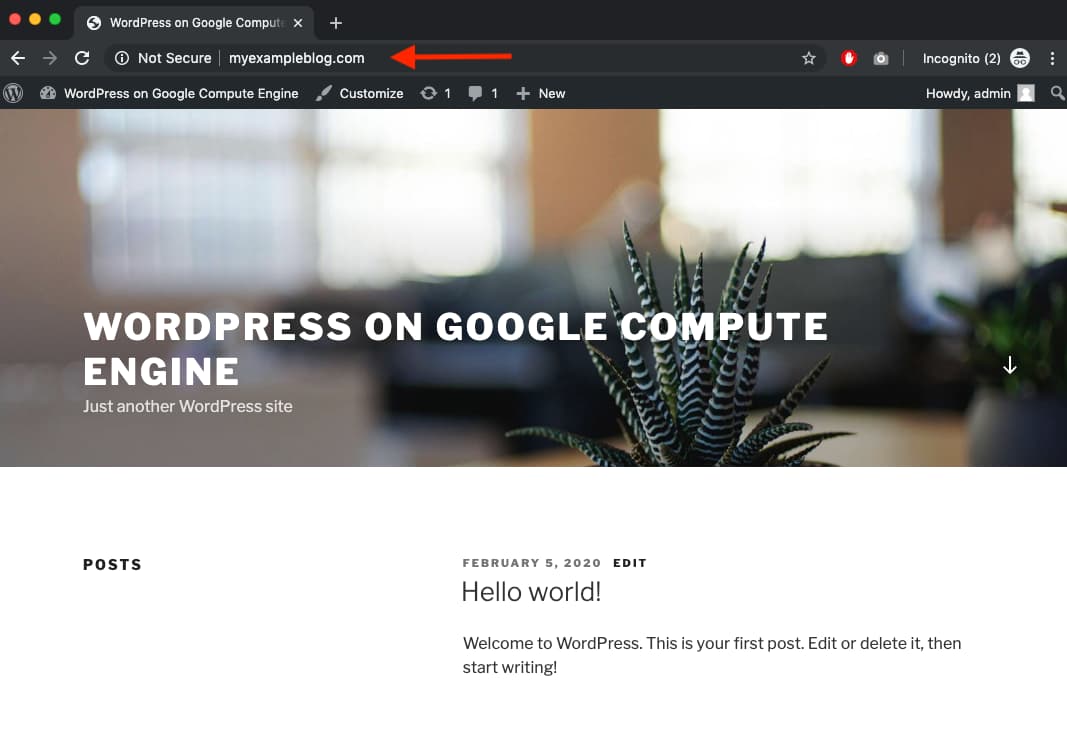
Now you will see your WordPress Server points to Your domain name with Google Cloud DNS.
That’s all needed to set up Domain Name to Google Cloud Hosting.
If you have any questions about this tutorial please post them as comments below.
Your domain name is now pointing to your Google Cloud!
Next thing is to,
If you have any questions about this tutorial please post them as comments below.