
In this guide, we are going to offload all WordPress to S3 bucket, but why?
When WordPress is installed in the server, all Uploads and assets are stored in the same server, which means when the WordPress page loads, it requests all files to be loaded from the server. That’s a big stress on the server when you have multiple images on the page and it loads slowly.
and It’s impossible to scale WordPress with a horizontal scale. (that means adding more server to handle the load). To implement a highly scaled WordPress first point is to decouple all assets and databases.
For now, we are decoupling uploads, all your WordPress uploads ( images and videos) are stored in wp-content -> upload folder https://www.wpmentor.com/wp-content/uploads/
S3 is a more robust storage option and images load faster than your server.
Once S3 is Setup images on your WordPress upload directly to s3. But, it will no give you the CDN speed, as you still need CDN in front of the S3 bucket. I will share with you how to optimize the image with AWS CloudFront CDN.
Let’s start with the setup.
There are 4 steps in this tutorial:
1.Install WP Offload Media Lite Plugin
2. Configure the IAM role in AWS.
3. Add access keys to the wp-config.php file
4. Configure WP Offload Media plugin
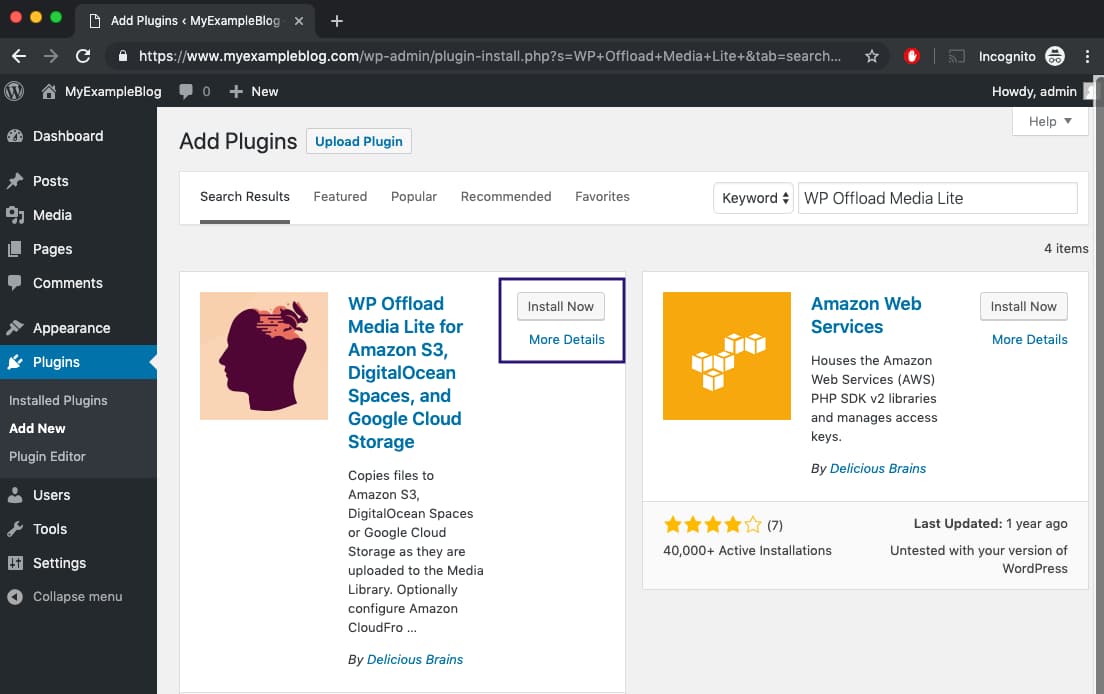
Step 1. Install WP Offload Media Lite Plugin
We are going to use WP Offload Media Lite, The basic version is free. Install the plugin from the WordPress dashboard.
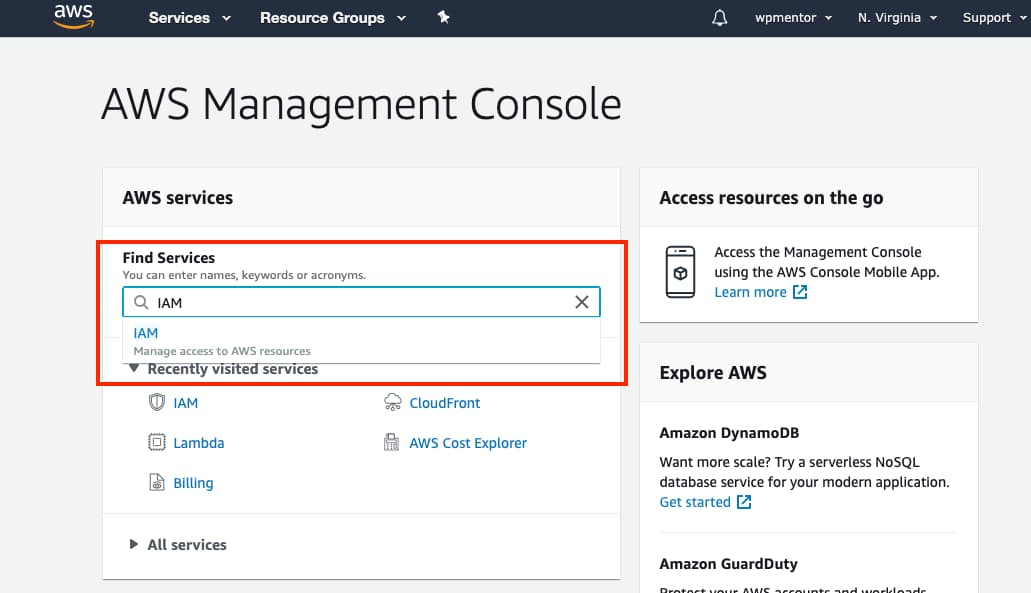
Step 2: Configure the IAM role in AWS.
To set up the AWS S3 bucket you need to have an account in AWS (Amazon Web Services), if you don’t have an account then go to aws.amazon.com and signup for the account.
After setting up the account, log in to your AWS console dashboard.
Then search for IAM in the services and click on IAM ( Manage access to AWS resources).
On the next window, you see the IAM screen click on Users
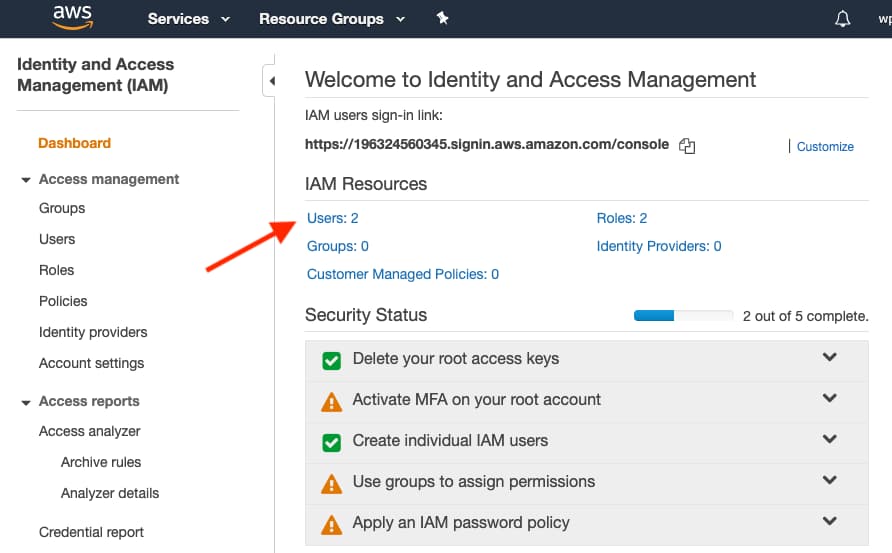
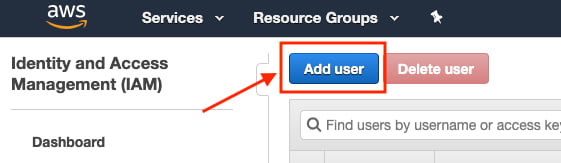
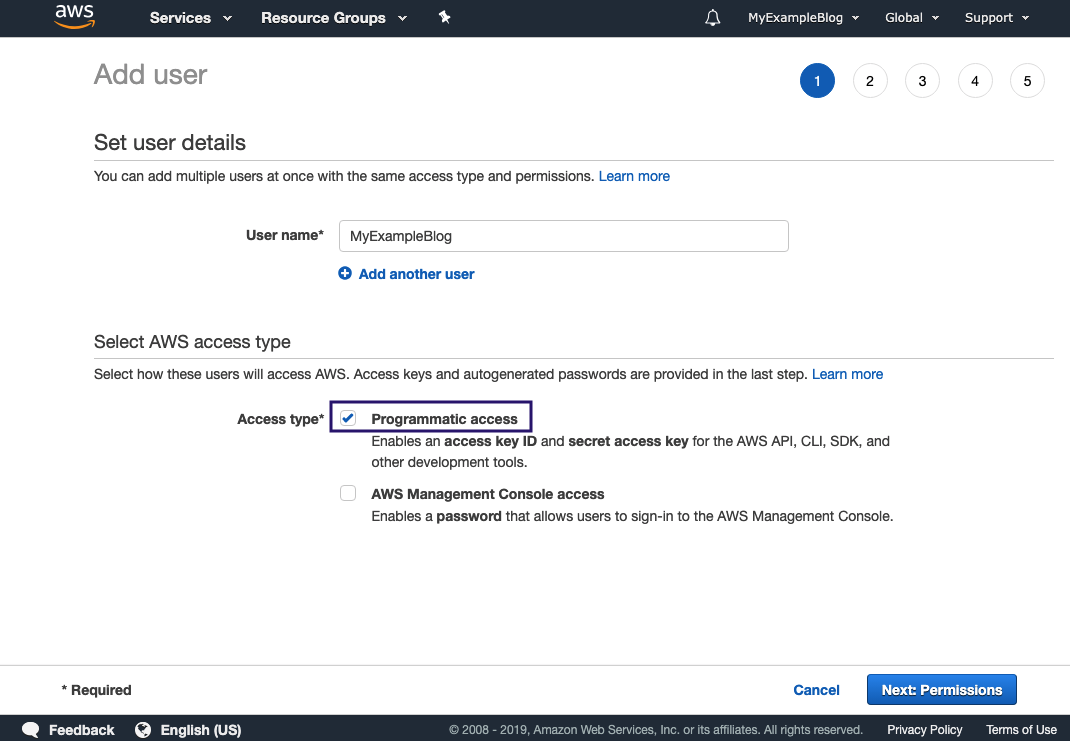
After Clicking Users you will see a button on top to Add user
In the next screen enter the User name, give the IAM name that is more relevant to your WordPress site and check the checkbox programmatic access then clicks on Next: Permission
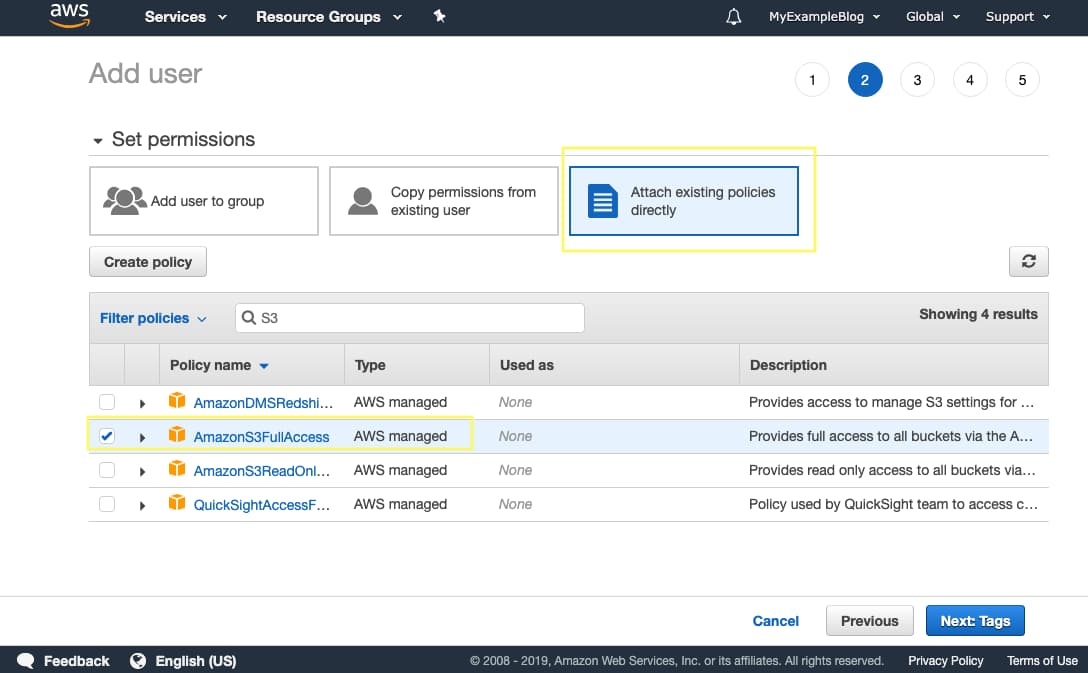
Give User to Full Access of S3 bucket.
before you create user verify the details
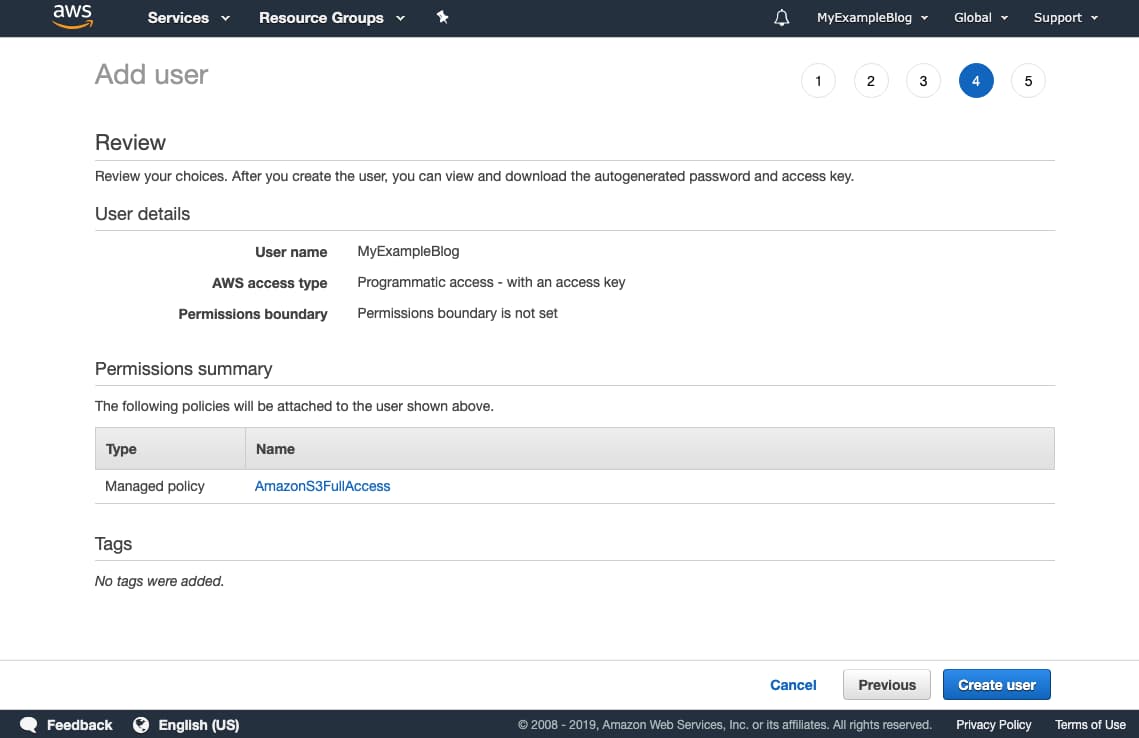
Now copy the Access Key ID and Secret access key, we need to add these two keys into the wp-config.php file.

Step 3: Add access keys to the wp-config.php file
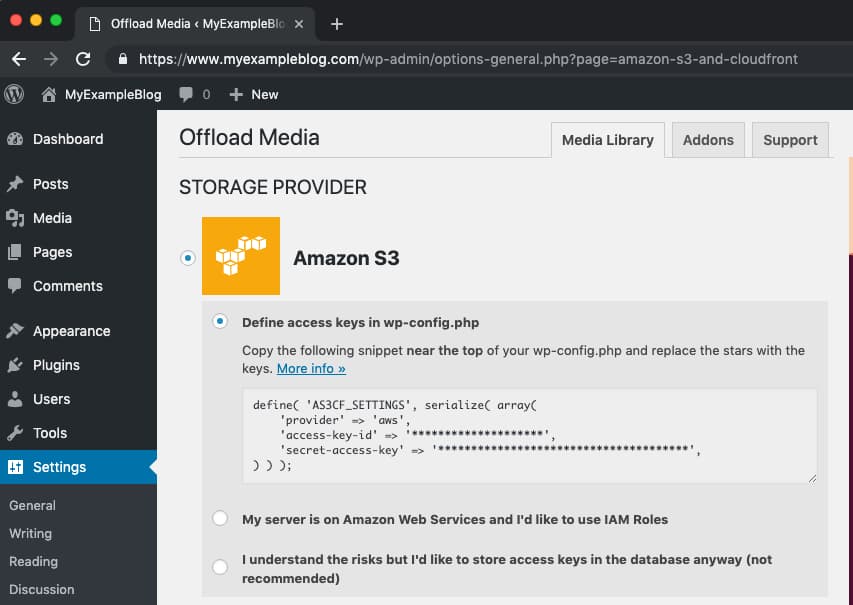
For better security, we recommend defining your access keys in your wp-config.php:
define( 'AS3CF_SETTINGS', serialize( array(
    'provider' => 'aws',
    'access-key-id' => '********************',
    'secret-access-key' => '**************************************',
) ) );
These should be placed at the following block of code in your wp-config.php. This file is located at the root folder of your WordPress installation.
. . .

define( 'WP_DEBUG', false );

define( 'AS3CF_SETTINGS', serialize( array(
    'provider' => 'aws',
    'access-key-id' => 'AKIAHJFWFK54FEMYKTG56FV',
    'secret-access-key' => 'LBnxQ7My+xcAfrty7cQrapqw45e5wq64e5646e4qwOxh/1b',
) ) );

/* That's all, stop editing! Happy publishing. */

/** Absolute path to the WordPress directory. */
if ( ! defined( 'ABSPATH' ) ) {
        define( 'ABSPATH', dirname( __FILE__ ) . '/' );
}

/** Sets up WordPress vars and included files. */
require_once( ABSPATH . 'wp-settings.php' );
make sure your code is before this code block
if ( ! defined( 'ABSPATH' ) ) {
        define( 'ABSPATH', dirname( __FILE__ ) . '/' );
}
Step 4: Configure WP Offload Media plugin
select define access key in wp-config.php and click on next
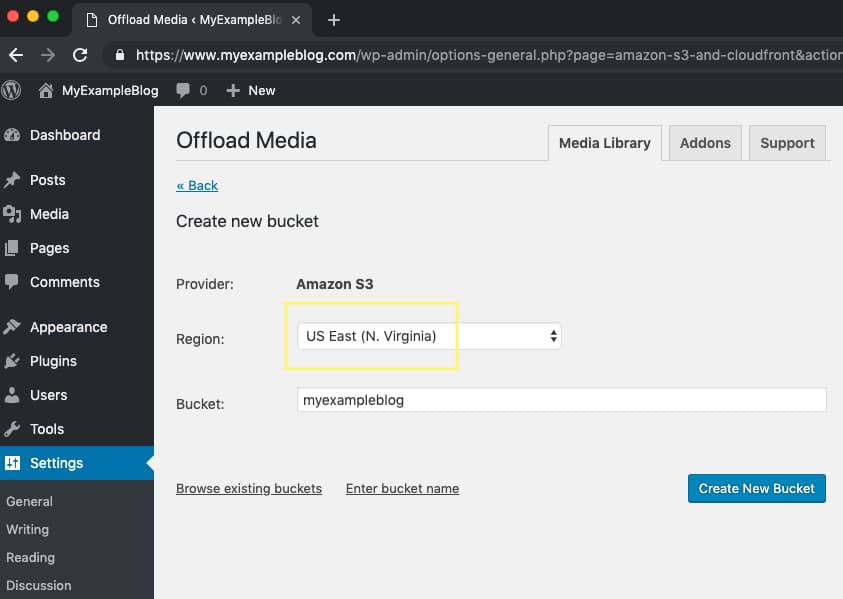
Click On create a new bucket
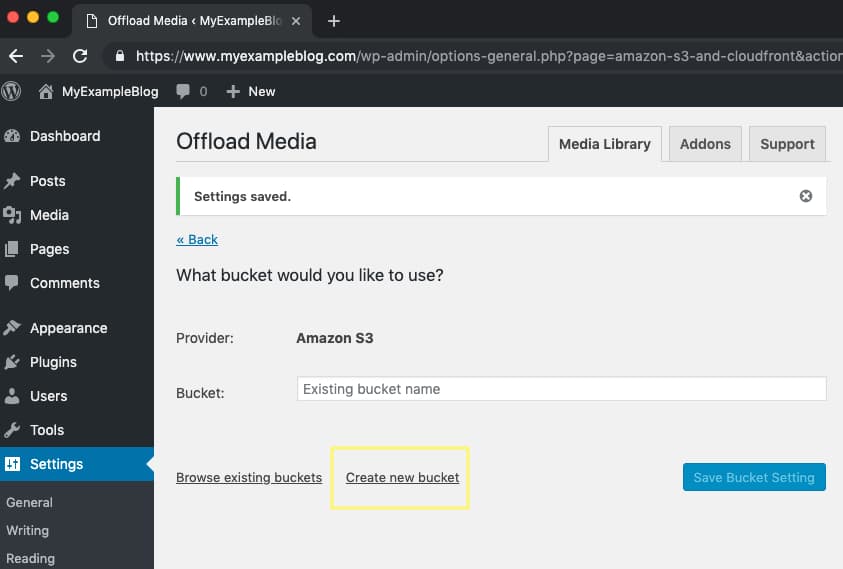
Now enter the bucket name and select the region
Do not add any special character except dashes(-), other wiser accessing your S3 bucket will fail sometime.
After clicking the new Bucket you will see the following setting.
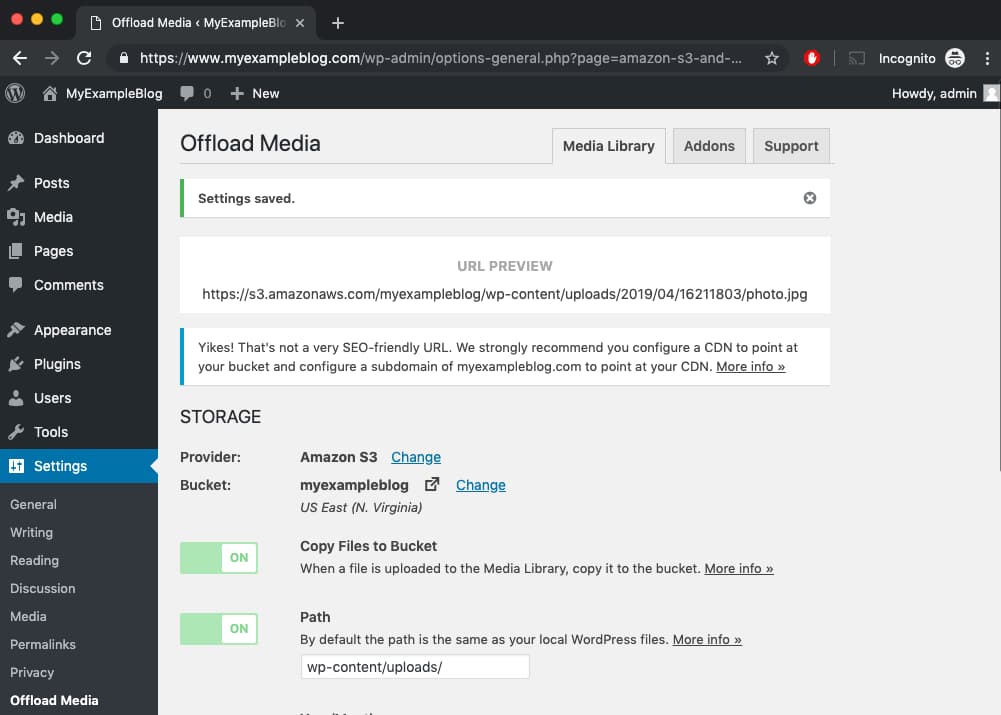
That’s all, Now you can verify in media after uploading URL. you will see that it’s S3 bucket URL.
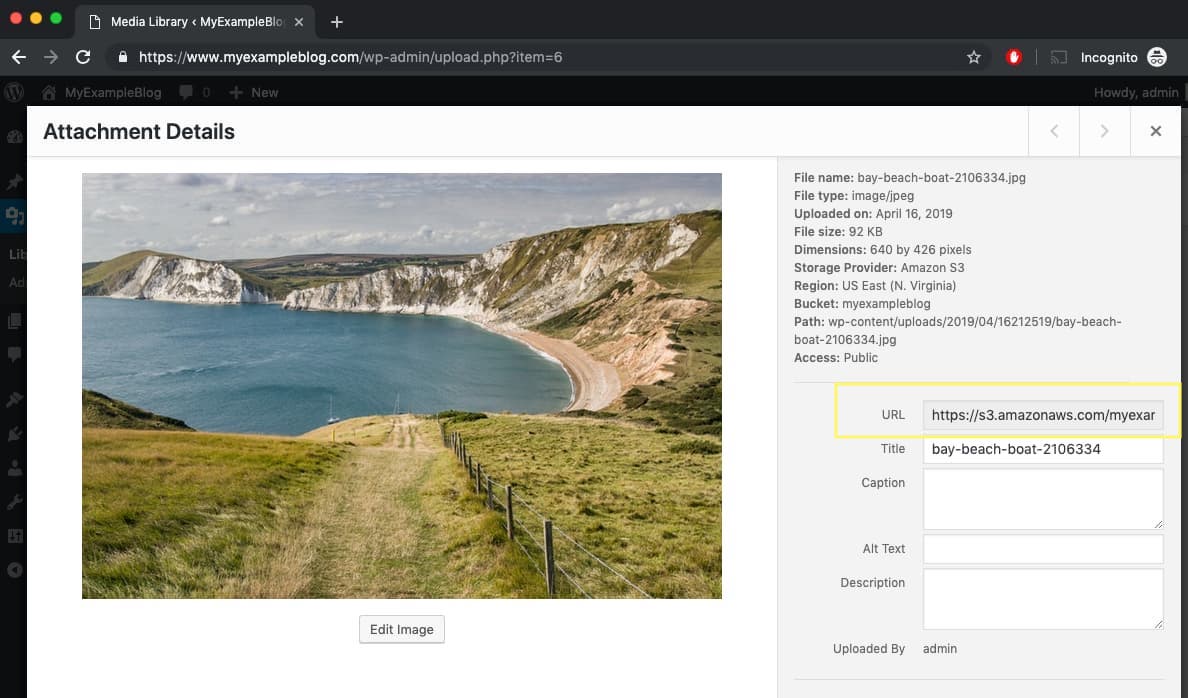
Now, this URL doesn’t look good and it’s not on your domain.
We recommended adding a DNS record that is related to your domain, so in the future, if you switch from S3 to another file system like Digital Ocean, you don’t need to change all posts to change image URL.
At, WPMentor We use S3 but we added CloudFront CDN in front of the S3 bucket and CloudFront will load image faster as it’s CDN and our image URL host is cdn.wpmentor.com.