
In this tutorial, we’re going to configure WordPress CloudFront CDN in Front of the S3 bucket.
Before we begin this, we assume that you already configure the S3 bucket for your images.
if you haven’t set up the S3 bucket then, you need to have your images offloaded to S3, we have a tutorial that explains How to Offload WordPress Assets with AWS S3 Bucket.
This Tutorial has 3 Steps.
- Create CloudFront distribution
- Add the CloudFront Distribution URL to WordPress
- Change the CloudFront URL points to your domain
1. Create CloudFront distribution
After you set up an S3 bucket from this tutorial, you will get the benefit of WordPress images is stored in the S3 bucket and loaded from the S3 bucket. This is a big step towards scalable WordPress.
But, an S3 bucket is located in a specific geographic location, which means if your users come from another geographic location it will take longer to load images on your site.
To improve the speed you need to have CDN in front of the S3 bucket so your WordPress images will be loaded from CDN. In this tutorial, we’re using AWS CloudFront CDN. However, you can set up any CDN in front of the S3 bucket.
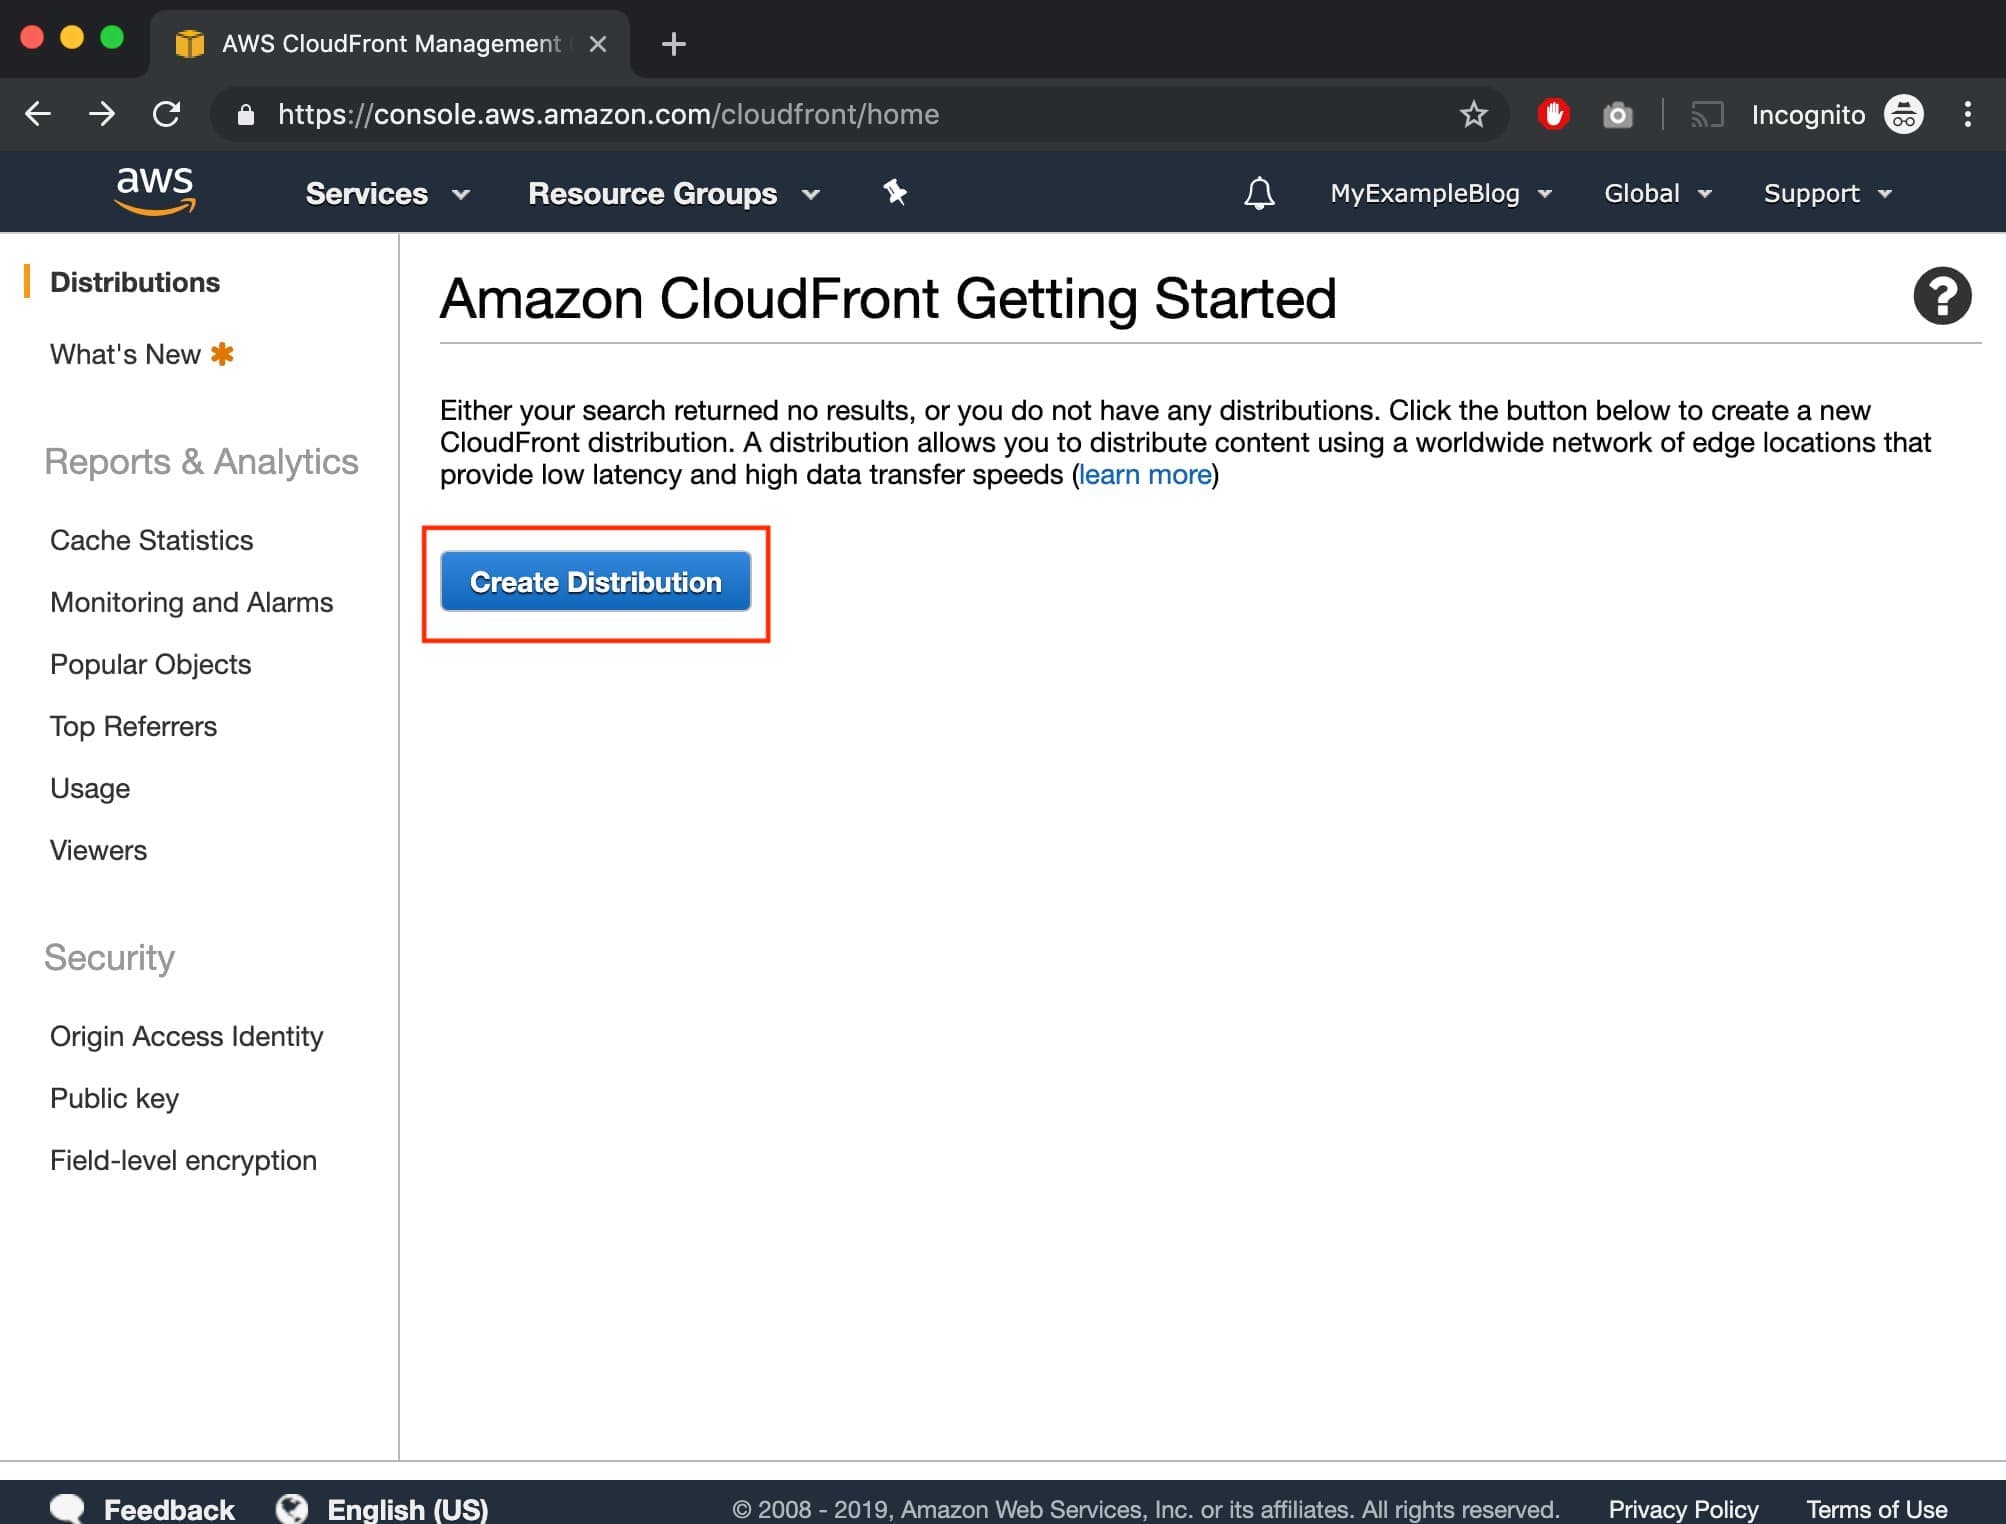
To set up a CloudFront distribution login into your AWS console and go to CloudFront (https://console.aws.amazon.com/cloudfront) and click on the Create Distribution button.
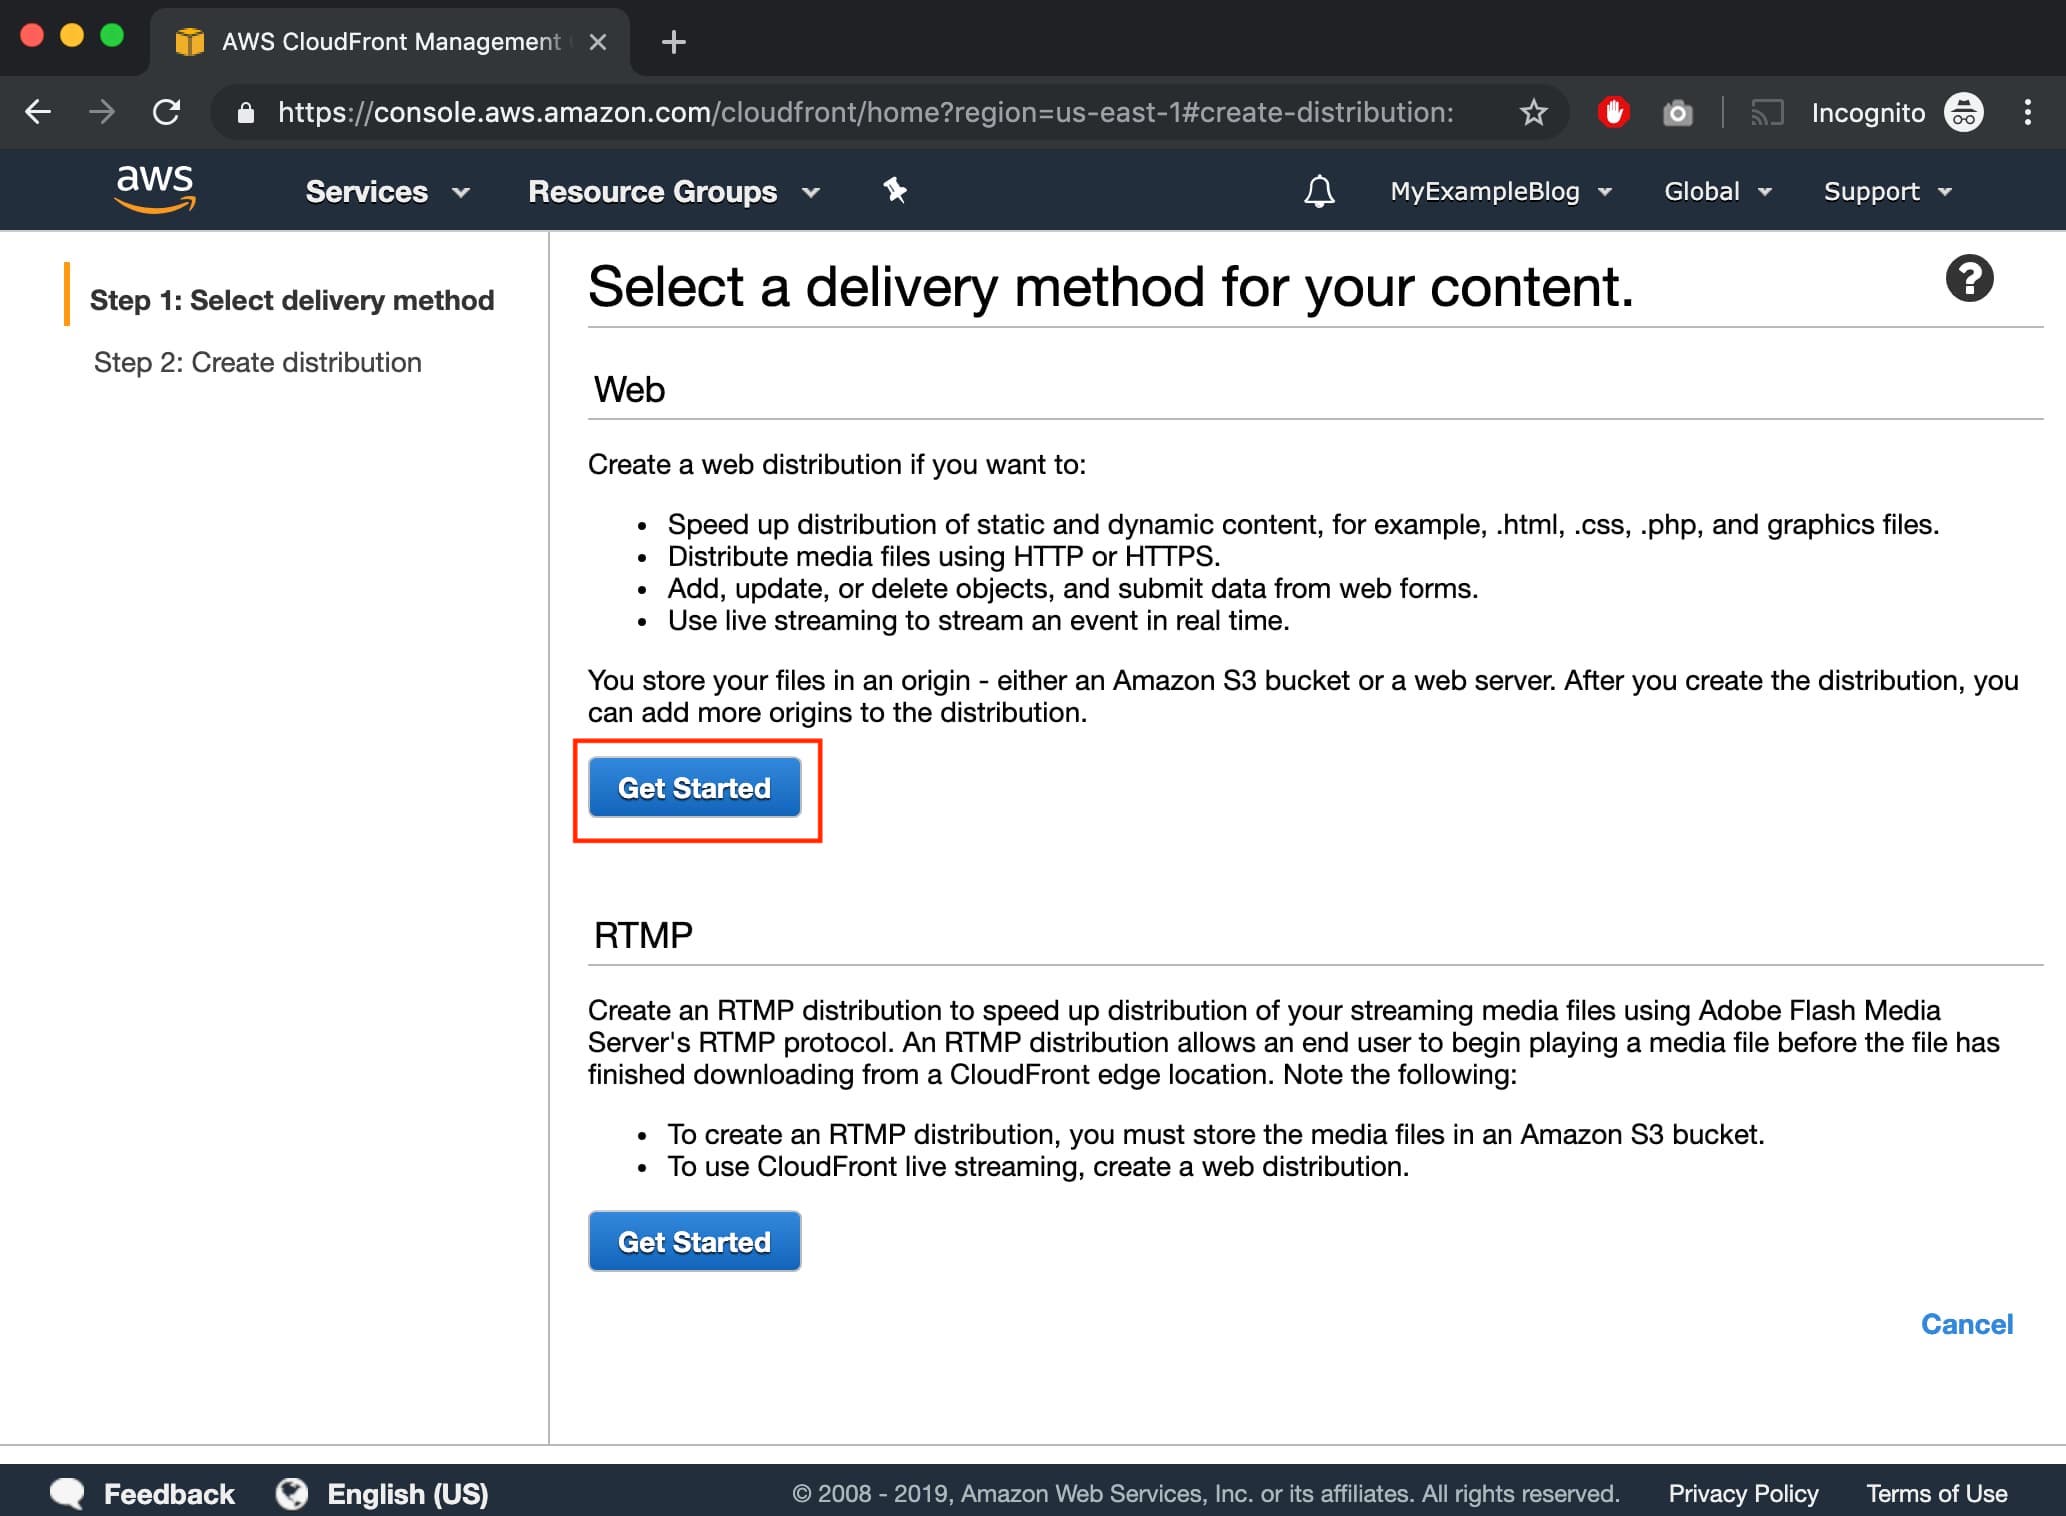
In the next screen, you need to click on Get Started CloudFront Web Distribution.
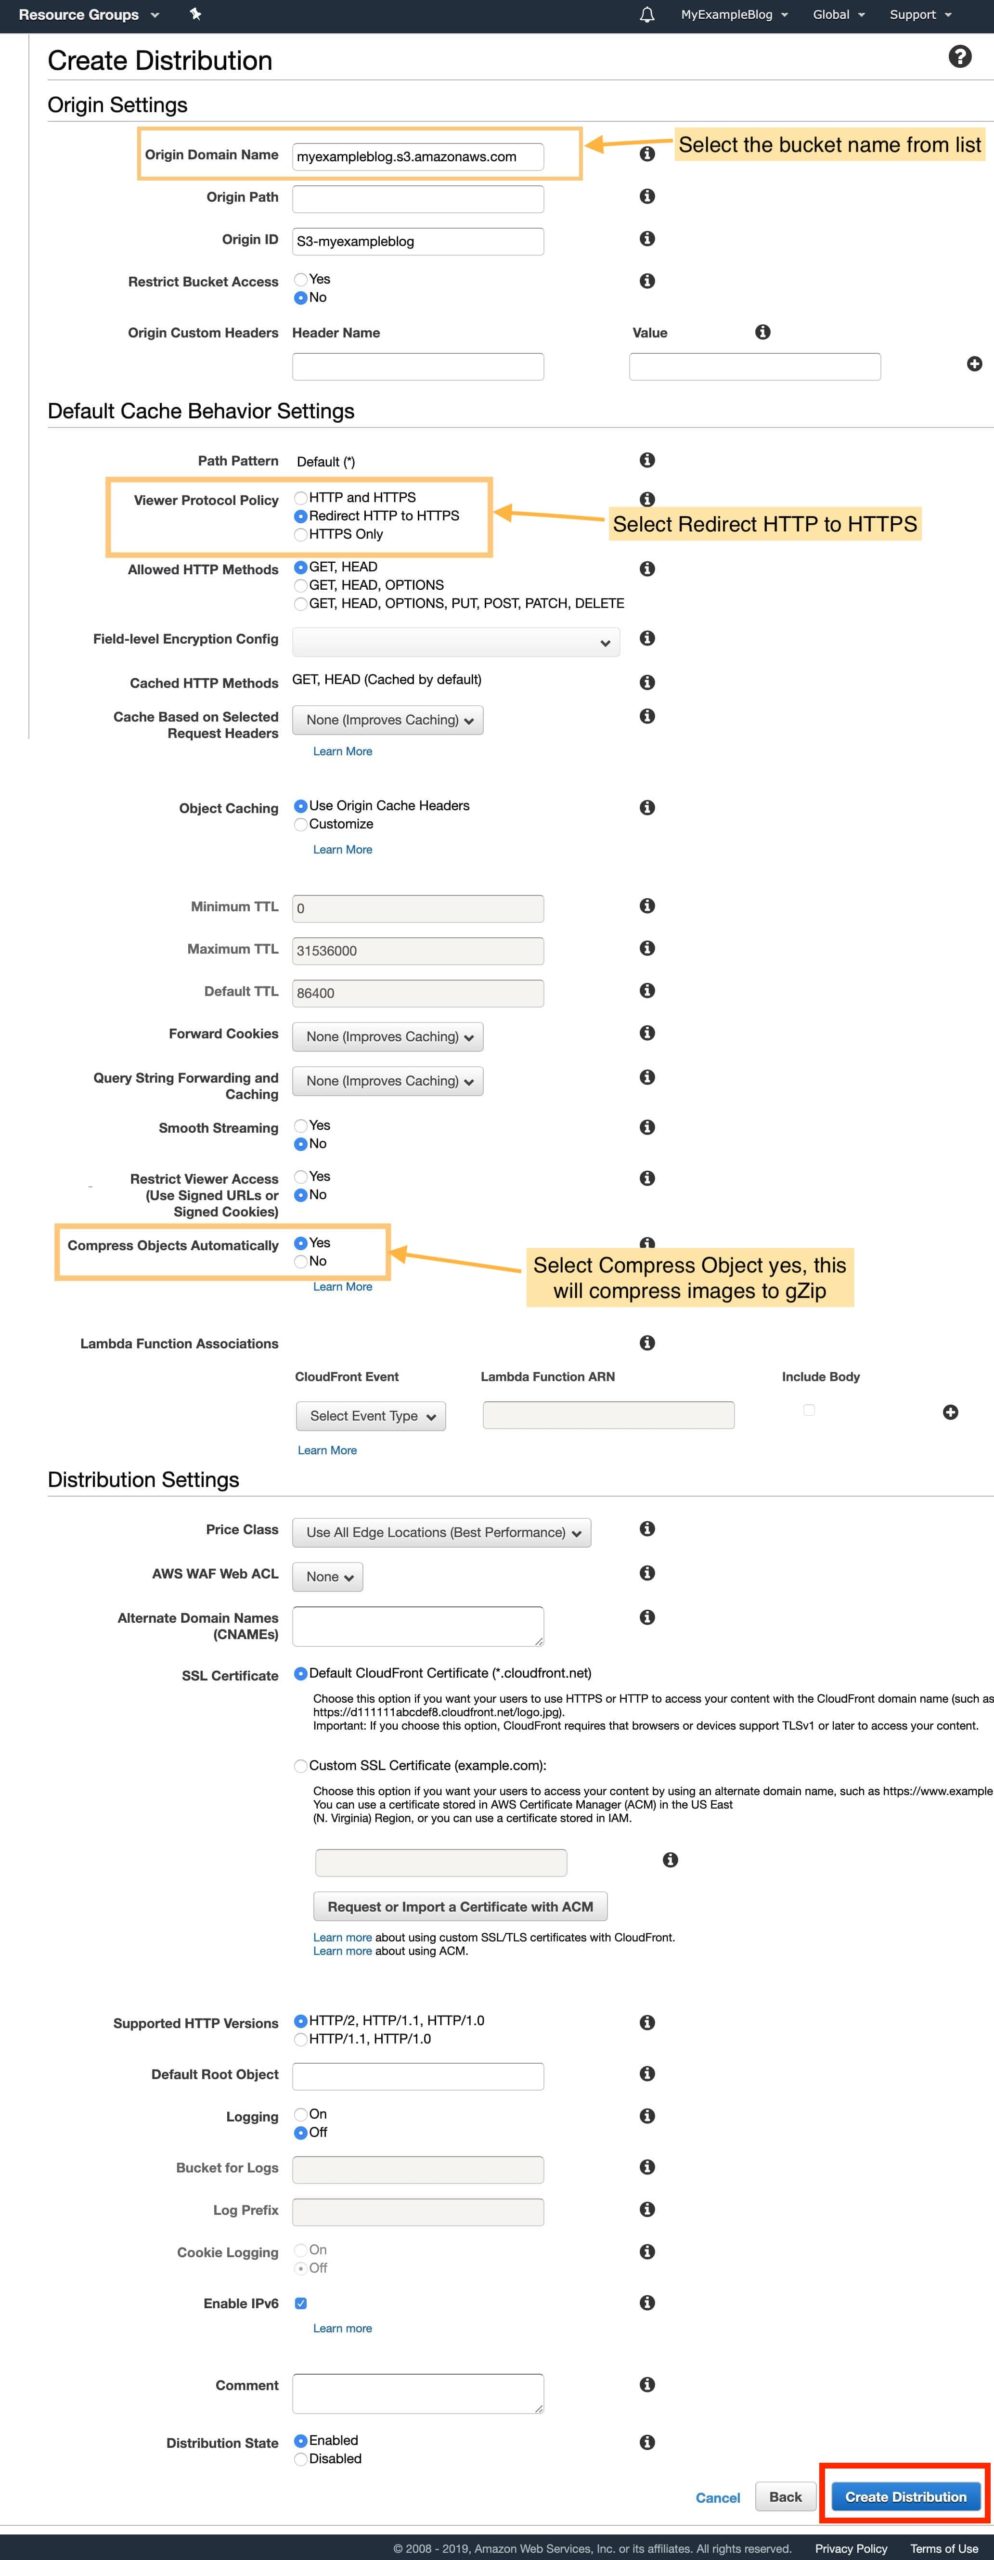
Next, there are multiple settings, Select Origin Domain name as your S3 bucket from the list. and select Redirect HTTP to HTTPS as Viewer protocol policy. then click on Create distribution.
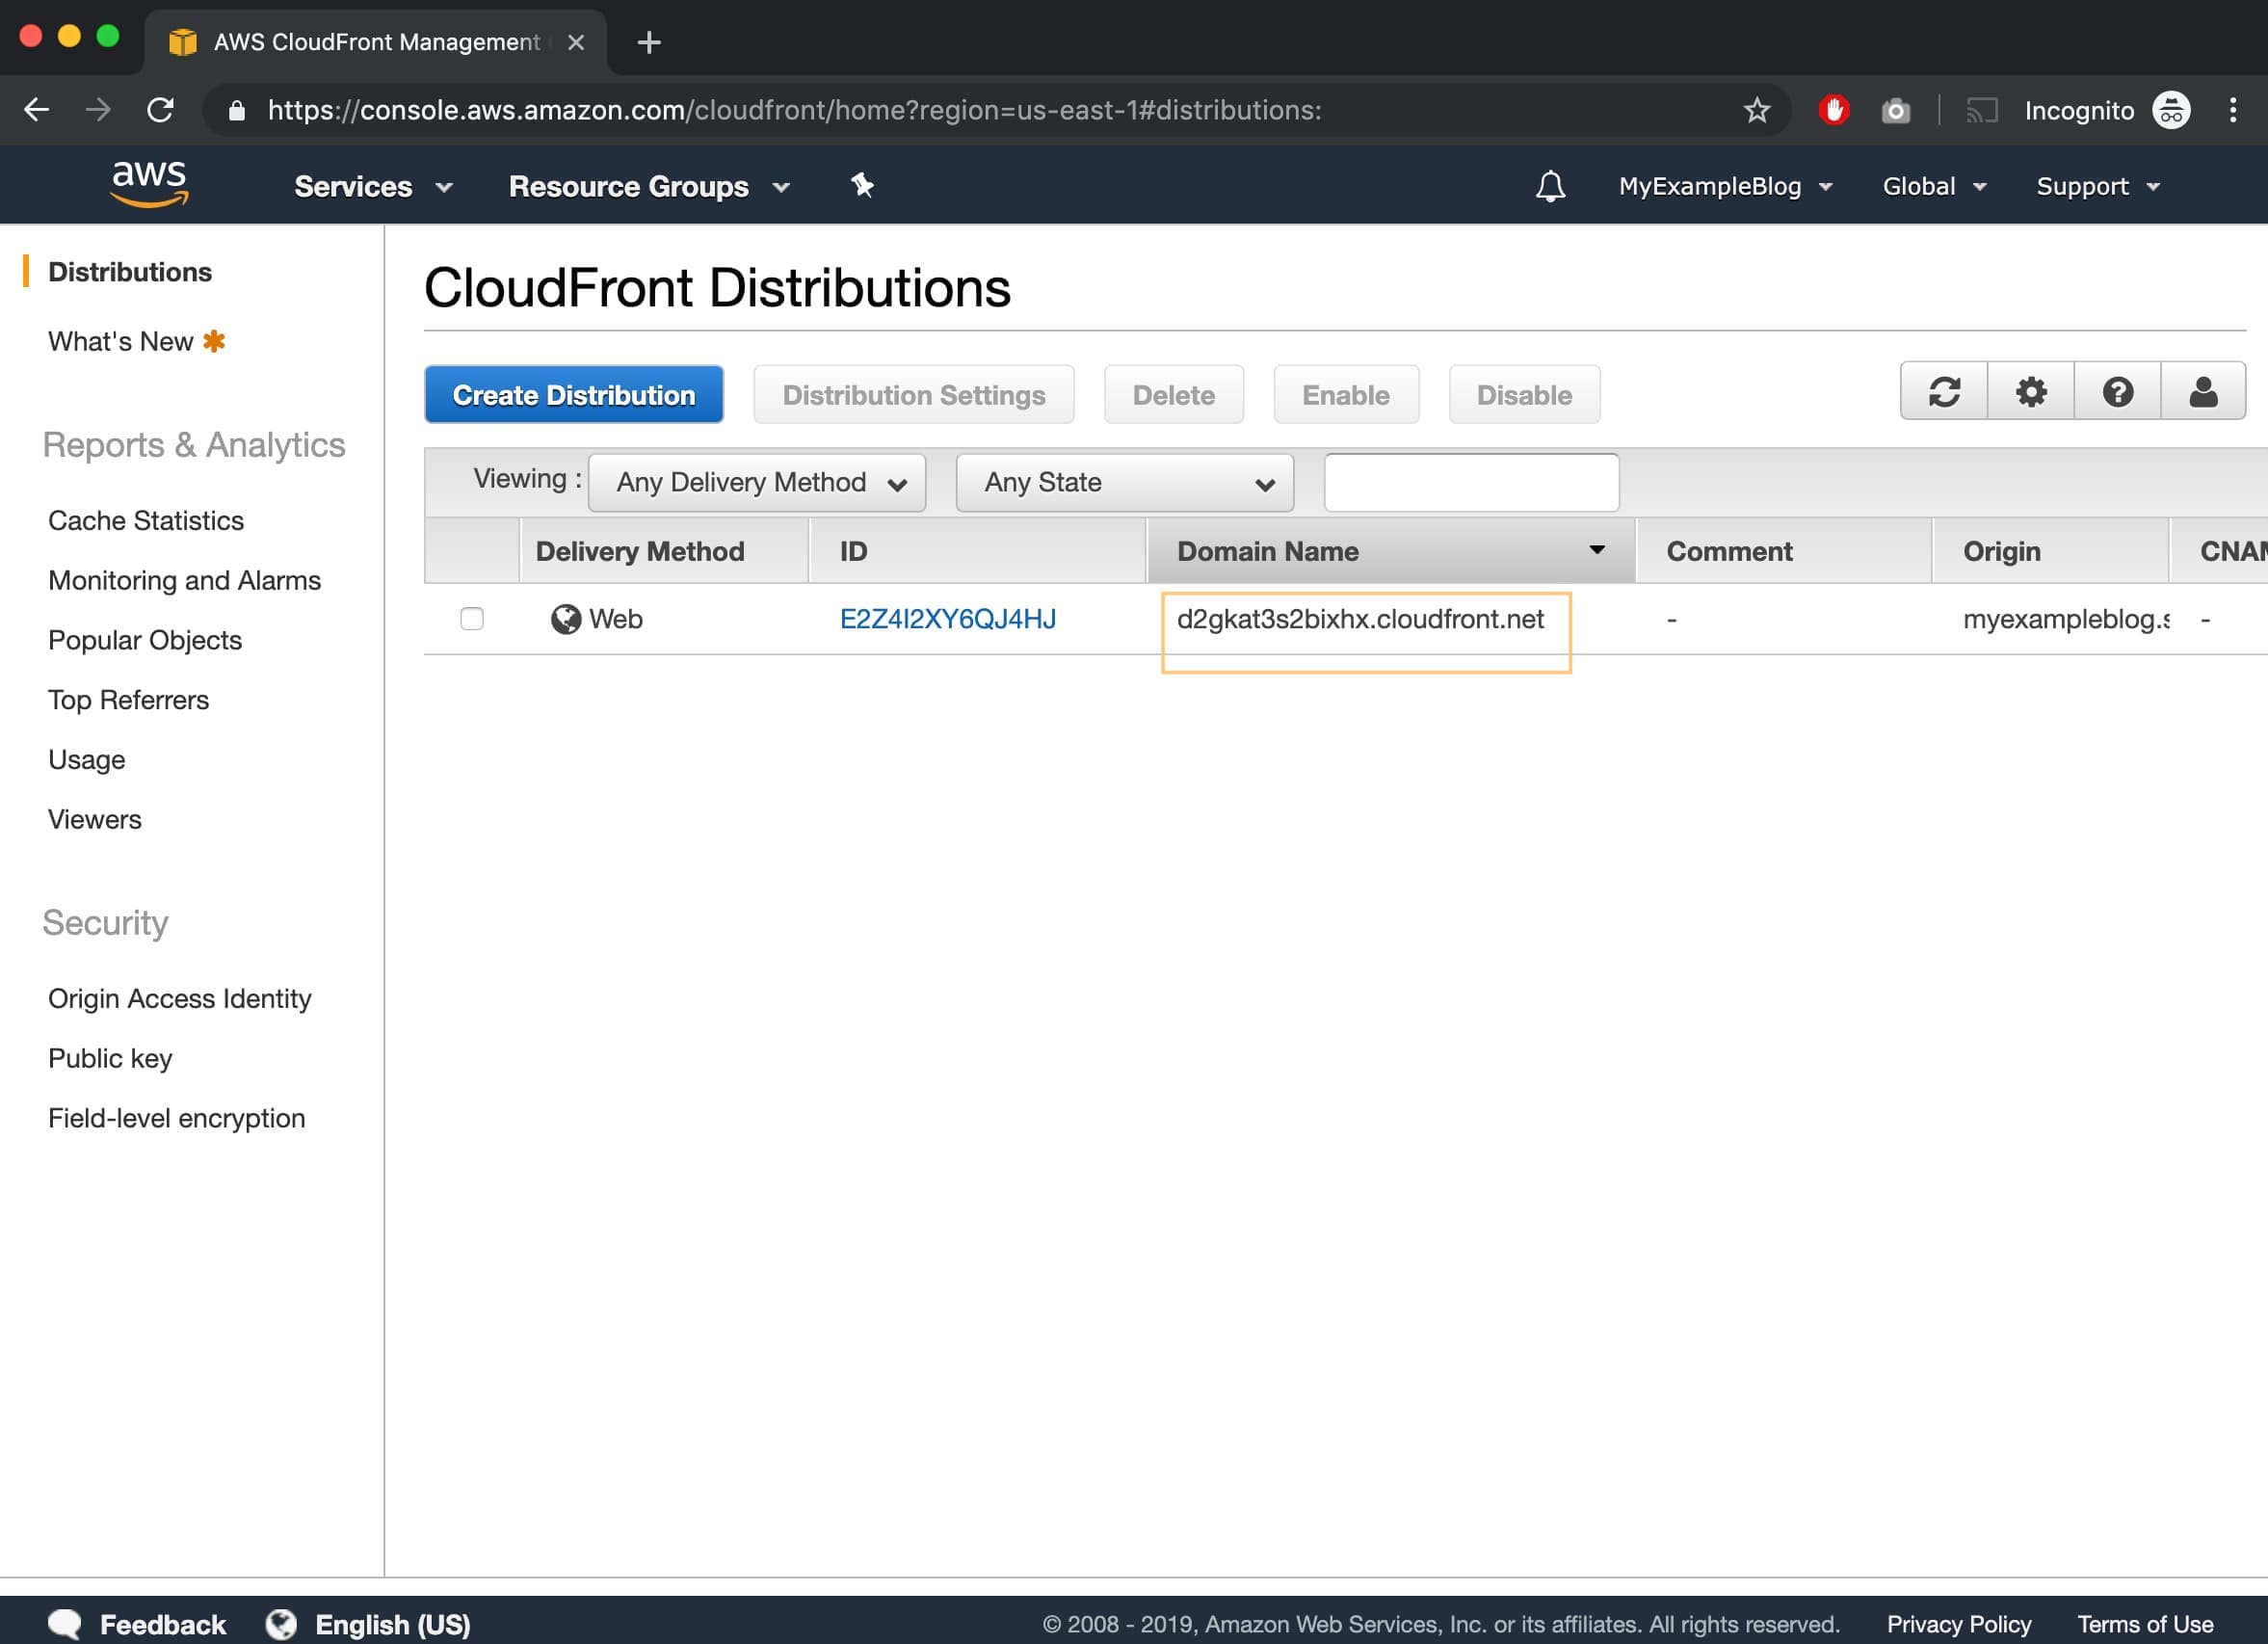
Now, creating distribution will take 10 to 15 minute, But, in meantime you can copy CloudFront Distribution URL.we need to add this URL in the WordPress.
2. Add the CloudFront Distribution URL to WordPress
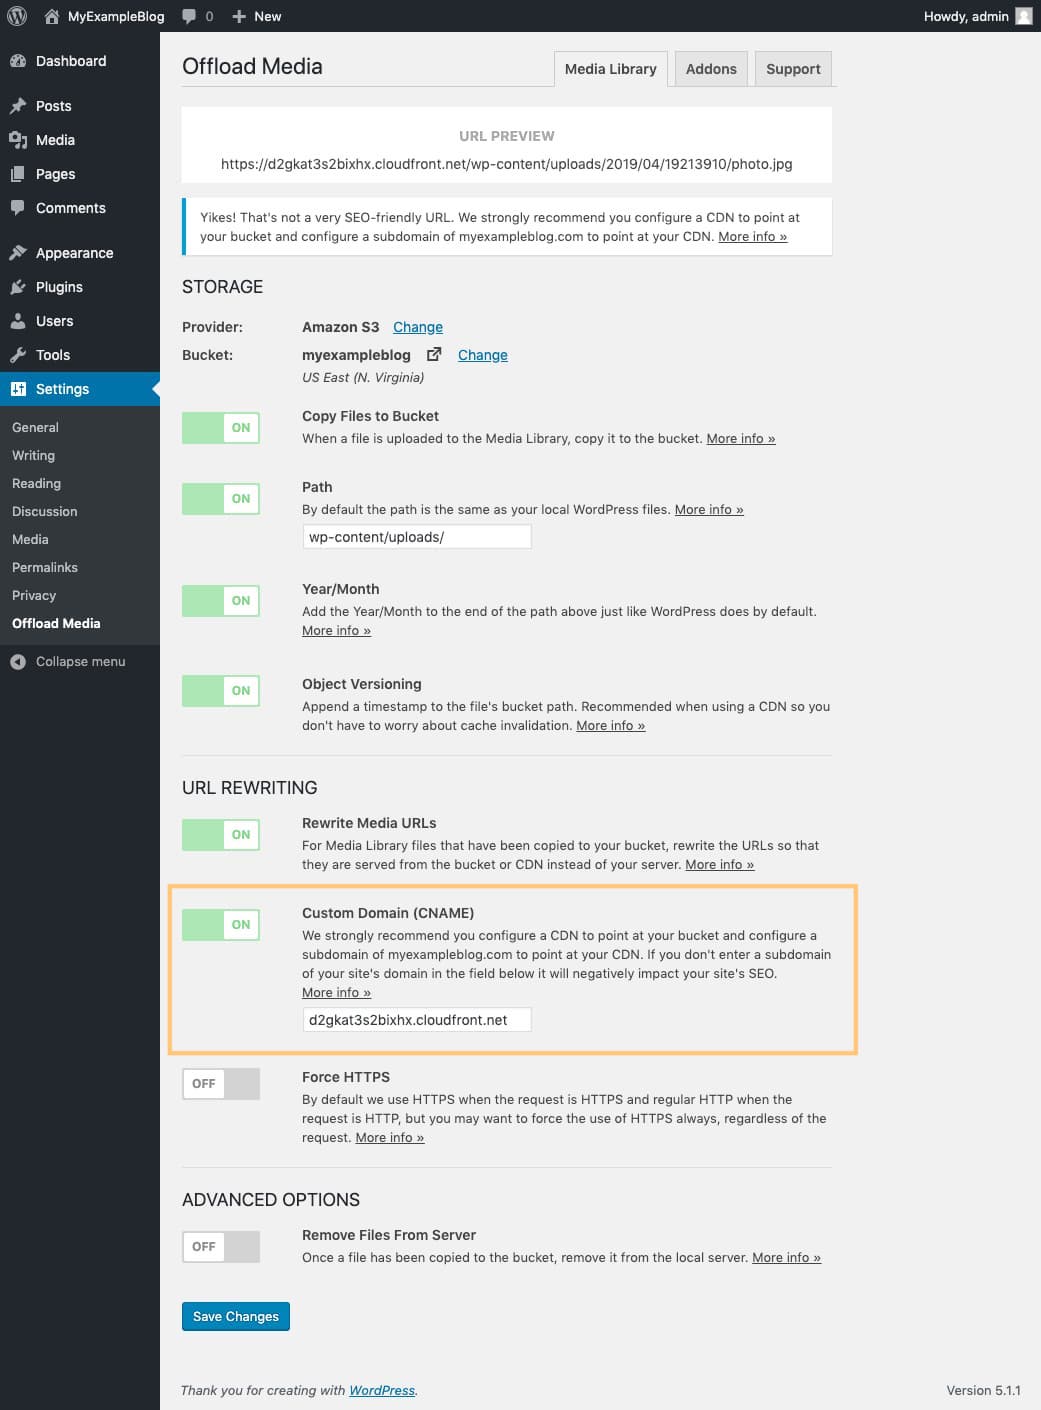
Now, We have a CloudFront distribution URL. We need to add this URL into our WordPress. As part of S3 Configuration, we installed the WP Offload Media Lite plugin. go the plugin setting and add the CloudFront URL in the Custom Domain (CNAME) as shown in the below screen and click on Save Changes.
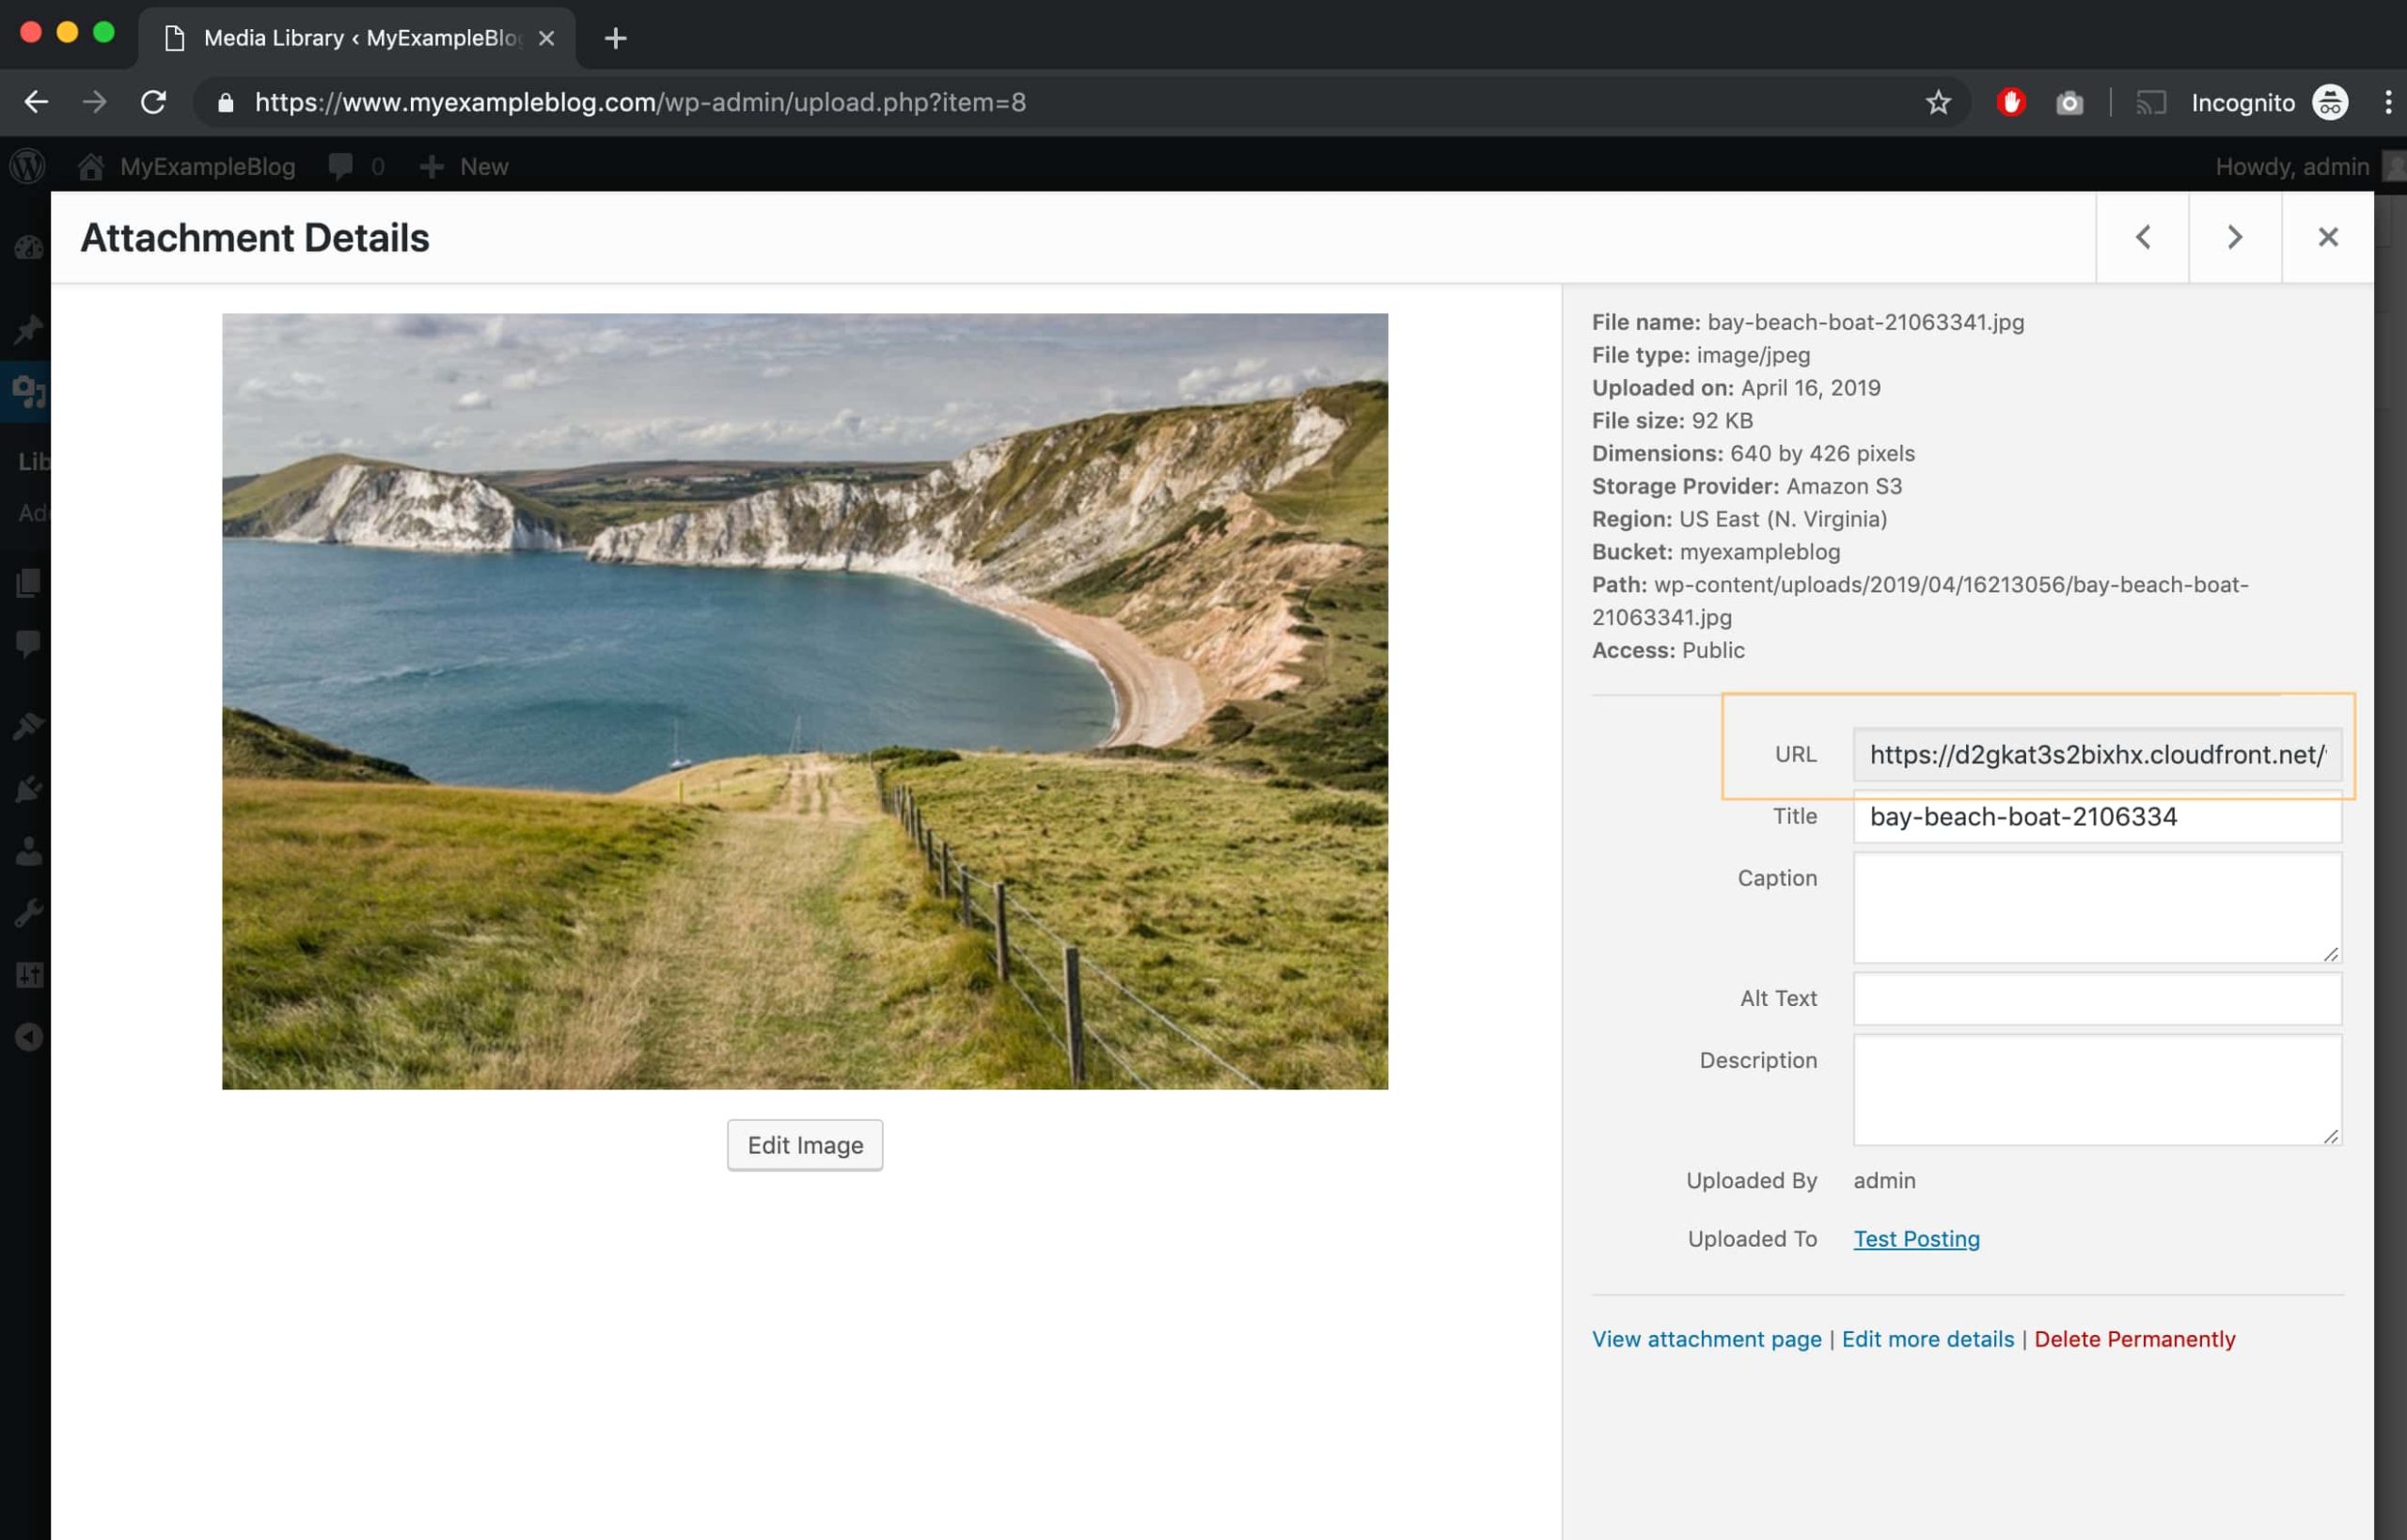
now As you can see your uploaded image will be loaded in from CloudFront URL over CDN.
But, this URL looks ugly and this is not your domain it’s bad practice for SEO. Once you change your CDN provider you need to change the URL again in all posts. so it’s better to use your subdomain URL for uploads. In my case, I’m using cdn.wpmentor.com to point all WordPress uploads.
To change the uploads URL follow the next step,
3. Change the CloudFront URL points to your domain
To point your subdomain (cdn.wpmentor.com or images.wpmentor.com) to your CloudFront URL, you need to add a DNS CNAME record in your domain registrar.
In my case it’s Cloudflare, I added the CNAME record cdn.wpmenror.com points to CloudFront URL.

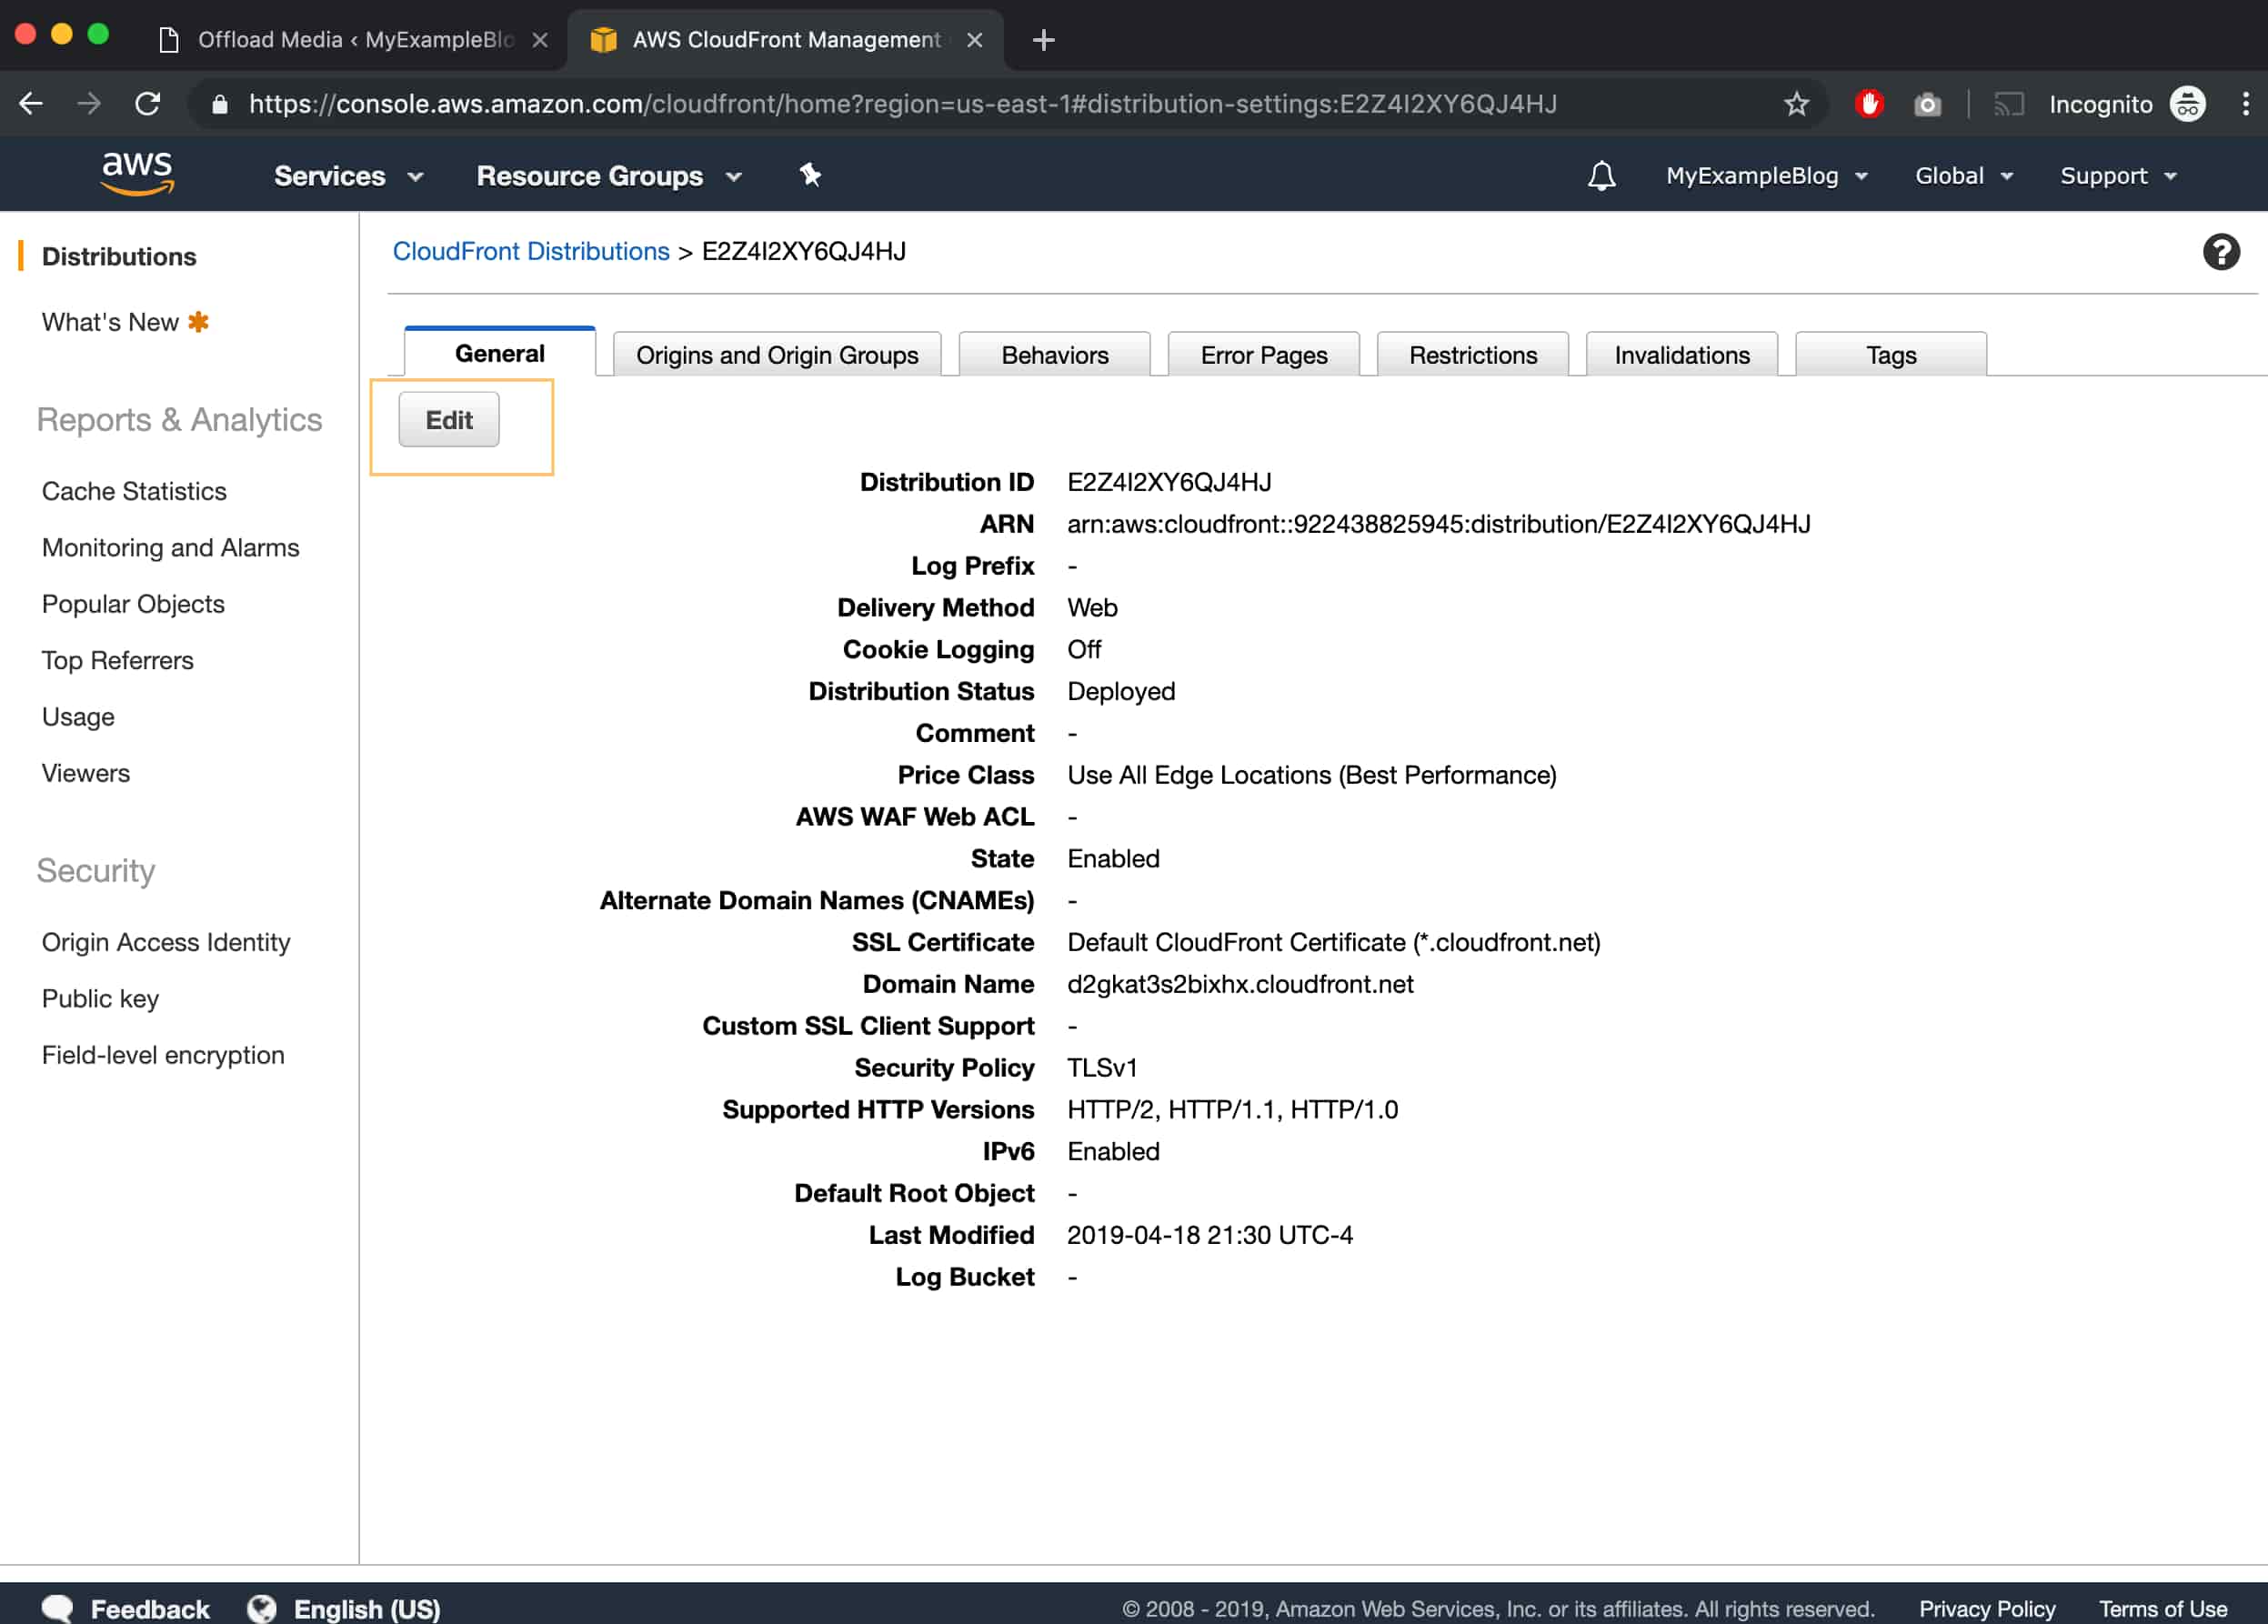
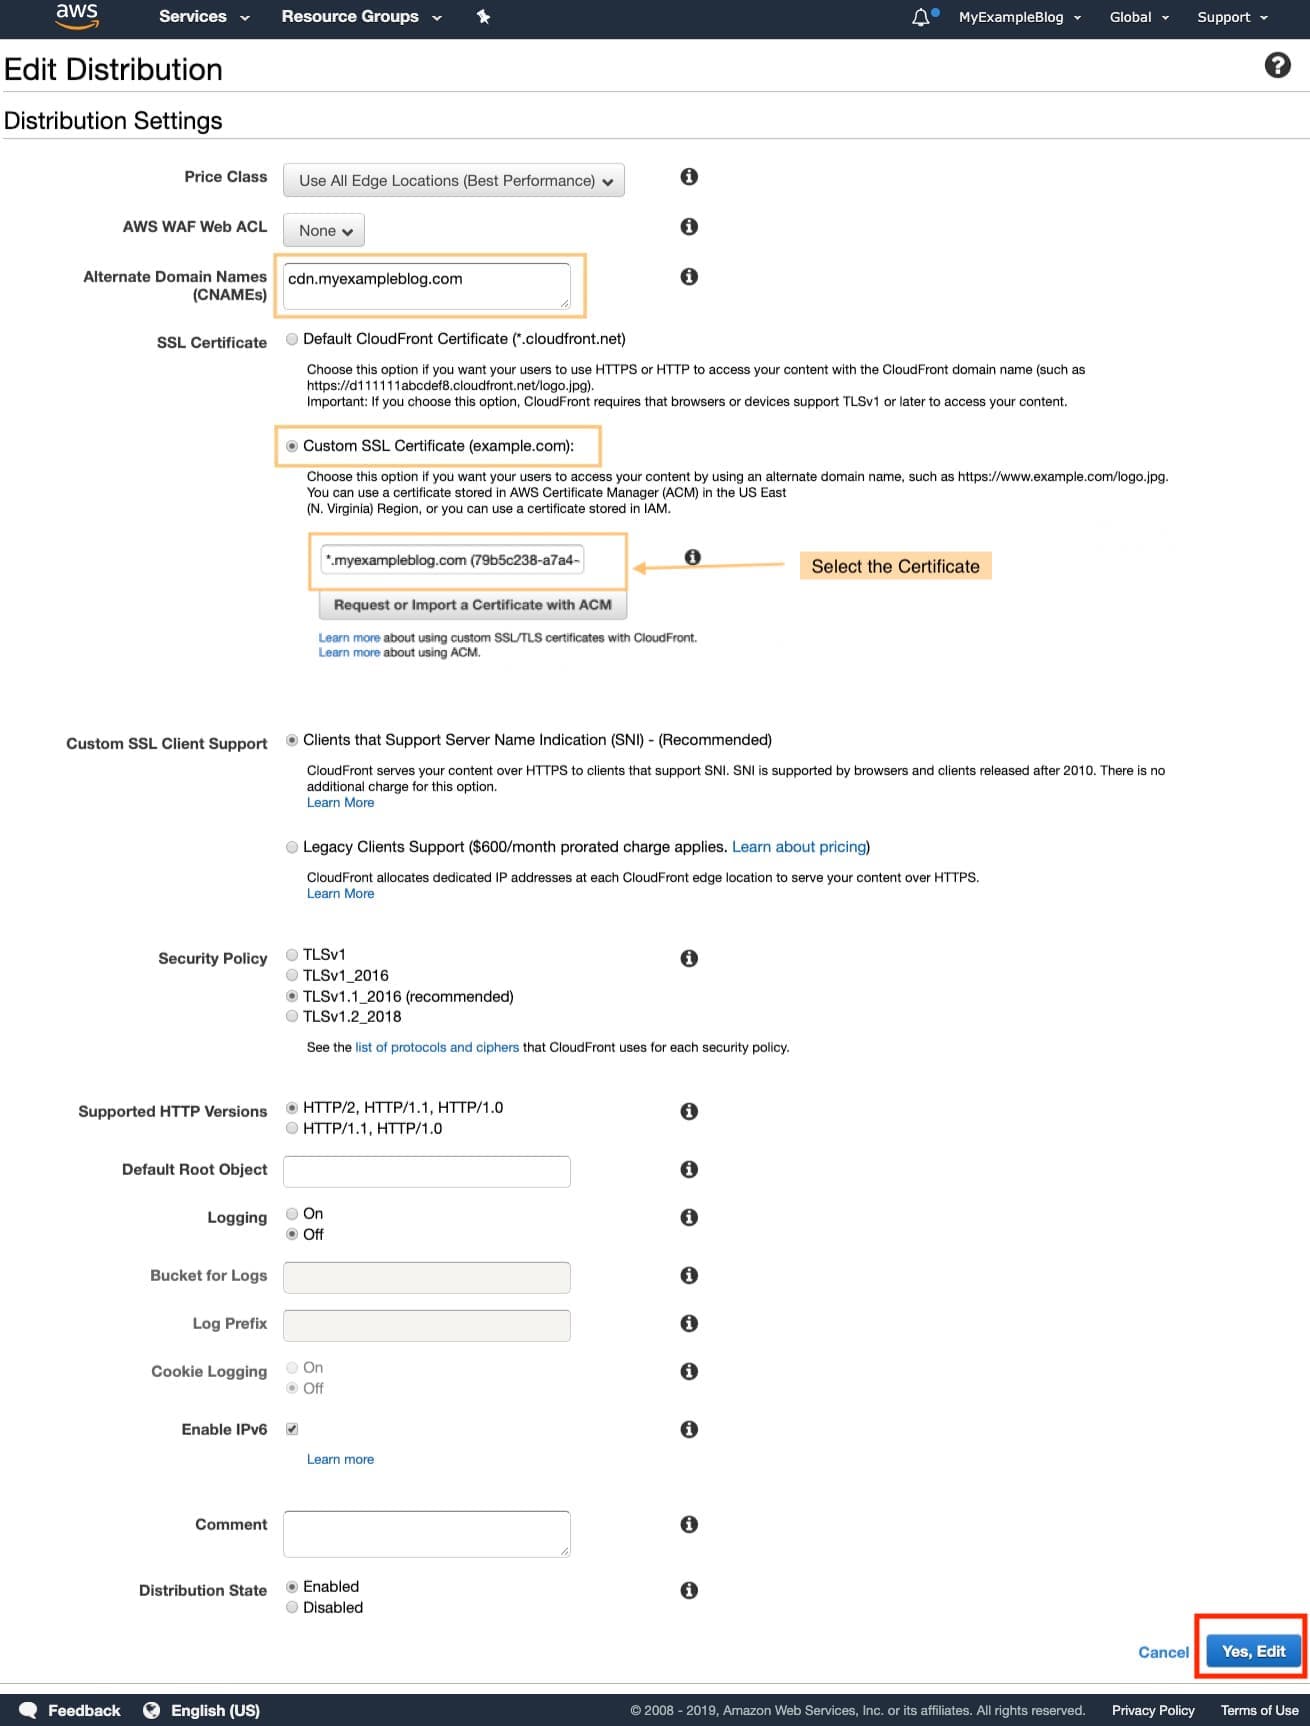
Now you need to add that subdomain (cdn.wpmentor.com) to your AWS CloudFront distribution. To add that CNAME record in CloudFront Distribution go to your CloudFront distribution and click on Edit.
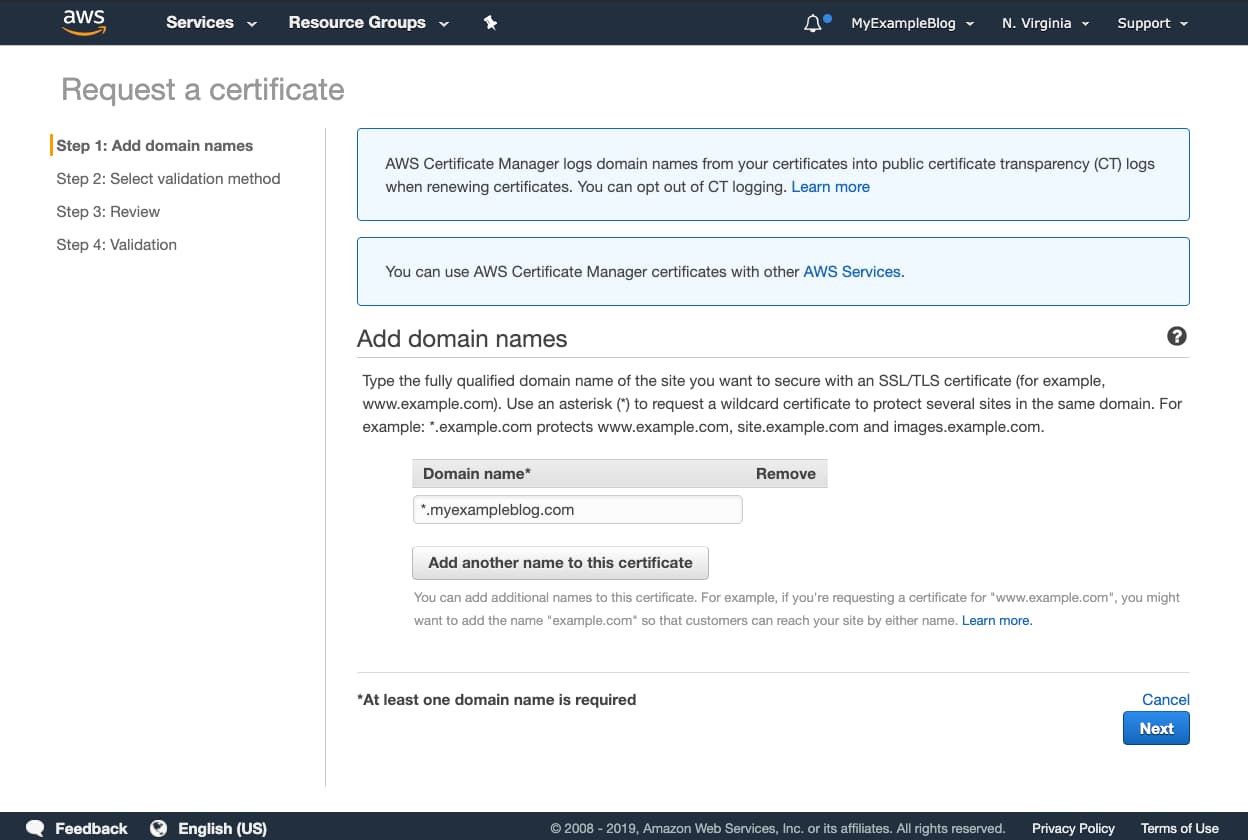
Add your subdomain into Alternate Domain Names (CNAMEs) and select Custom SSL Certificate and click on Request or import certificate with ACM, a new tab will open for AWS Certificate Manager. ( If you already have a certificate you can select it from the list).
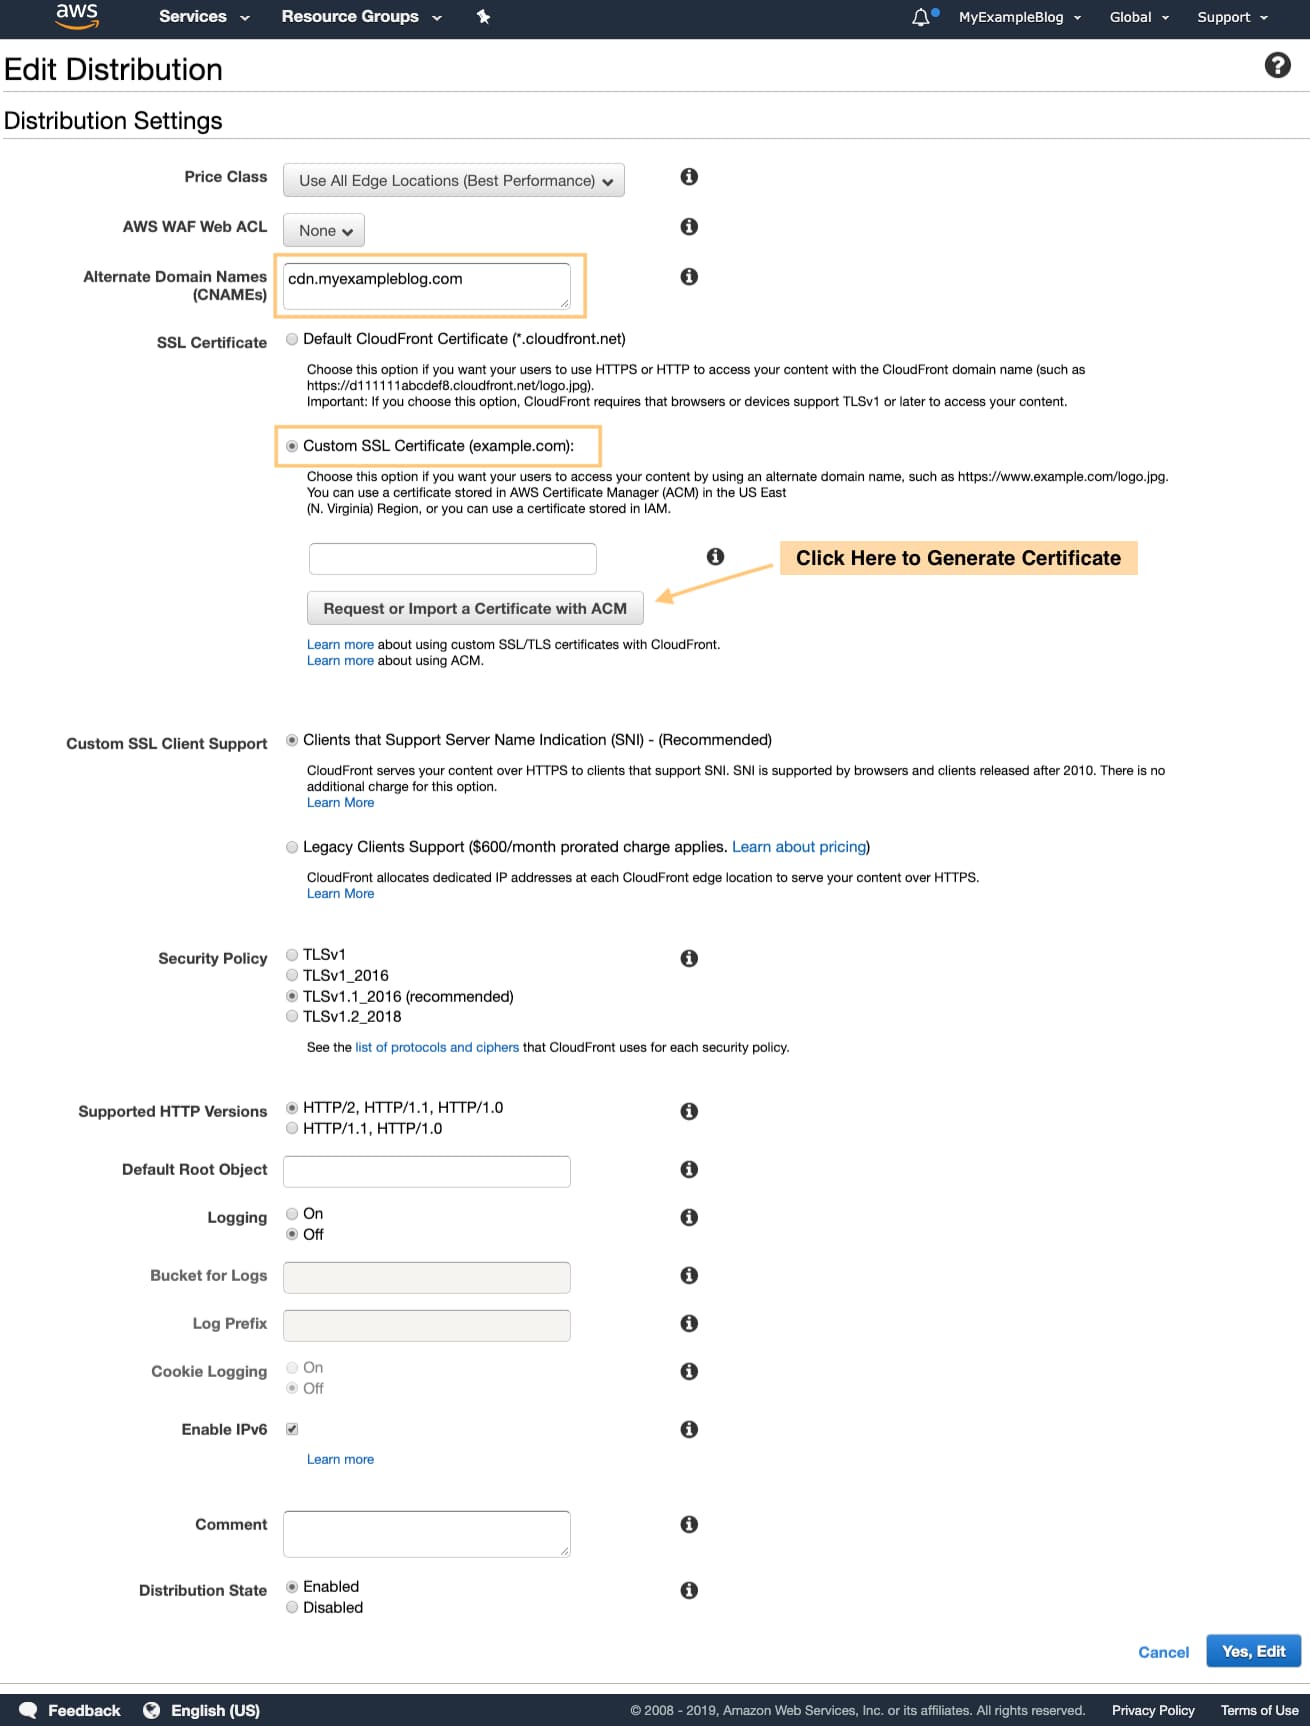
Now in the new Tab of AWS certificate manager add the wildcard domain to generate certificate and Click Next. ( you can create your subdomain certificate. But, you can use WildCard certificate for your all subdomain.)
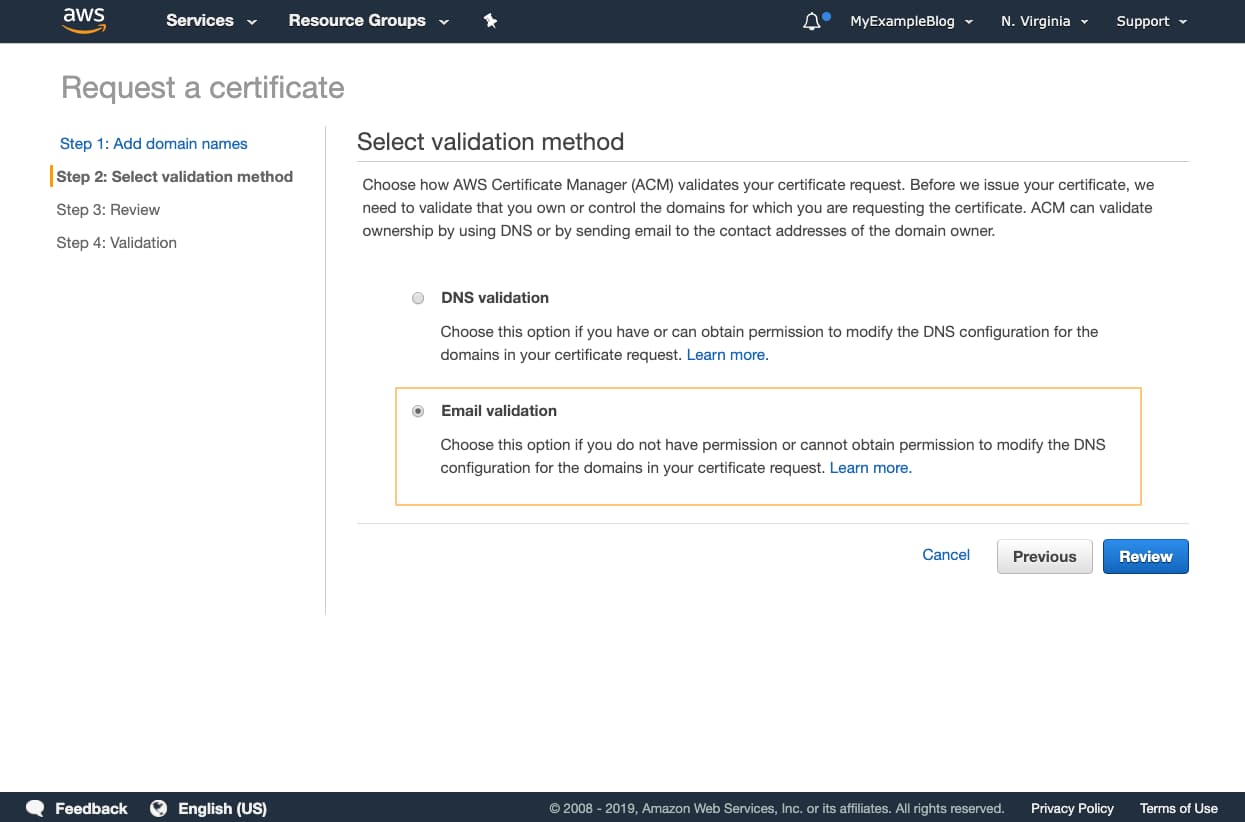
To verify the certificate you have two options you can select any option for me I have selected email validation, click on Review button after selecting your choice.
Next Step Is to confirm and Review all the inputs. Click on Confirm and request after you have verified all the details.

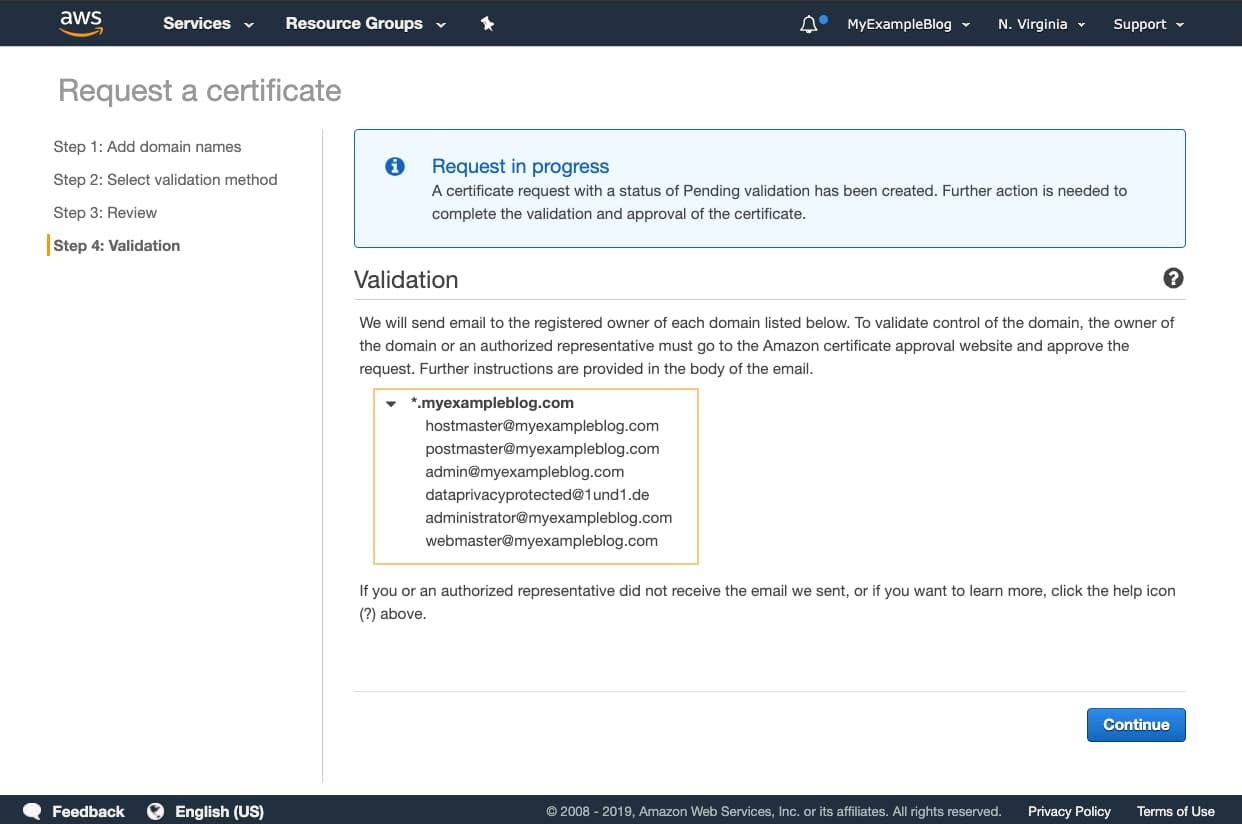
Now, this screen will show you how your domain is going to verify If you have selected Email validation then you will receive an email. ( make sure you have an email address with addresses on the screen).
In my case, I already had an email with [email protected] If you don’t have an email address listed here, then you have to create a new one. Otherwise, you can choose to verify by DNS validation.
now, check your email, in my case, it will be [email protected] you will receive a link to approve the request click on the link.
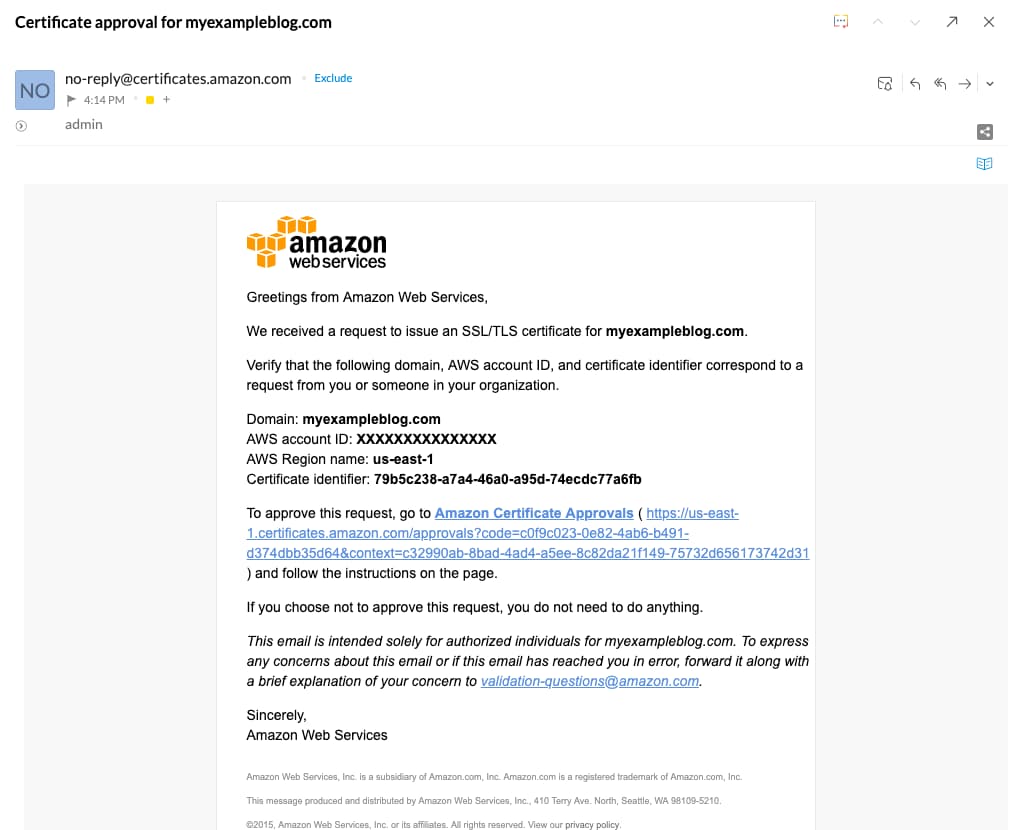
The link will open in the browser and click on I approve to approve the certificate request.
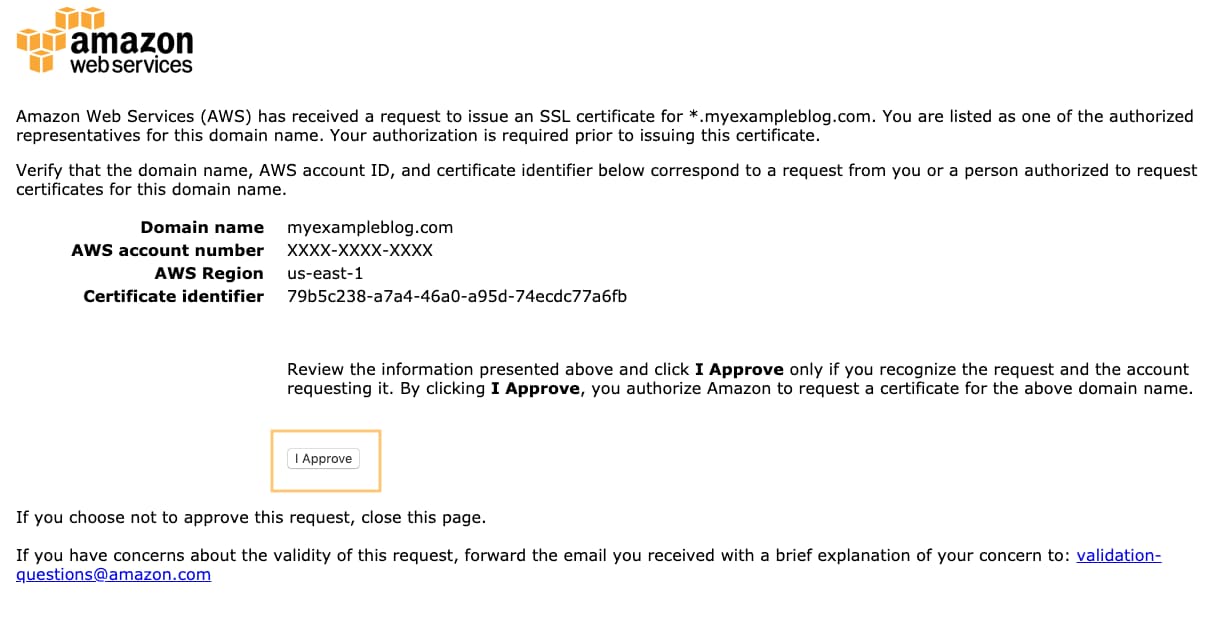
Once you approve the certificate request in a few minutes you will see your certificate status is Issued
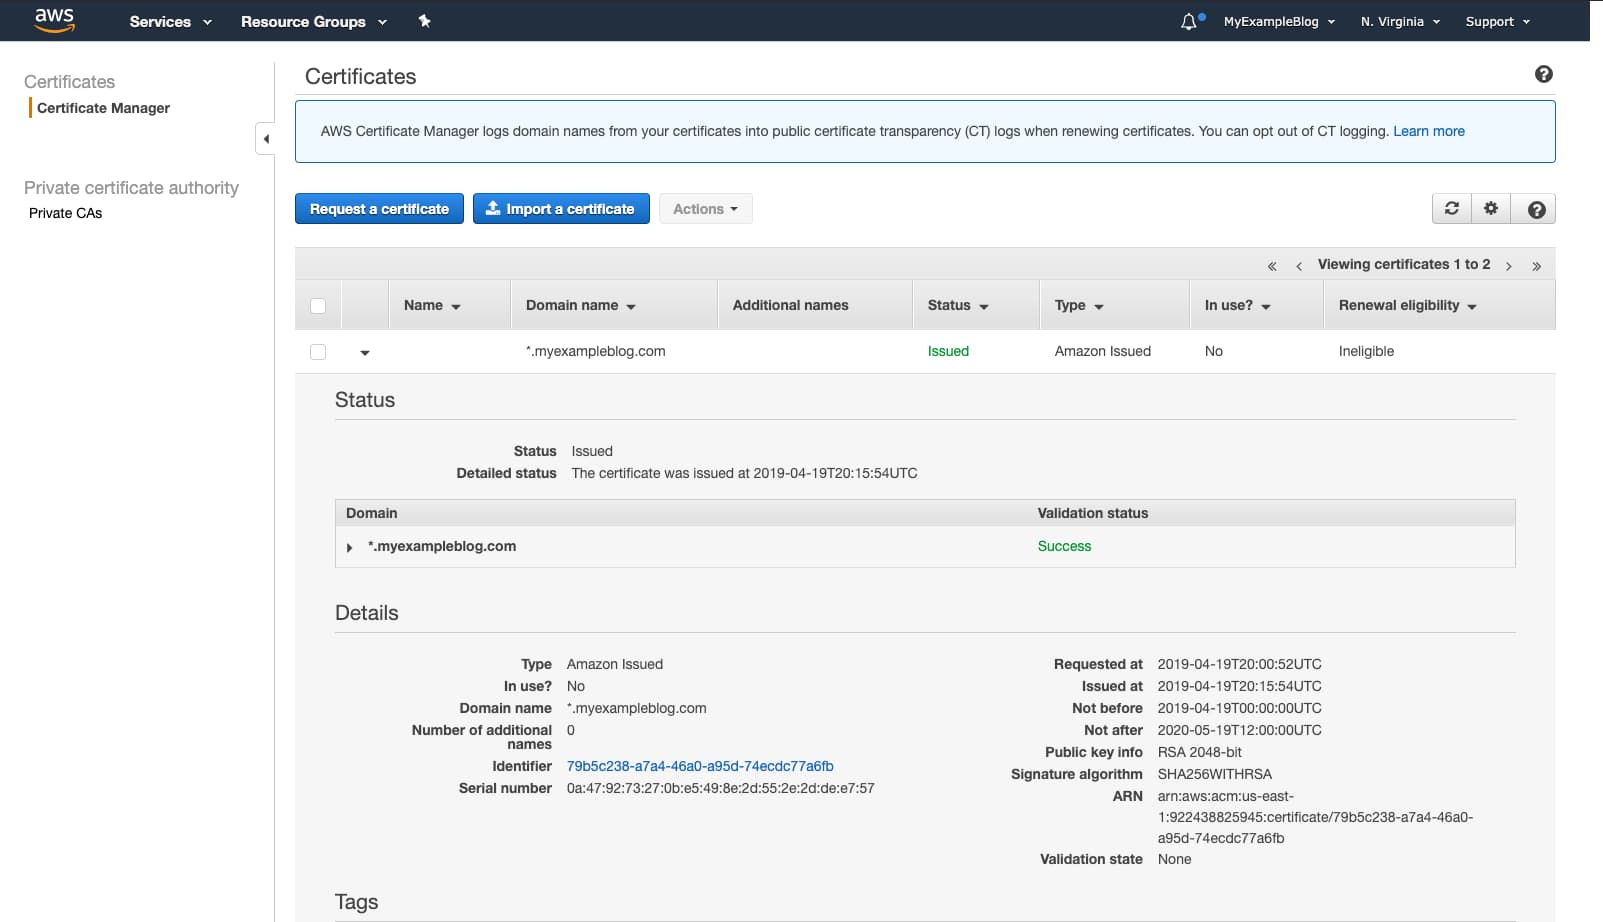
Now You have a certificate. Go to the first tab and select the certificate that you have created. and Click on Yes, Edit.
That’s all the settings you needed on the CloudFront side. now you need to add your subdomain ( cdn.wpmentor.com) to your WordPress offload media plugin.
Go to the WP Offload Media Lite plugin setting and change your Custom Domain (CNAME) points to your subdomain ( cdn.wpmenor.com) and click on Save Changes.

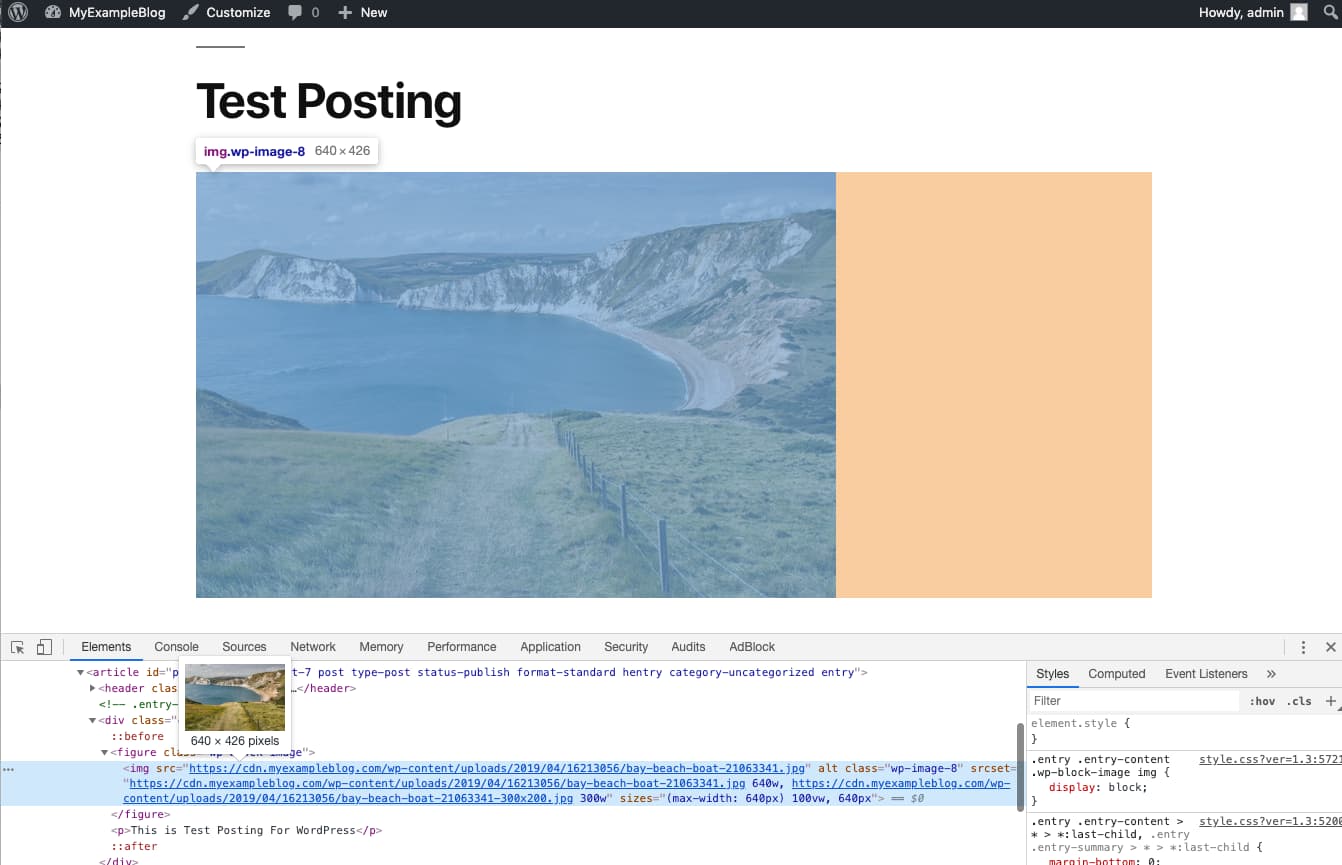
Now, If you upload a new image it will be loaded from CDN url cdn.myexampleblog.com
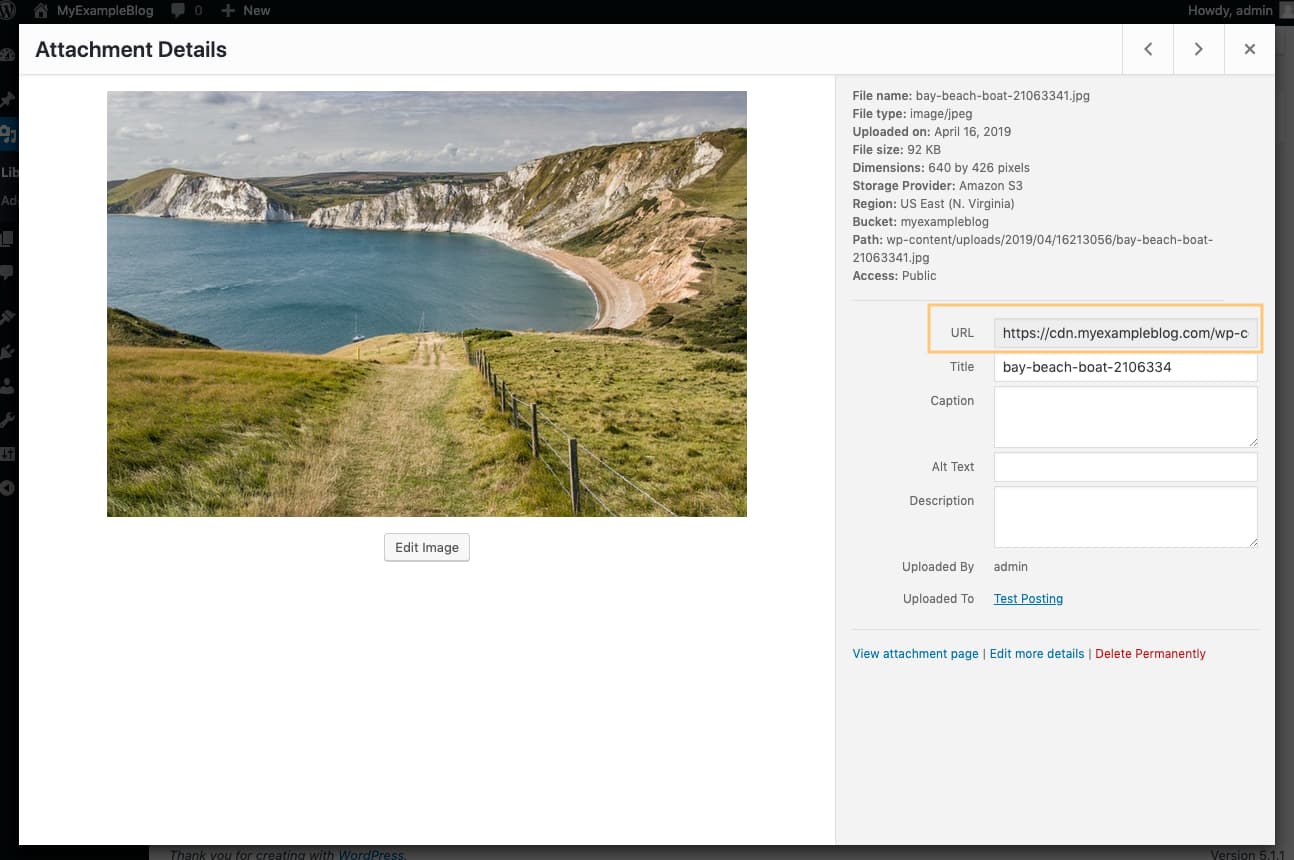
Now, if you check your existing post URL is changed to CDN URL.
That’s it!
your CloudFront distribution is created and your subdomain is pointing to your CloudFront distribution. This way it will be easy to move out to another CDN provider.
If you have any questions about this tutorial or general questions about WordPress on AWS or AWS CloudFront. please post them as comments below.